1. Login to your WHM
2. Assigned dedicated IP – You will then select the IP Functions icon from the Main Menu.
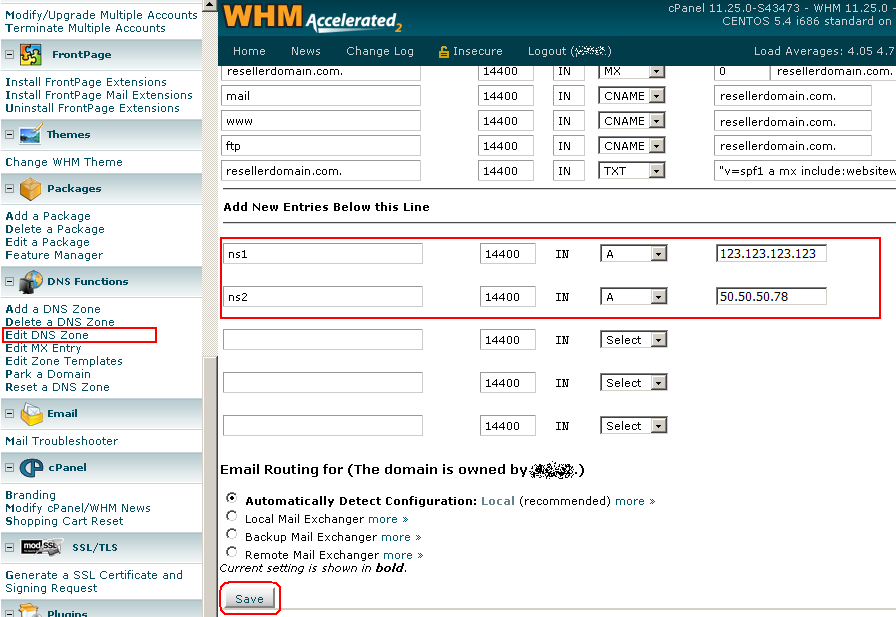
Then, select ‘Change Site’s IP Address’ icon. You will now see a list of the domains and users on your server. Find the domain you are wishing to install the SSL Certificate on and click the ‘Change’ button at the bottom of the page. You will now be given a drop down list of available IPs for you to assign to your site. Select the IP you want and click the ‘Change’ button and your site’s IP will be changed (Make sure not to set this to ‘main shared IP’).

3. Install the SSL Certificate – Go back to the Main Menu and select the ‘SSL/TLS’ icon.
Then select ‘Install an SSL Certificate on a Domain’ icon. You will then be taken to the ‘Install an SSL Certificate on a Domain’ management page. You will need to fill out all fields in order to install the SSL Certificate.
A. Enter the CSR into the first field.
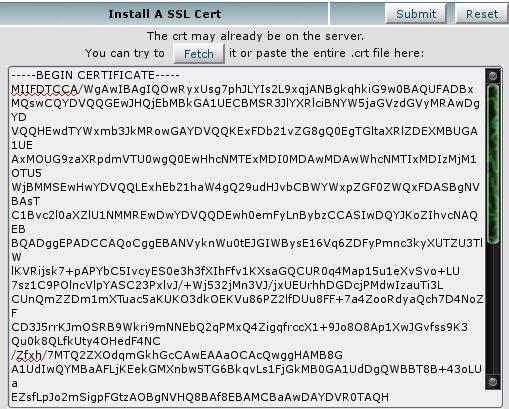
The SSL Manager will then try to fetch the rest of the fields needed. It should fill in the next three fields as such.
If any of this information isn’t correct then your SSL Certificate isn’t issued properly and you need to contact your SSL issuer for them to assist you with having the SSL Certificate reconfigured.
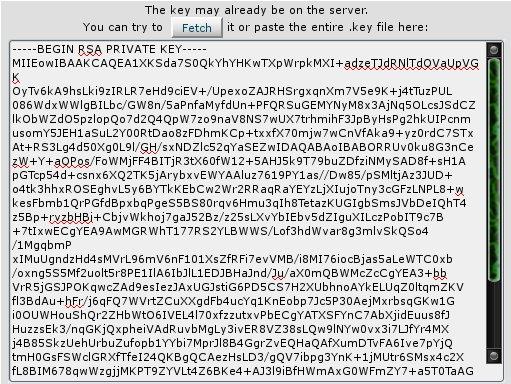
B. You will now need to insert the RSA key (If one was automatically fetched for you, please replace it with the one we have given you).
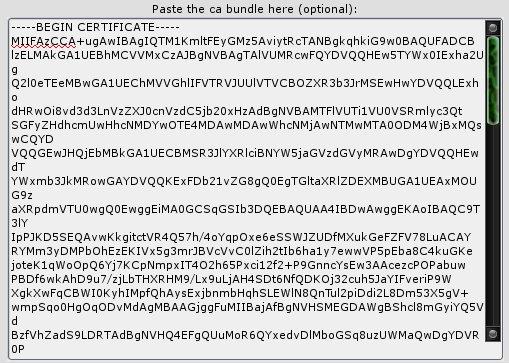
C. You will then need to enter your CA Bundle in the last field (If you do not enter a CA then the SSL Certificate will appear as self-signed and a warning will be shown when customers attempt to access your site securely).
Once you enter all three needed aspects of the SSL Certificate (CRT, RSA, and CA Bundle) then click the ‘Install’ button. The server will then install the SSL Certificate and notify of completion or if any errors that may have occurred. The new certificate should begin to work immediately and you may view your site using https:// to confirm this.
Newer Panels Versions
Manually enter information
To manually enter all of the information for your certificate:
Enter your domain in the Domain field.
When you enter the complete domain name, the Autofill by Domain option will appear next to the Domain field. If you wish to continue to enter information manually, do not click Autofill by Domain.
If the selected domain is not dedicated to a specific IP address, select an available IP address from the IP Address menu. You can only select an IP address that is labeled as shared oravailable.
In the Certificate field, copy and paste the entire contents of your certificate’s .crt file.
In the Private Key field, copy and paste the entire contents of your certificate’s .key file.
If you chose to install a purchased certificate, you may need to fill in the Certificate Authority Bundle (optional) field. If you do not have the information, contact the organization from which you purchased the certificate.
Click Install.
You can click Reset to remove the information from all fields.
If the installation is successful, WHM will display a message to indicate that the certificate installed. If the installation is unsuccessful, WHM will display an error message to indicate the problem. More information about how to troubleshoot an SSL installation is available.