This article will show you how to install macOS Ventura with your Windows PC using VMware Workstation 17 Player
To get started, you’ll need to get the following files:
Download the macOS Unlocker for VMware.
Download macOS Ventura ISO.
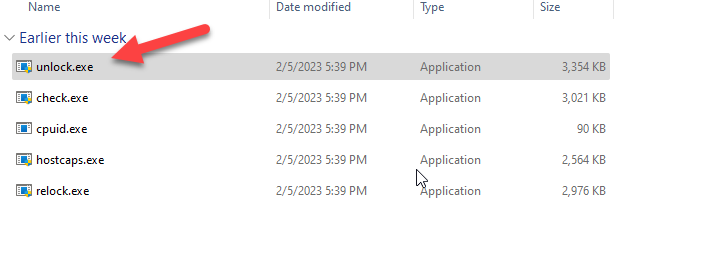
Install Unlocker. Make sure VMware Player is closed. Download Unlocker from Here, Get the ZIP file. Unzip it.
Open command Prompt as Administrator. Go to the Unlocker windows directory.
Execute “unlock.exe”.

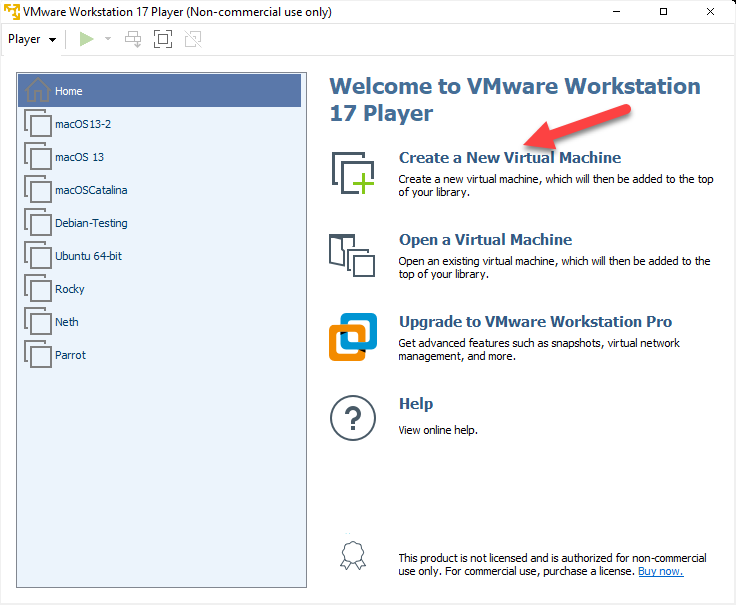
Next, open up VMware Workstation Player and create a new Virtual Machine.
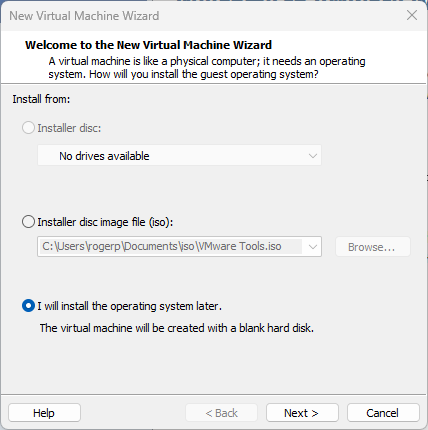
Check “I will install the operating system later” and tap on “Next.”
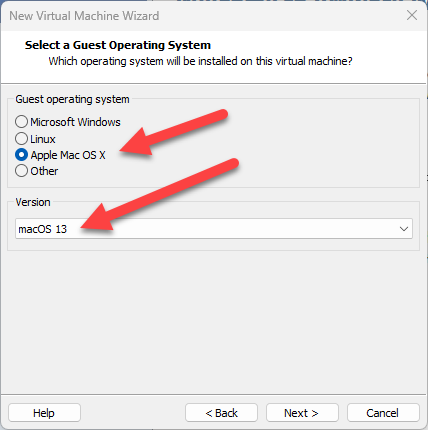
Now, select “Apple Mac OS X” from the operating system list, tap on macOS 13 from the version drop-down list, and tap “Next.”
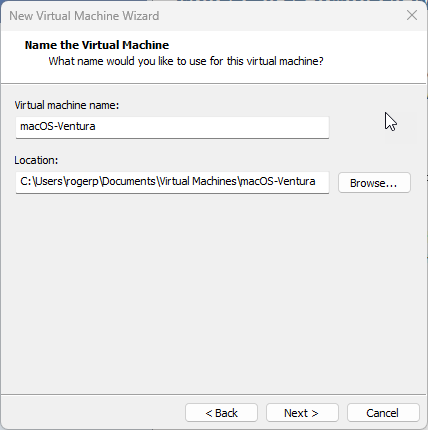
Give your virtual machine a name, such as “macOS-Ventura.” Tap “Browse” to pick a place to store virtual machine files, tap “Next,” or leave it as the default.
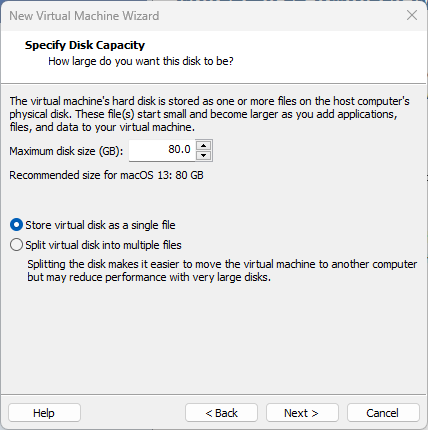
Next, choose a disk capacity of 80 GB or more. Then check “Store the virtual disk as a single file,” and Click “Next” to continue.
Then, click “Customize Hardware”.

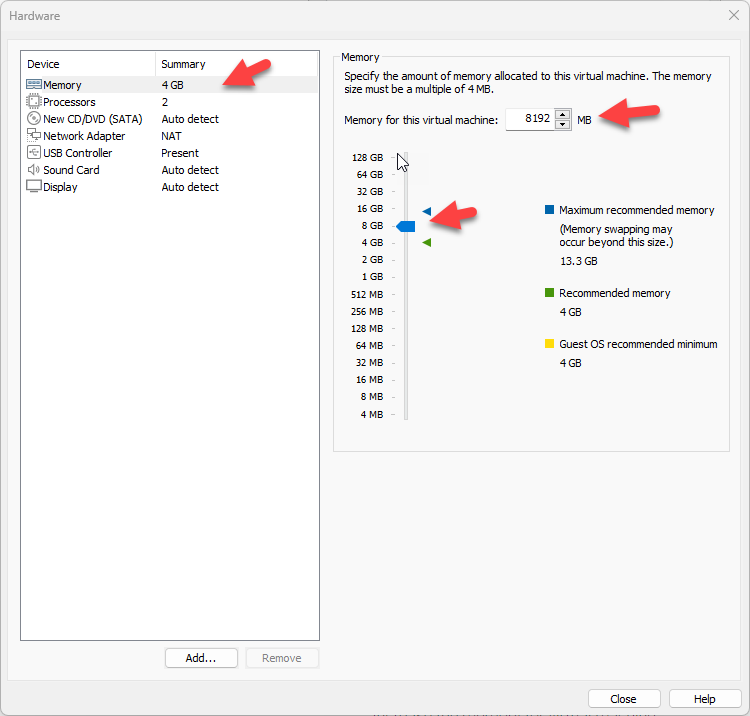
Increase memory from 4 GB to 8 GB or higher for better performance.
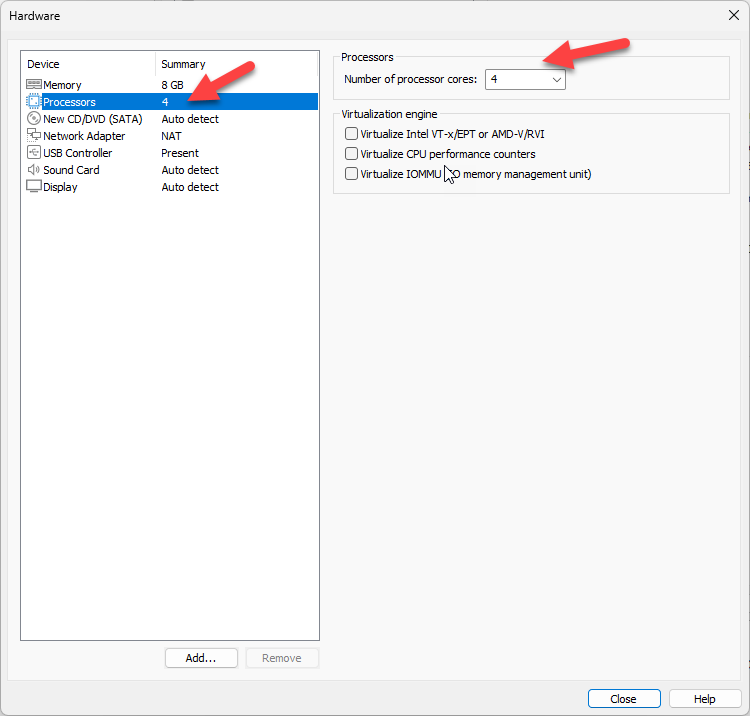
Next, go to the Processors menu. Then, increase the CPU processor core from 2 cores to 4 or higher cores for better performance.
Now, on the left menu, select “New CD/DVD (SATA),” then “Use ISO image file” and “Browse.”
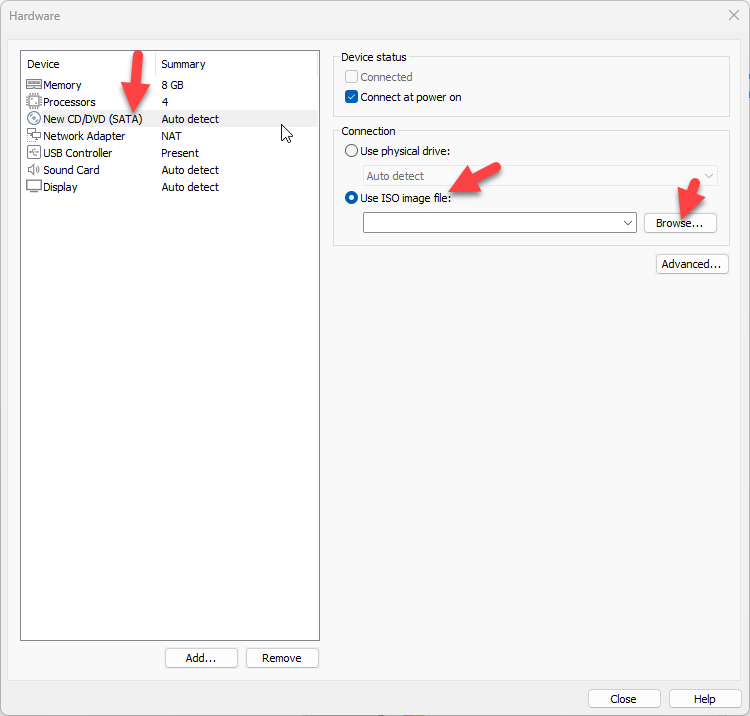
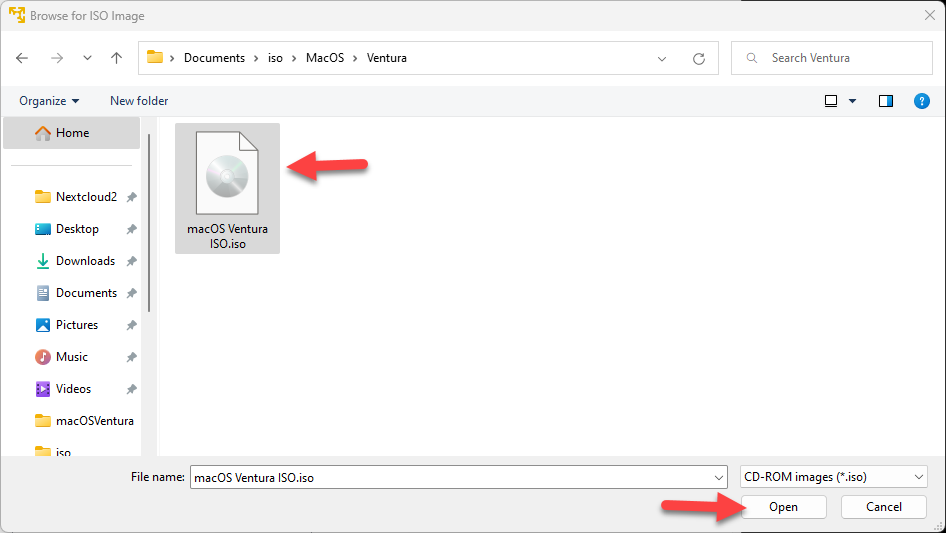
Find the macOS Ventura (macOS 13) iso file, then click “Open.”
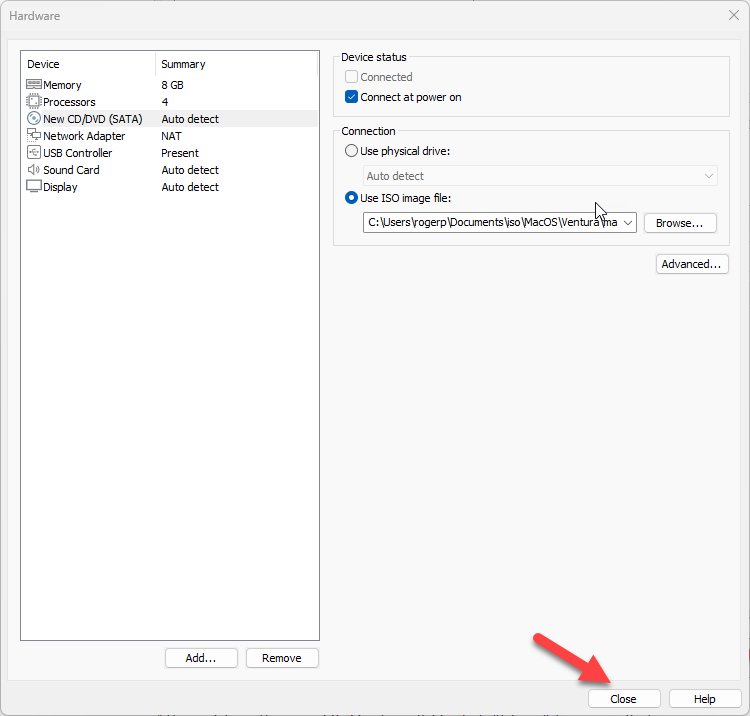
After adding the macOS Ventura ISO, click “Close” to save all changes.
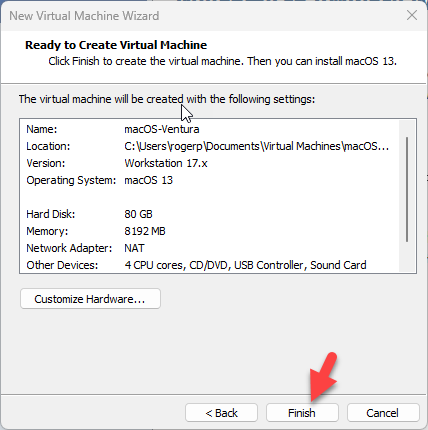
Finally, tap “Finish” on the New Virtual Machine Wizard Window.
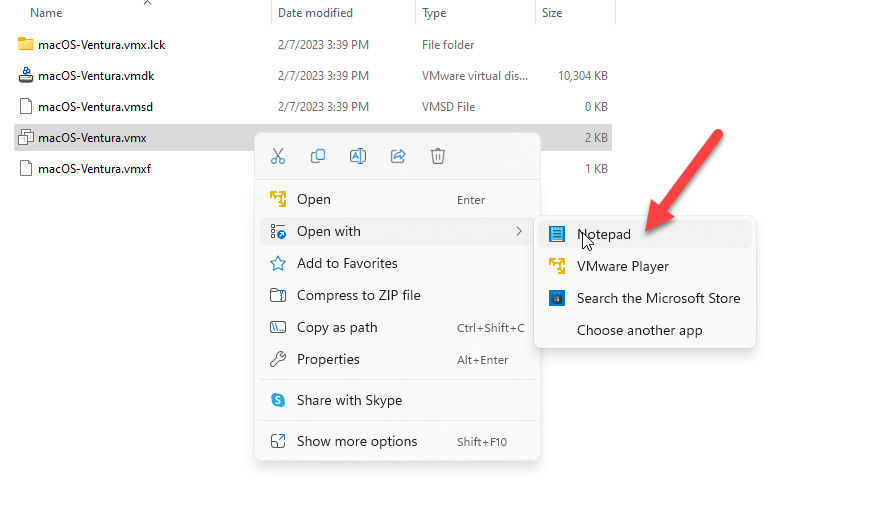
Modify the macOS Ventura VMX file
Go to the virtual machine folder you selected earlier in this instruction to edit the VMX file. If you haven’t specified a new location, the default is Document > Virtual Machine > macOS-Ventura.
Now, right-click on “macOS-Ventura.vmx” and choose “Notepad” or another text editor.
Add the following code at the bottom of the text.
smc.version = "0"
For Networking to work, we need to add the following. Select “Find” from the menu. Alternatively, you can also use “Ctrl + F” to open it.
In the search box that appears, search for the below line.
Ethernet0.virtualDev = "e1000e"
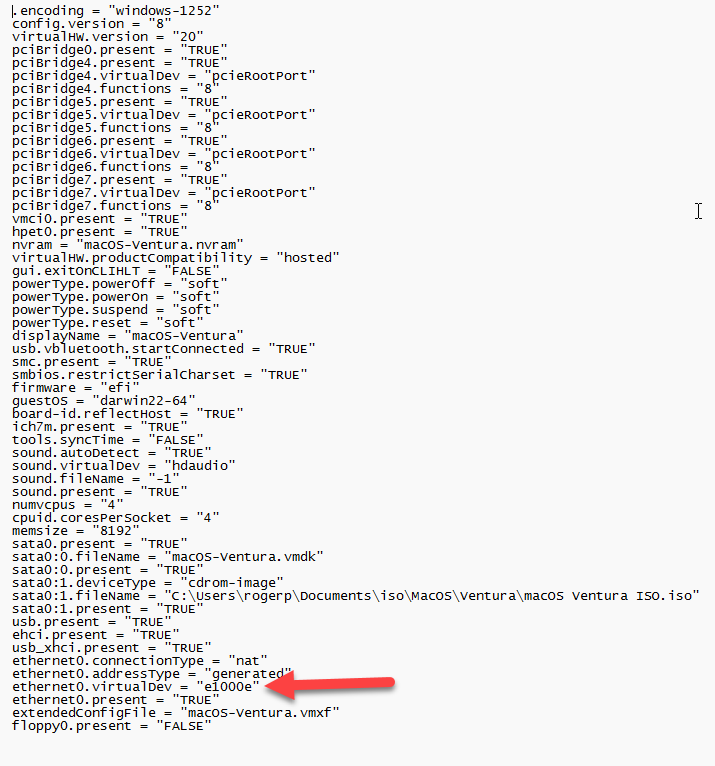
Now, change the e1000e to vmxnet3.
Ethernet0.virtualDev = "vmxnet3"
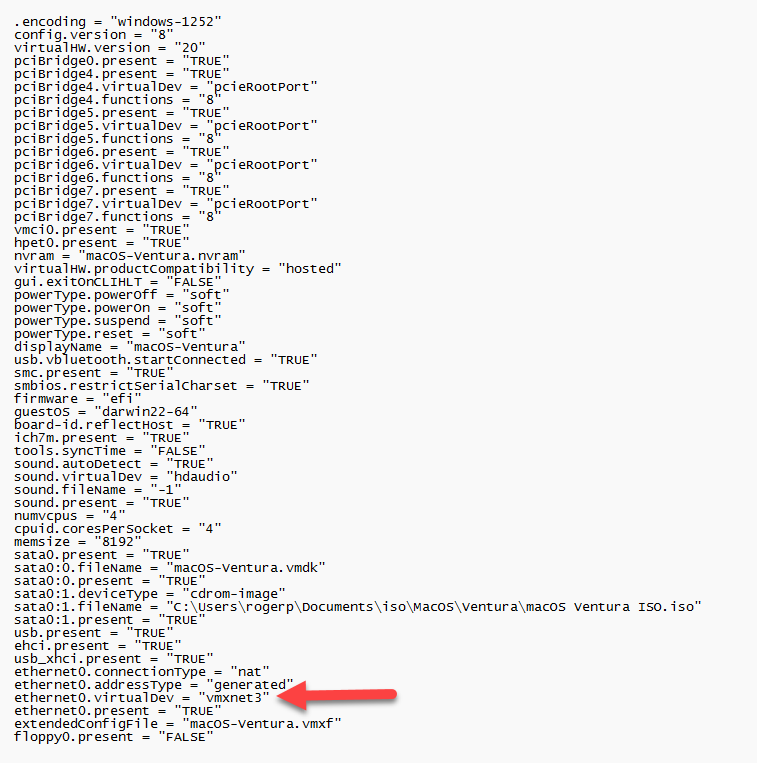
Go to the “File” tab, click “Save. Then Close the file.
Install macOS Ventura on VMware on Windows PC
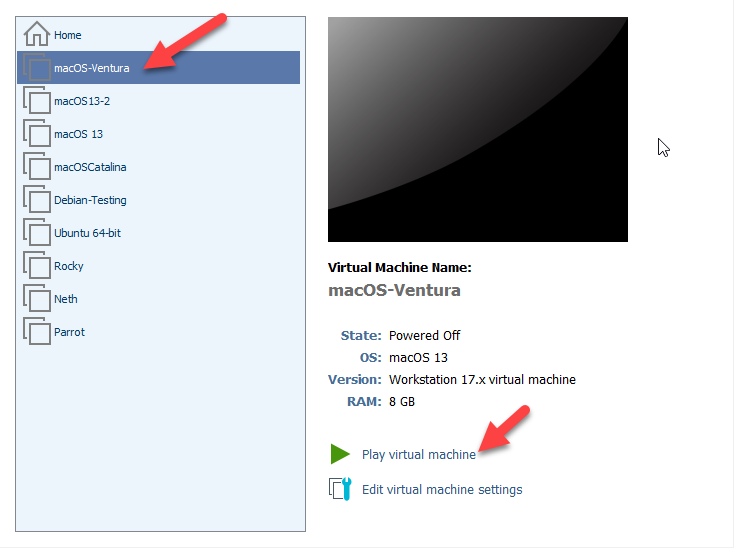
It is now time to install macOS Ventura. Start VMware, then choose “Power on this Virtual Machine” in the macOS Ventura VM panel and wait for it to start.
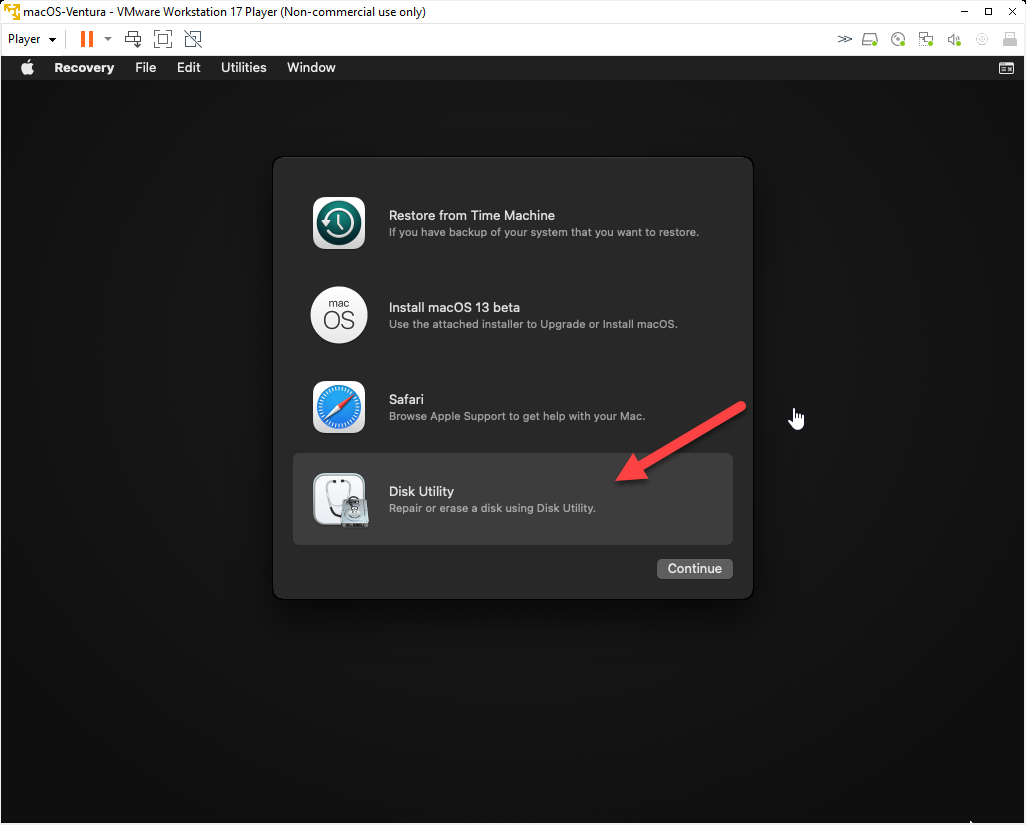
Next, on the language screen, choose your preferred language. Now, tap on the “Disk Utility” and select “Continue.”
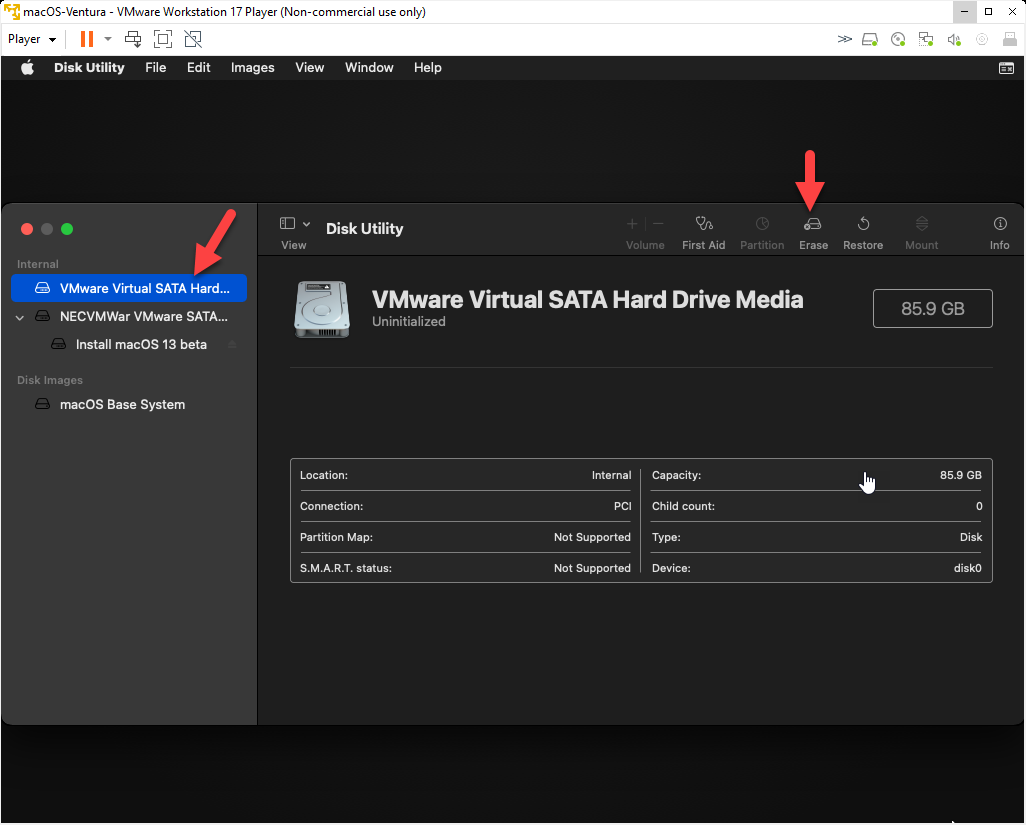
Next, select “VMware Virtual SATA Hard Drive Media” and click “Erase.”
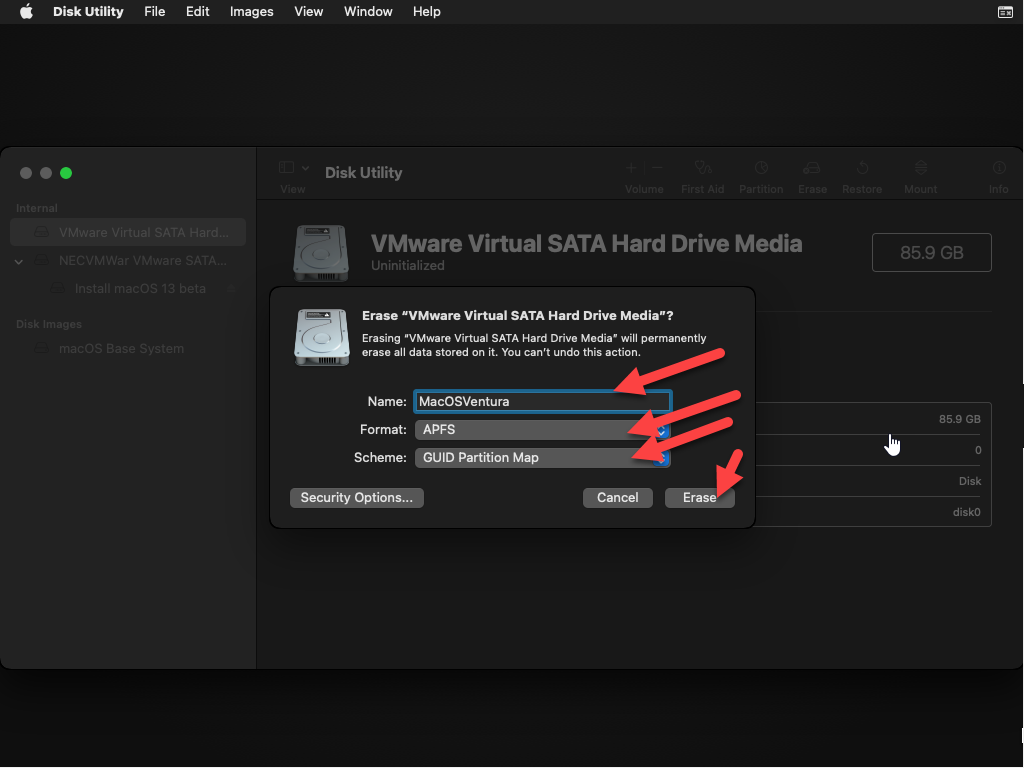
Now, type “macOSVentura” for the name, then choose “APFS” from the Format drop-down menu and click “Erase.”
Tap on “Done” to close the dialogue box.
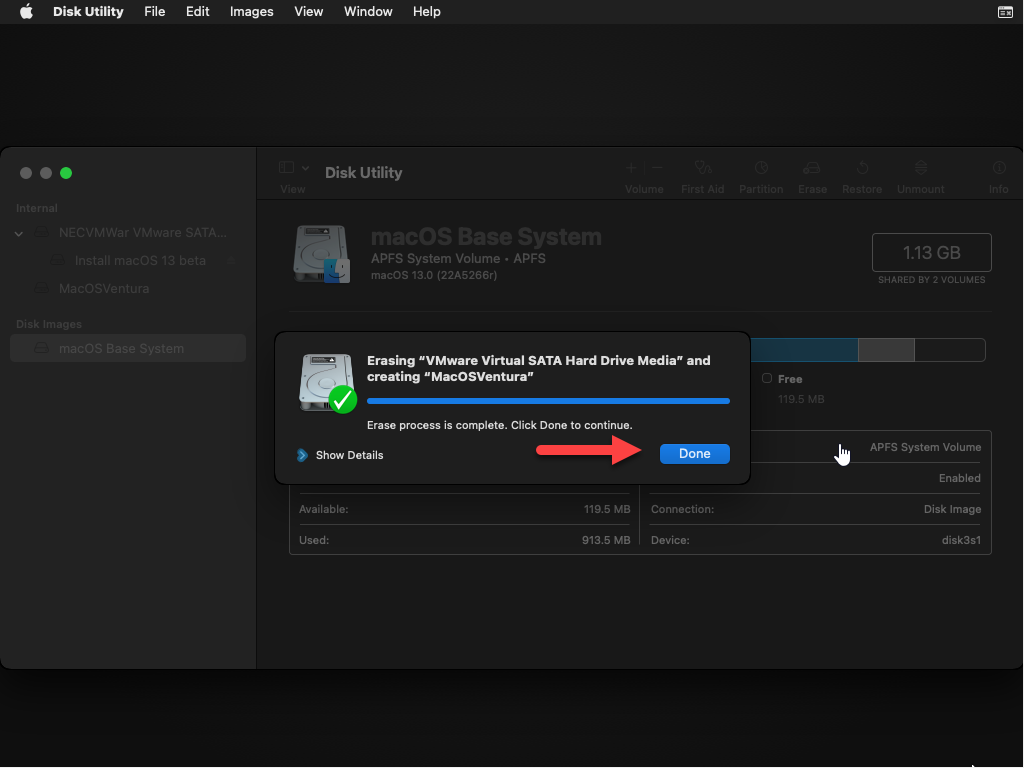
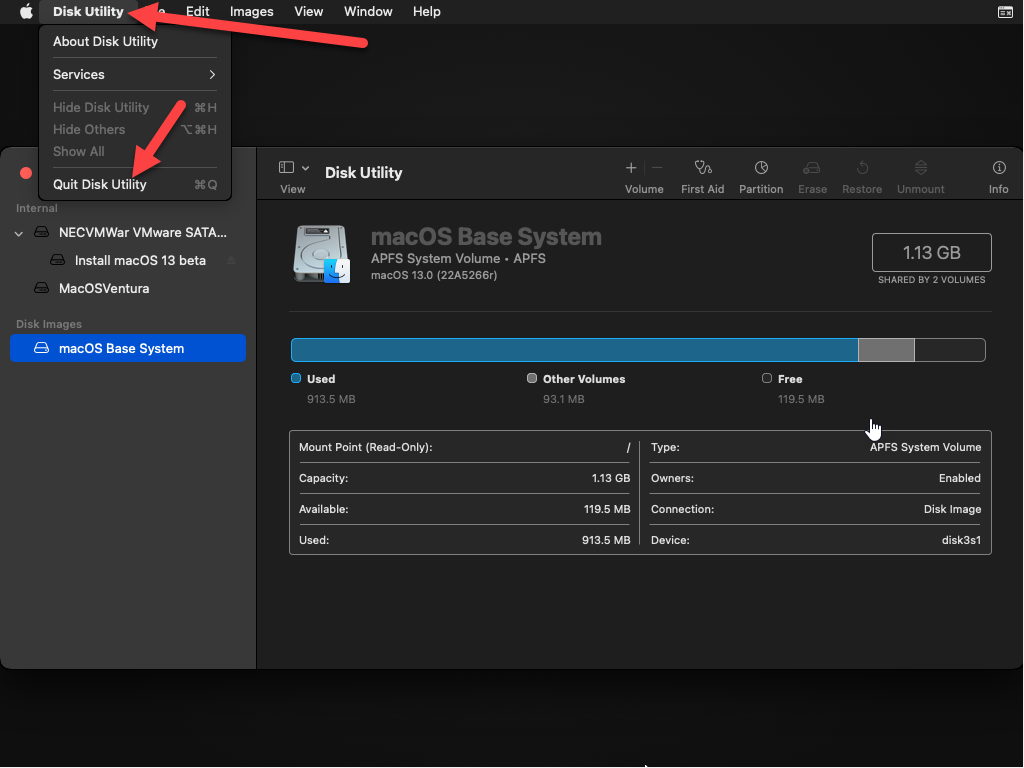
Tap “Quit Disk Utility” from the Disk Utility Tab.
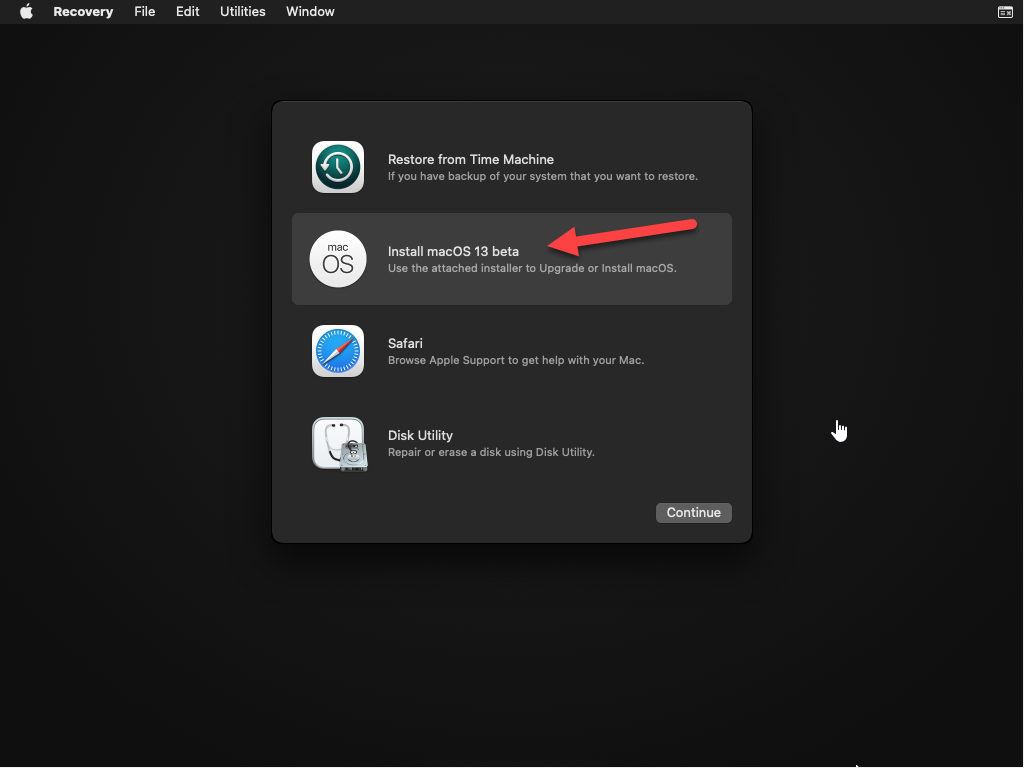
Tap on “Install macOS 13 Beta” and tap on “Continue” twice.
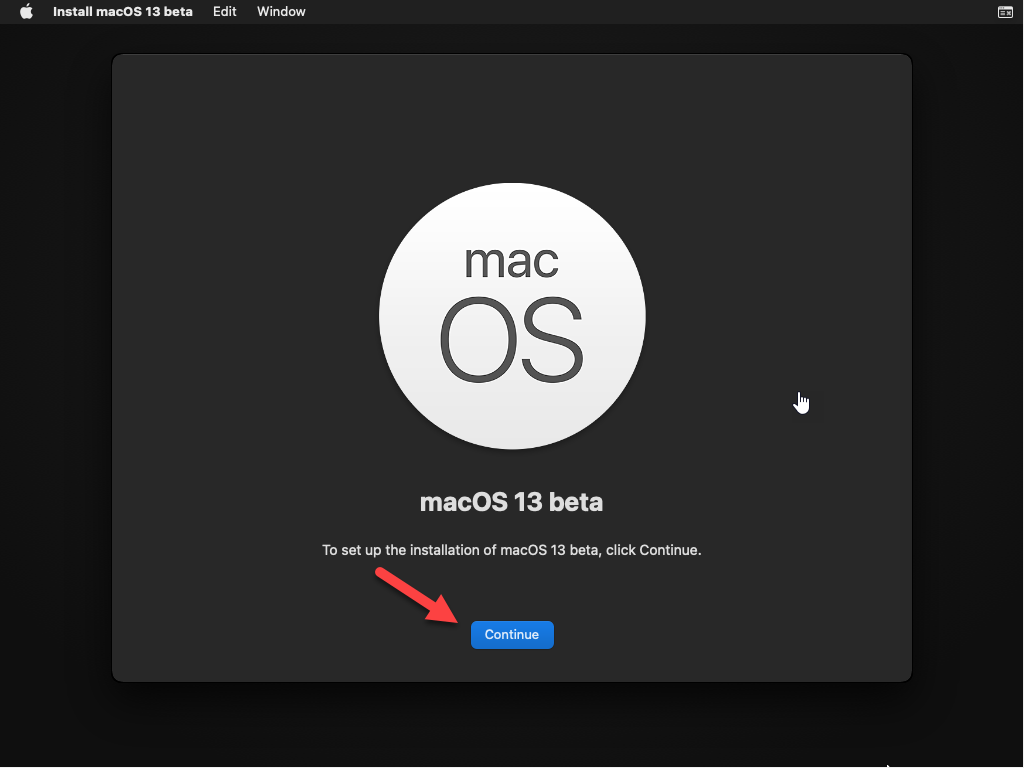
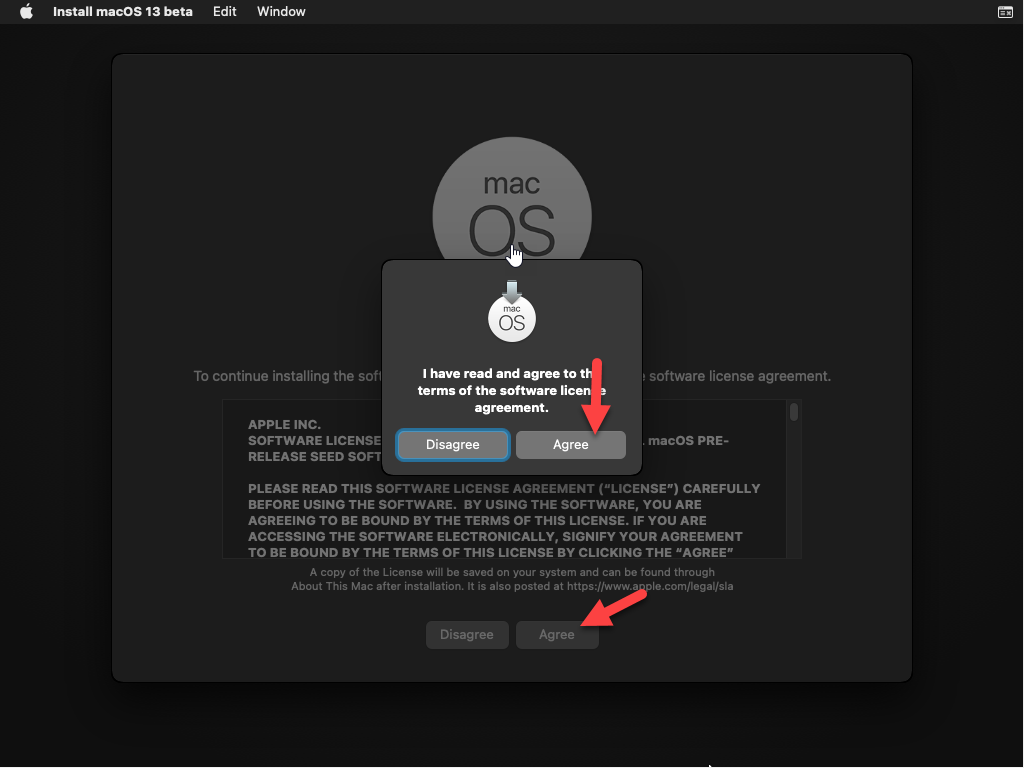
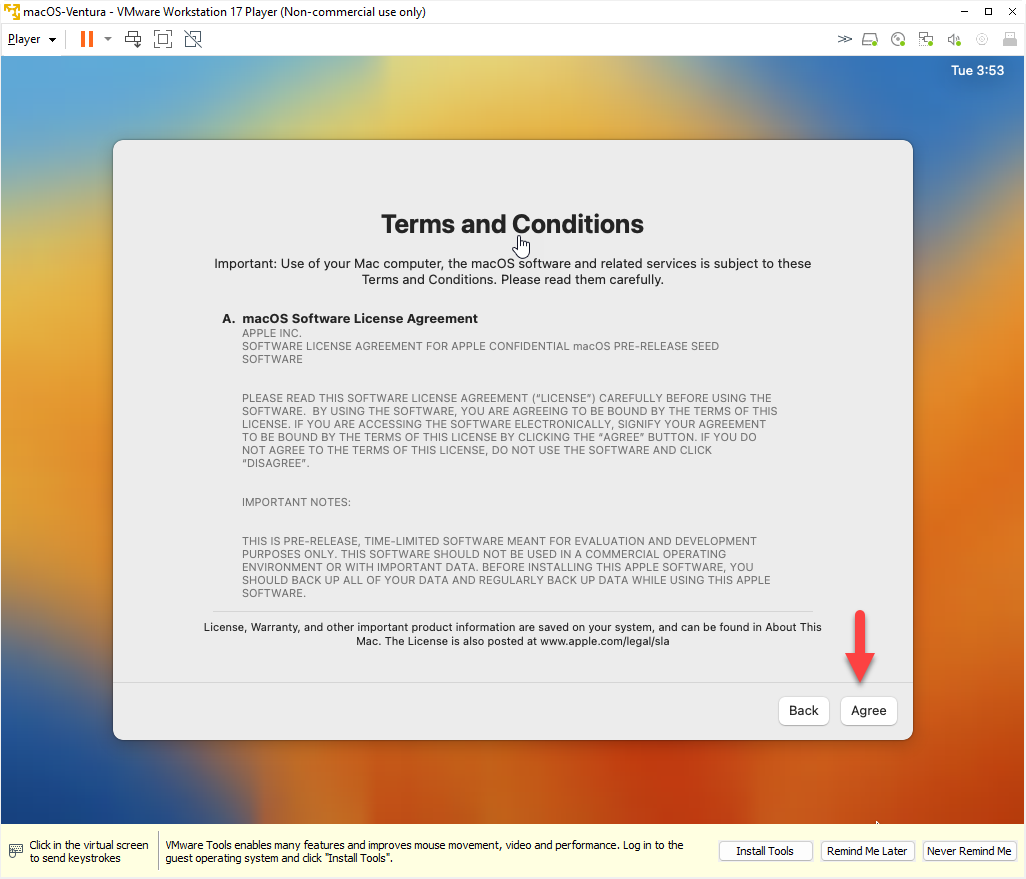
Accept the software licensing agreement’s terms and conditions.
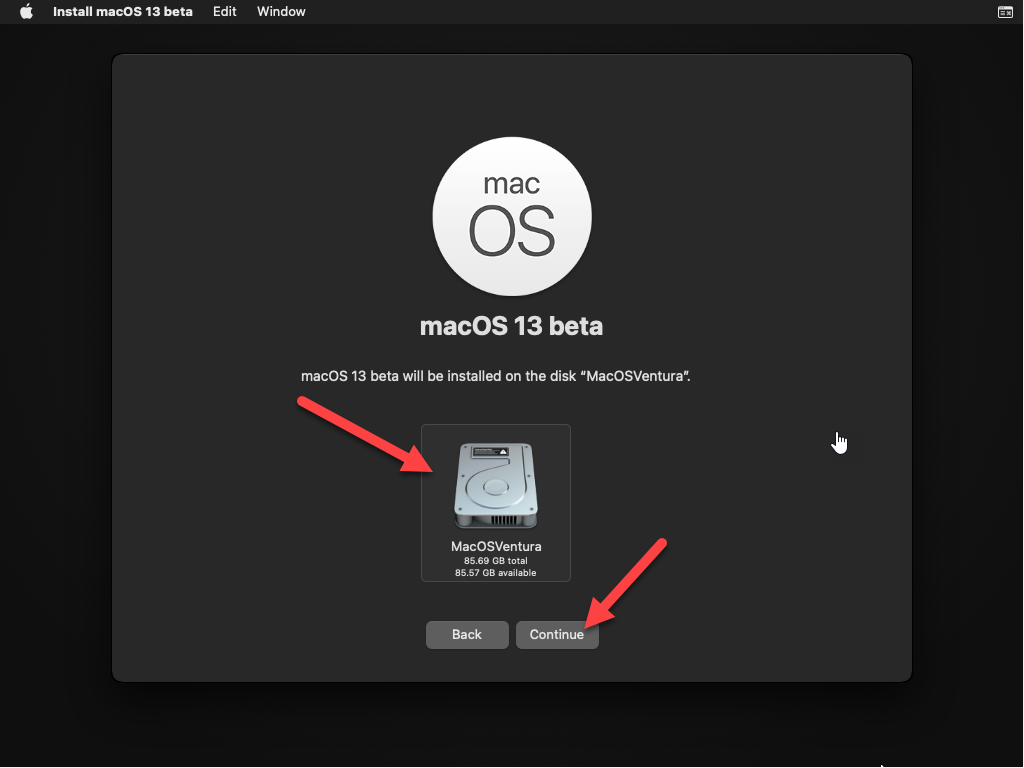
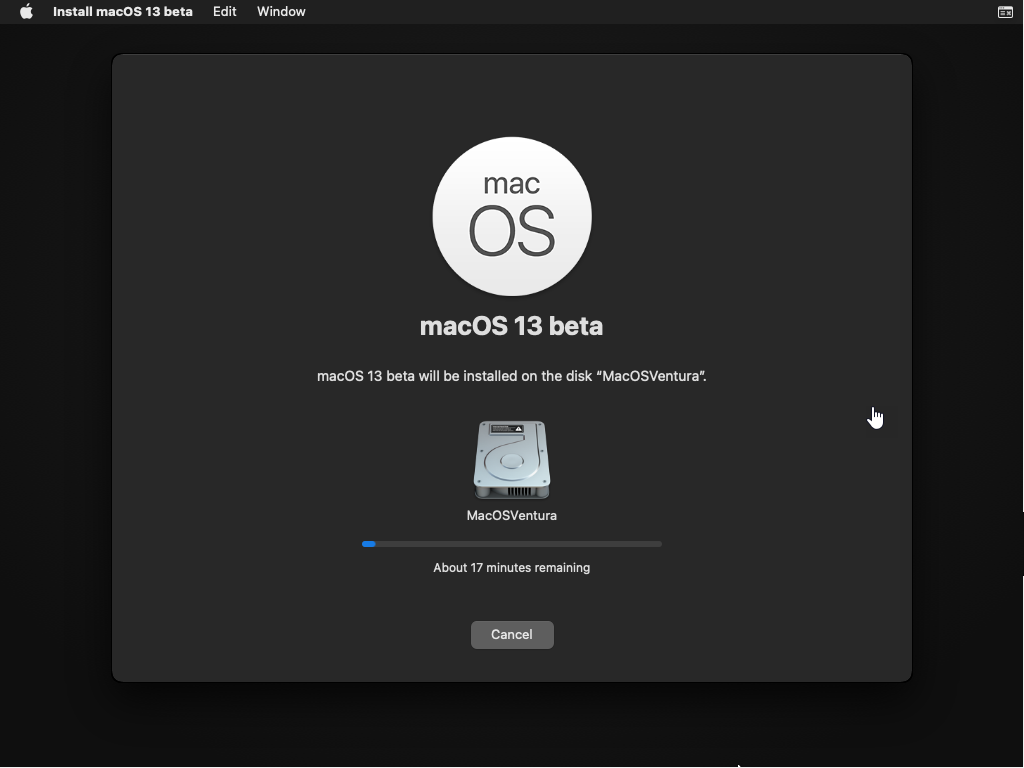
Tap on the available disk, then click “Install.” The installation will be finished after two or three restarts.
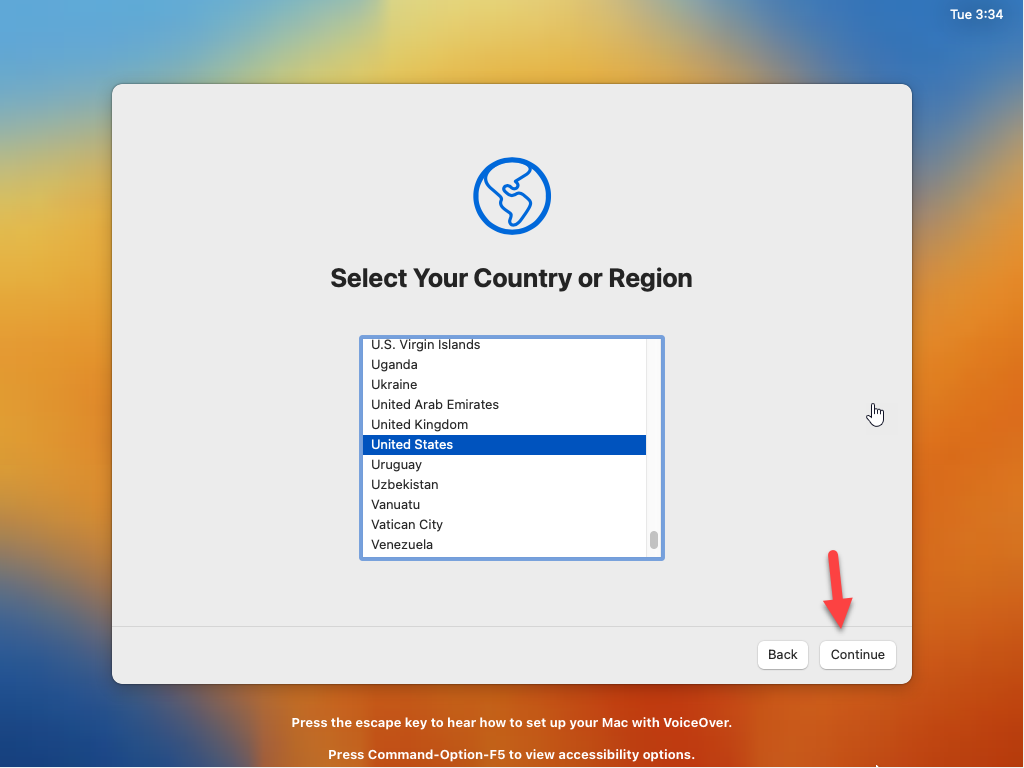
After successfully installing macOS Ventura you must configure some basic account settings.
Settings
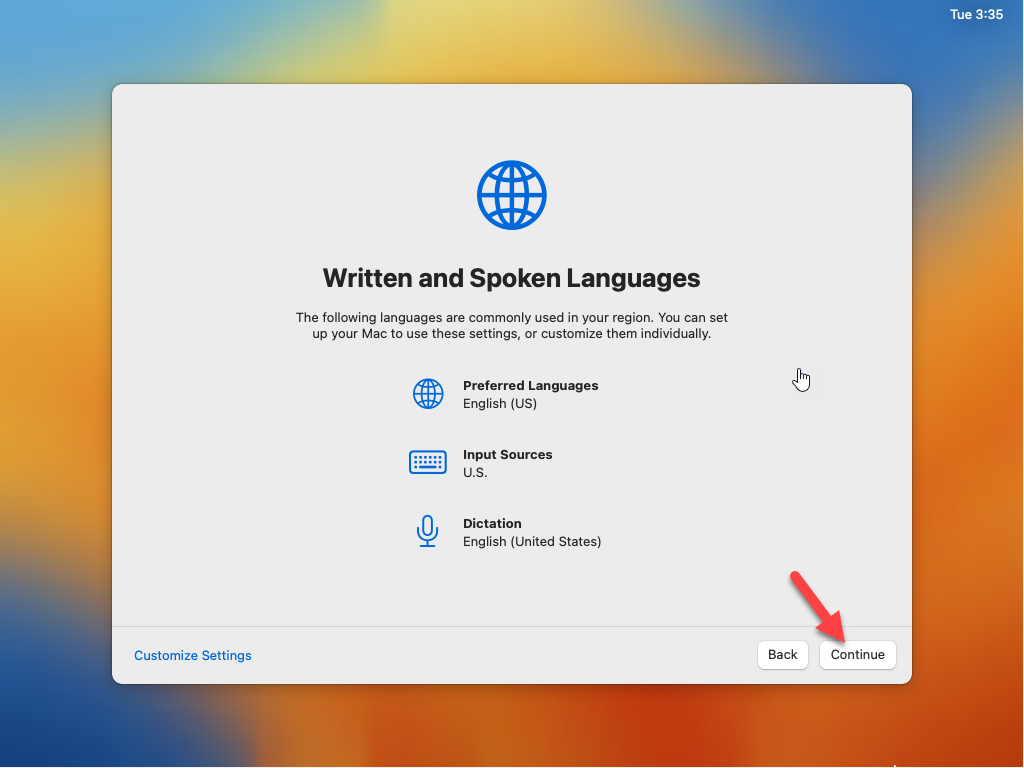
Settings
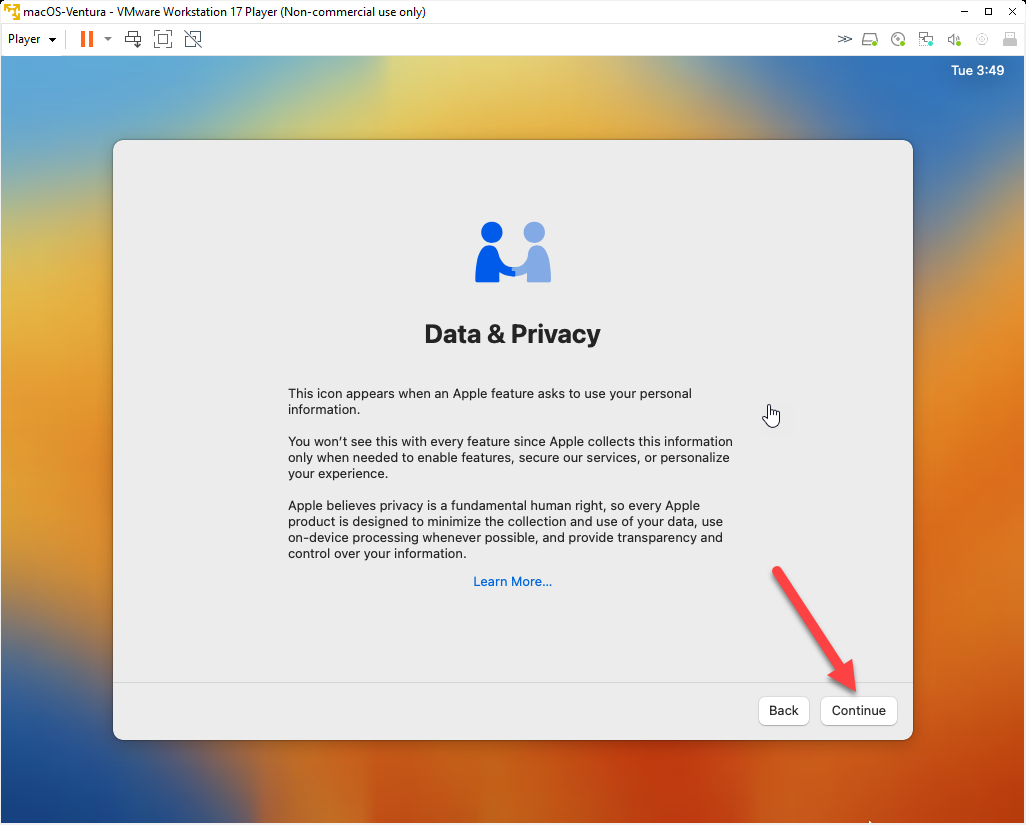
Data and Privacy
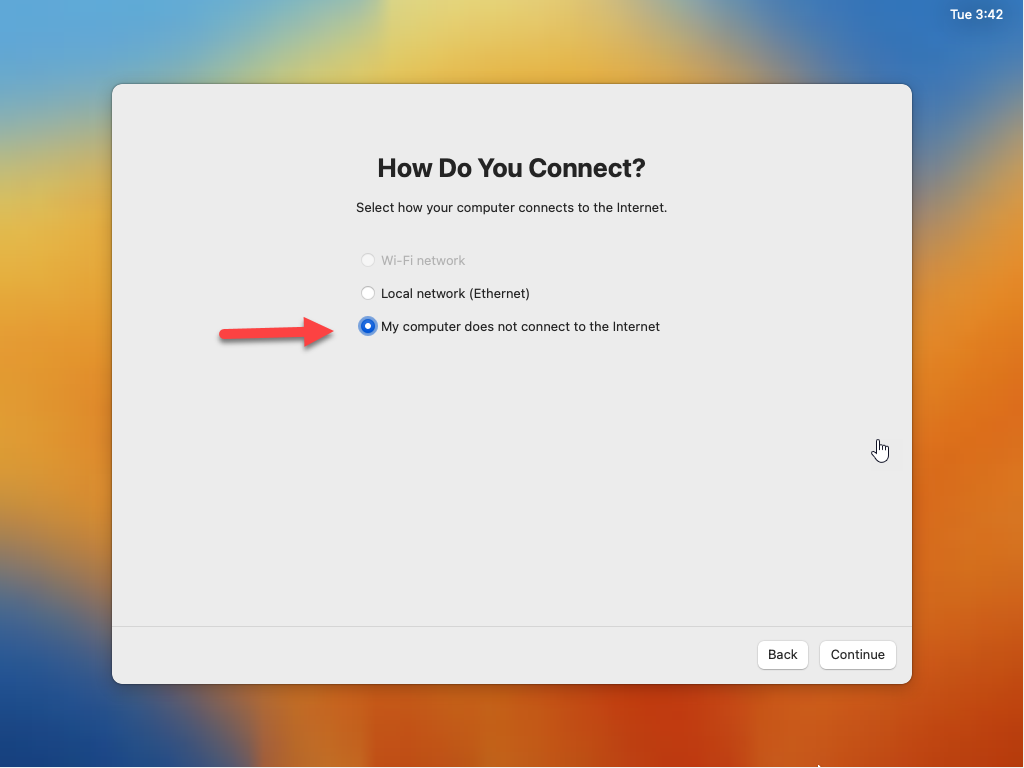
Networking. Choose “My computer does not connect to the internet.” We will set this up in a bit.
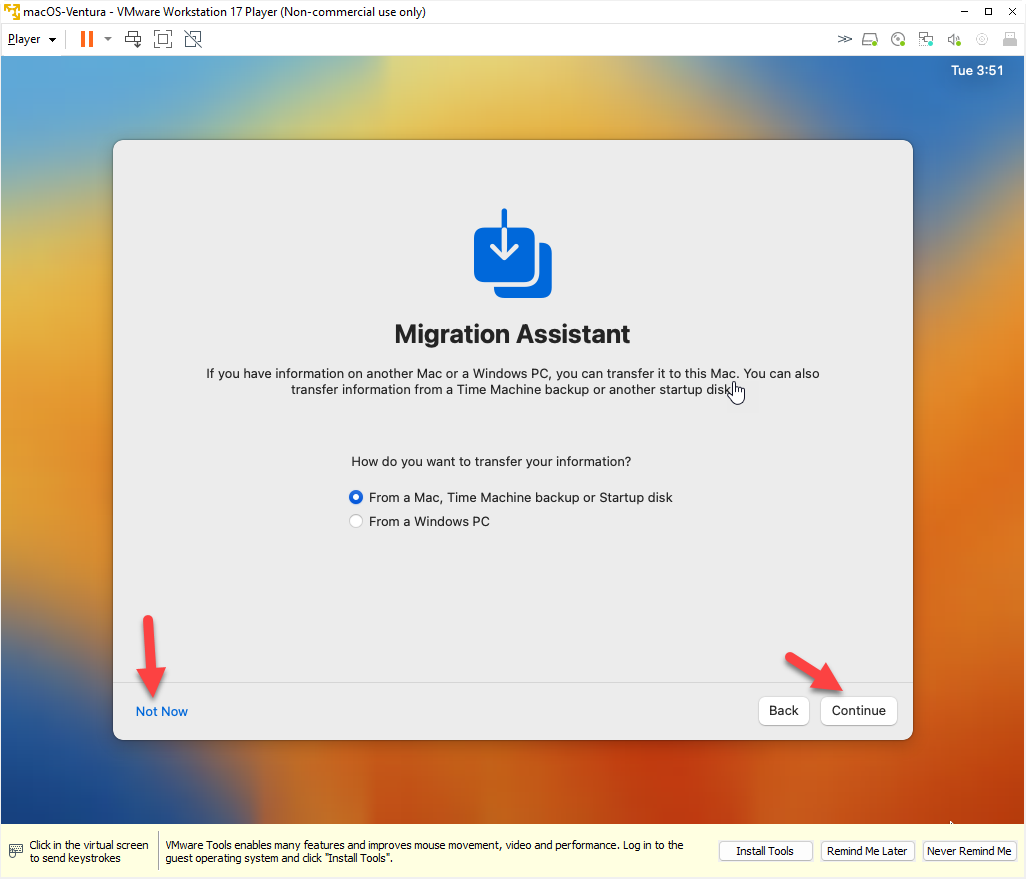
Migration
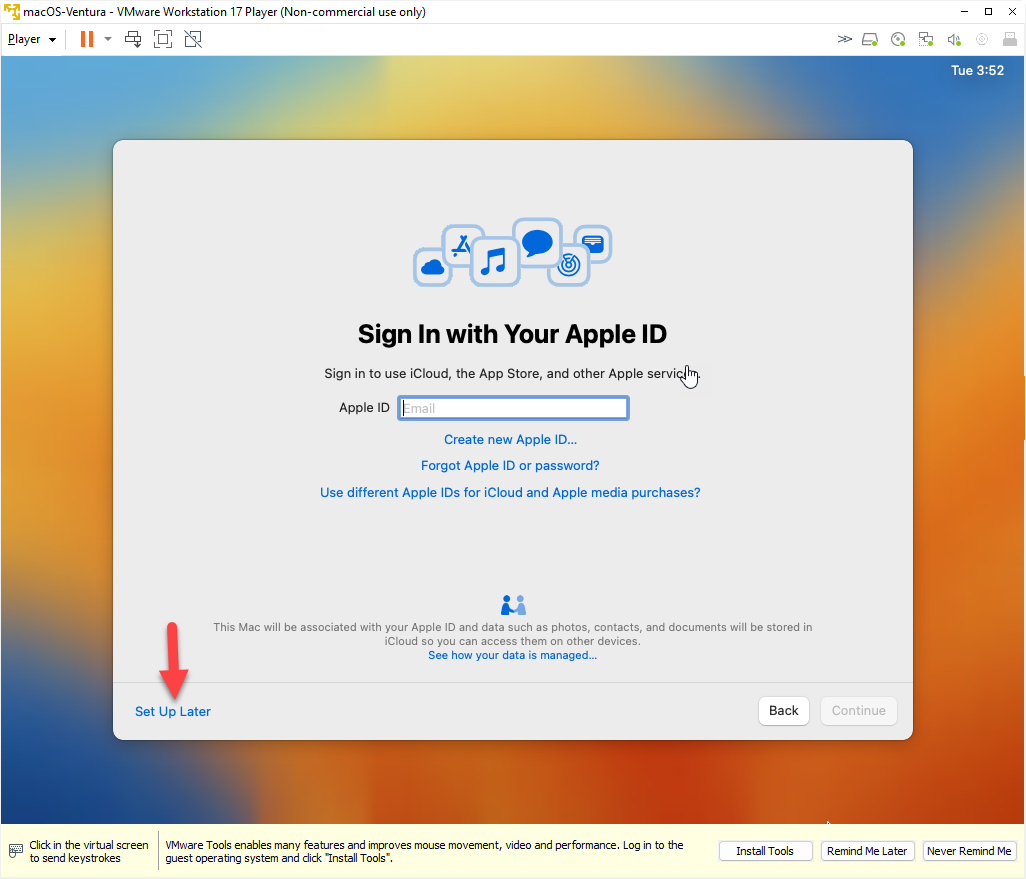
Skip Sign In
Agree to terms
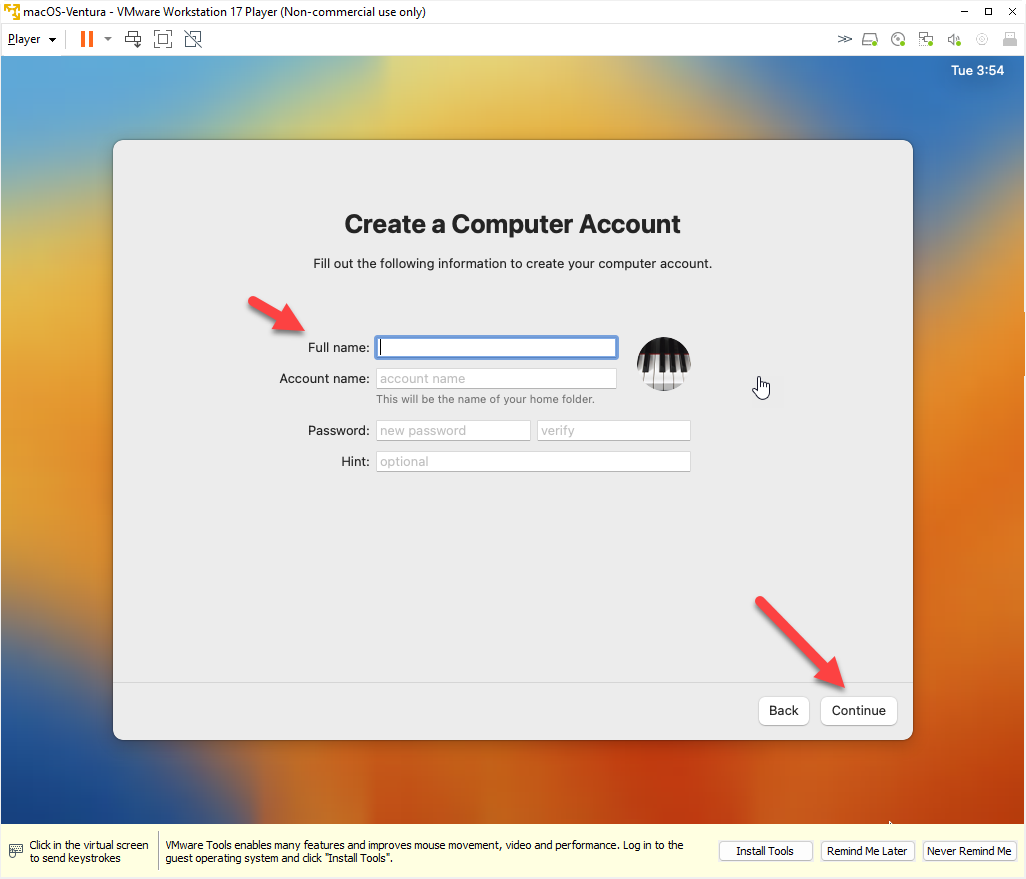
Create account.
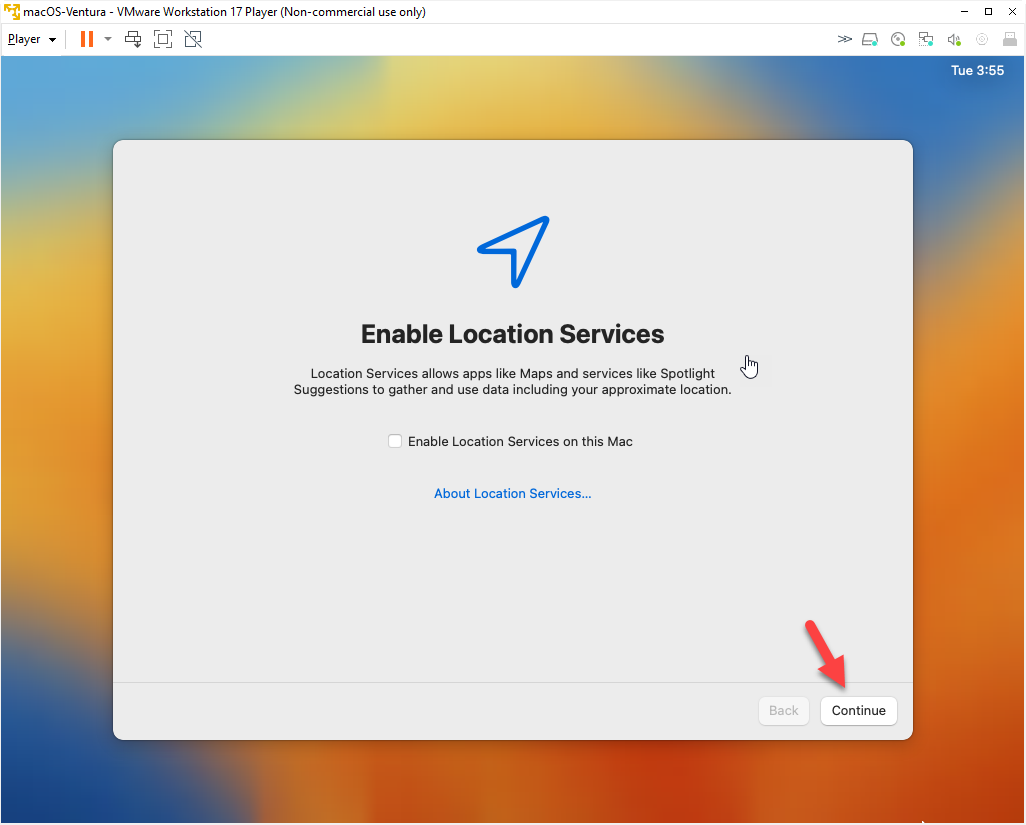
Enable location services.
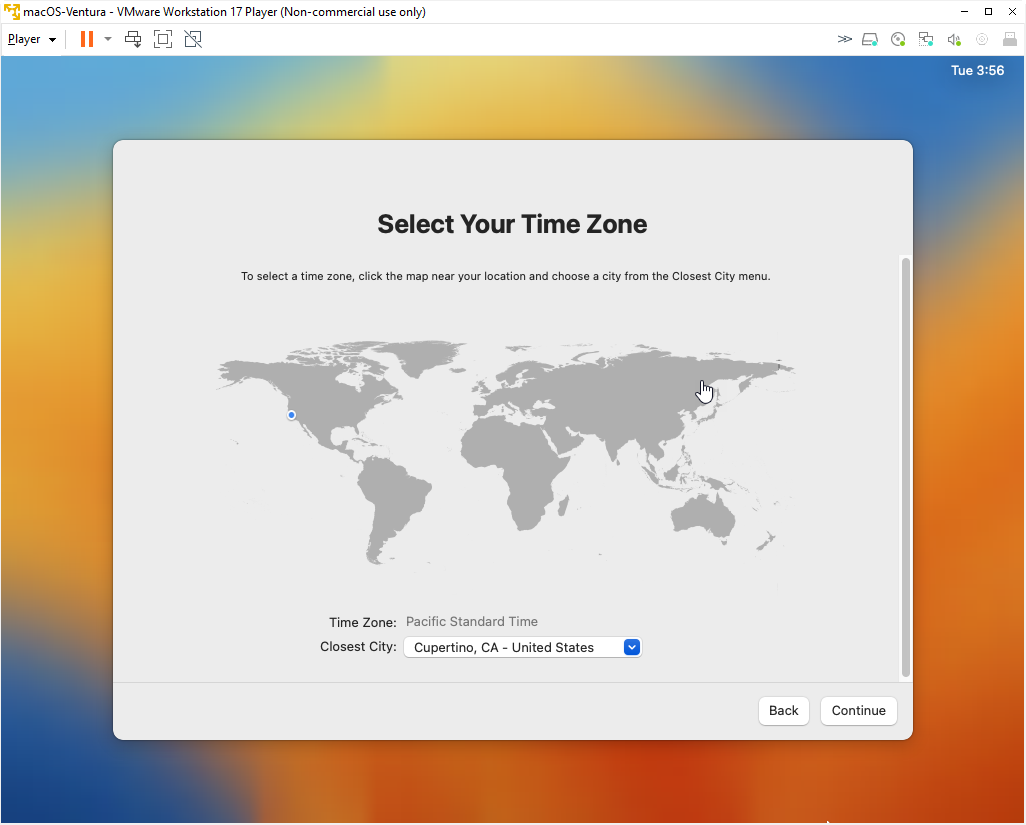
Choose time zone
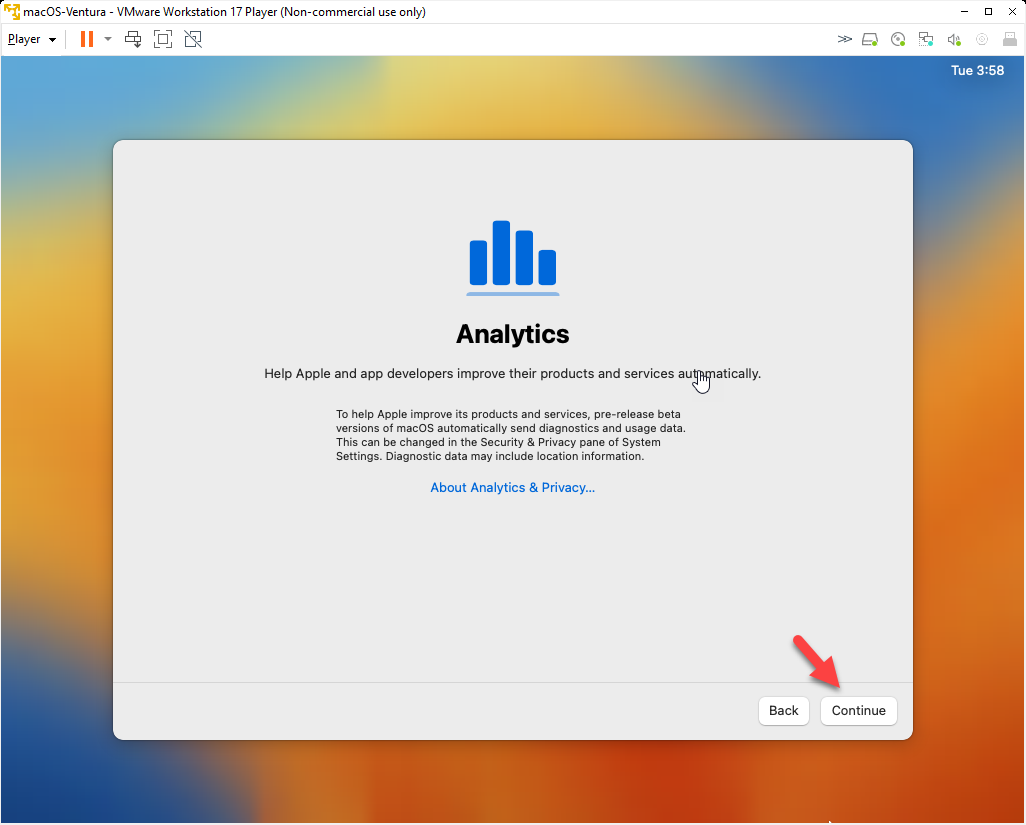
Analytics
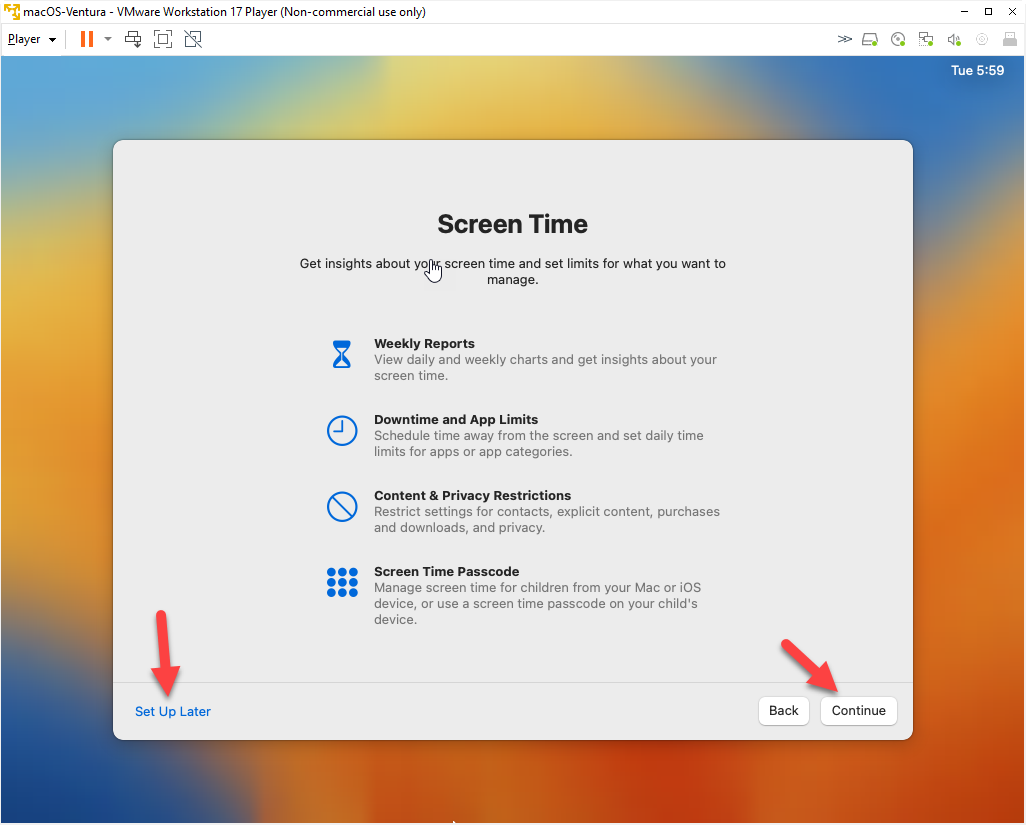
Screen Time
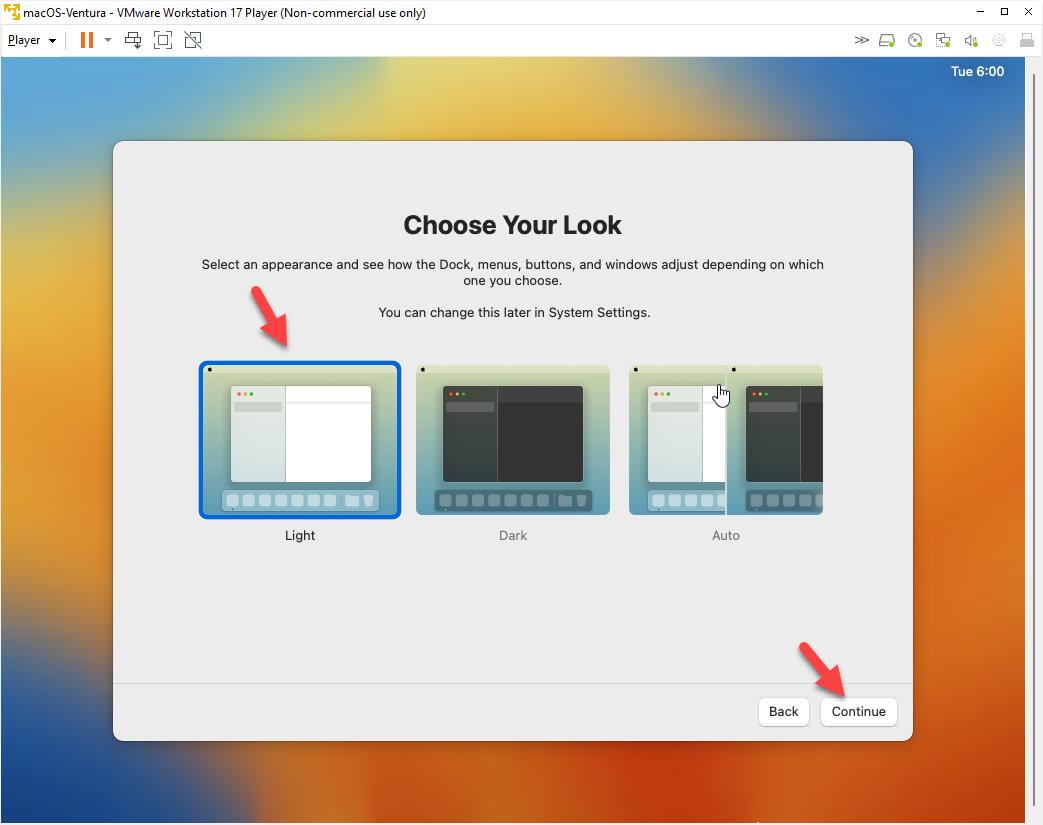
Choose your look.
Completion
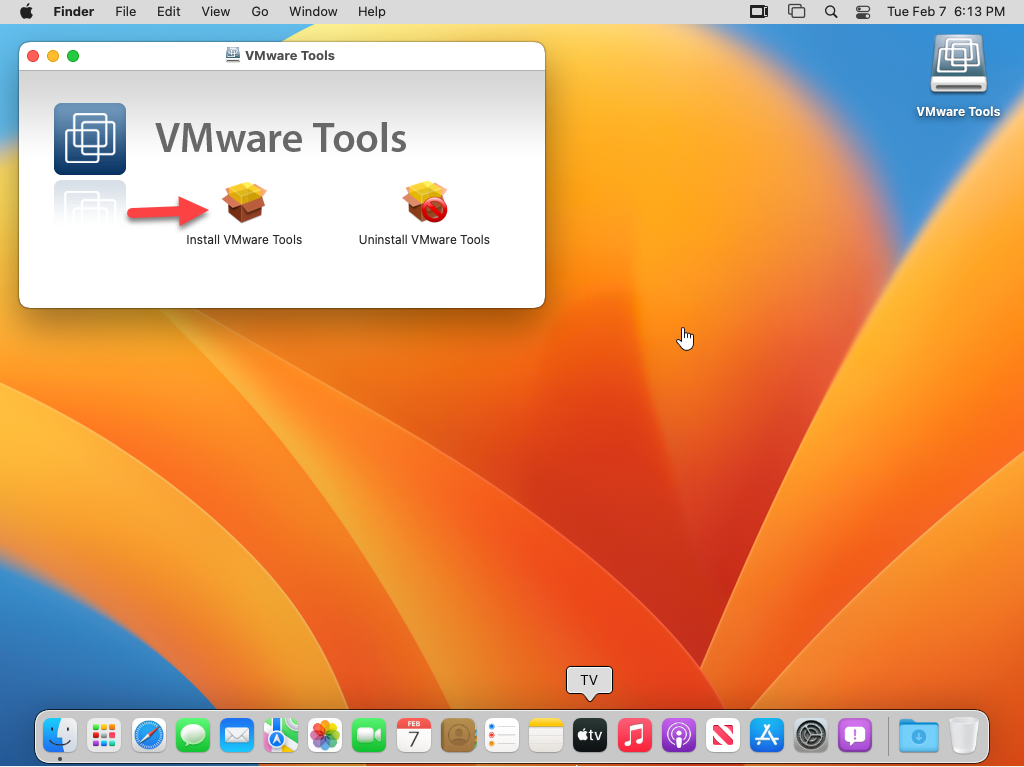
Now Let’s Install VMware Tools
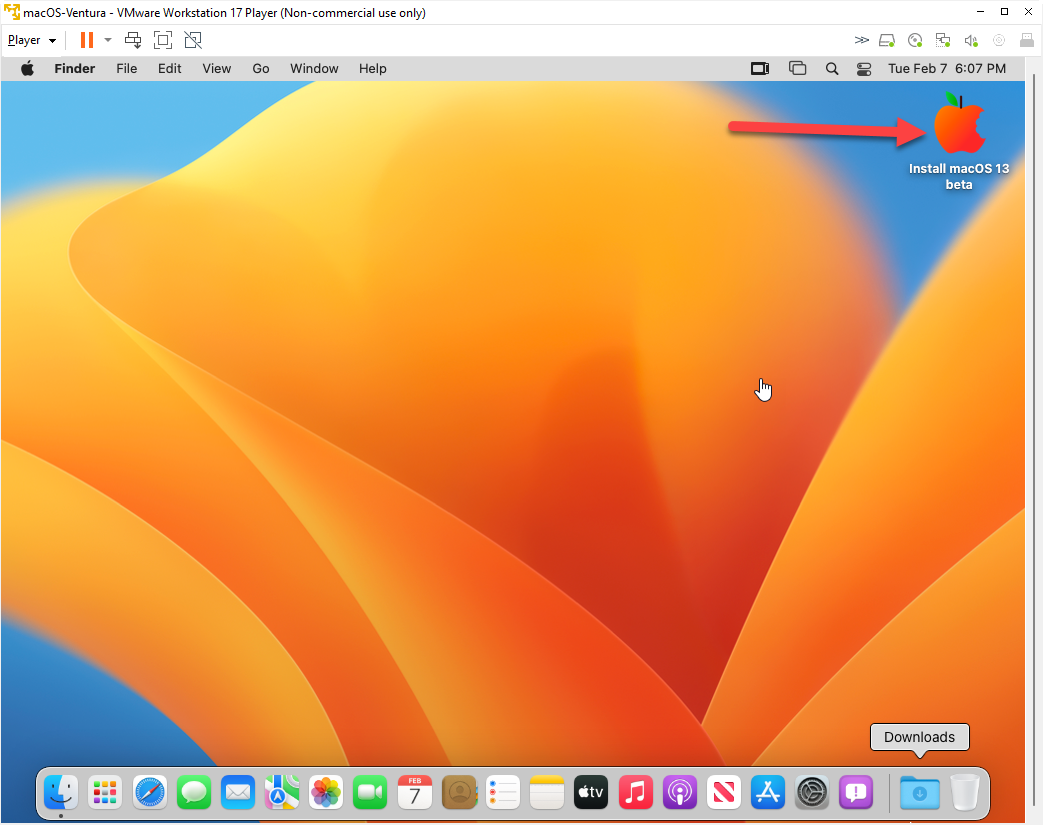
Eject the Install Disk macOS13 beta
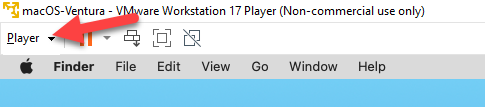
Now Click on Player > Manage > Install VMware Tools
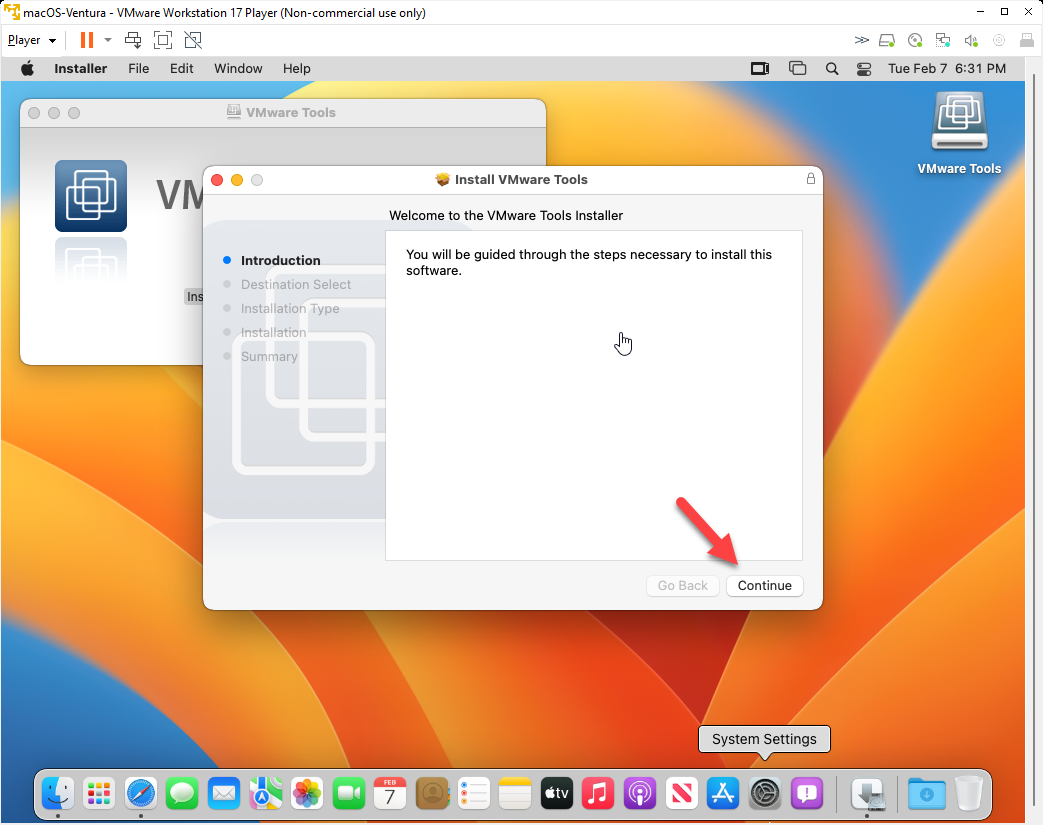
Click “Continue.”
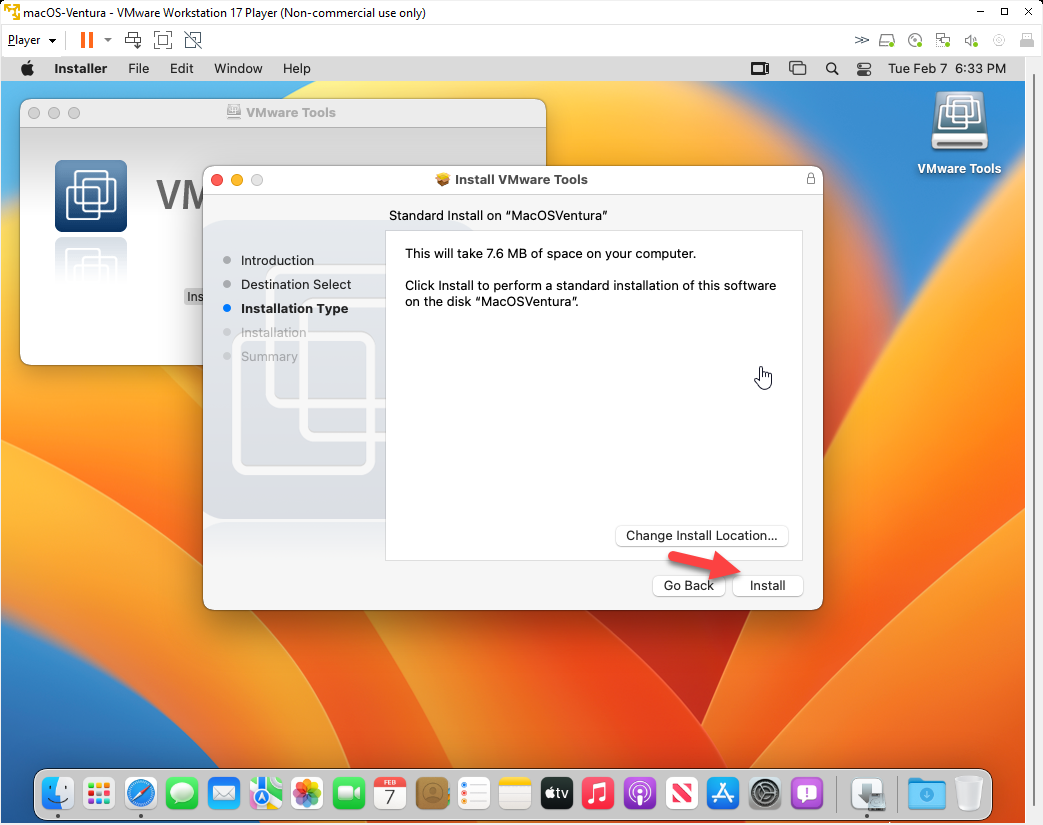
Click “Install.”
Enter Password.
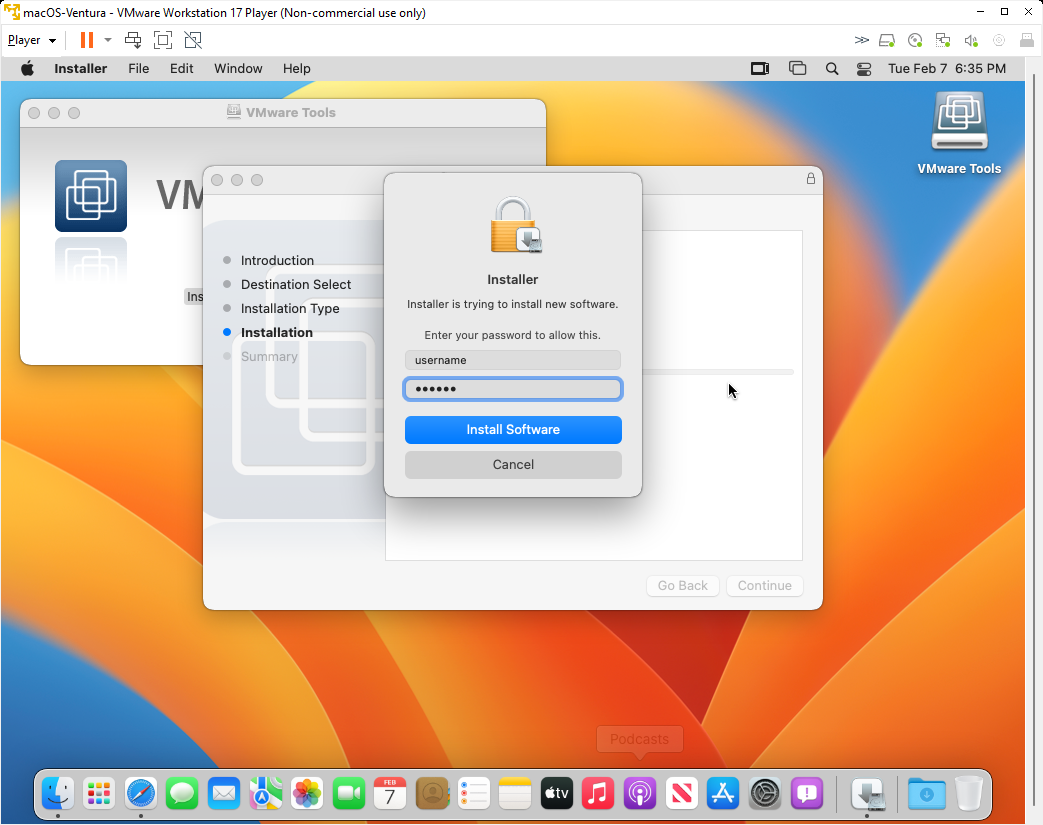
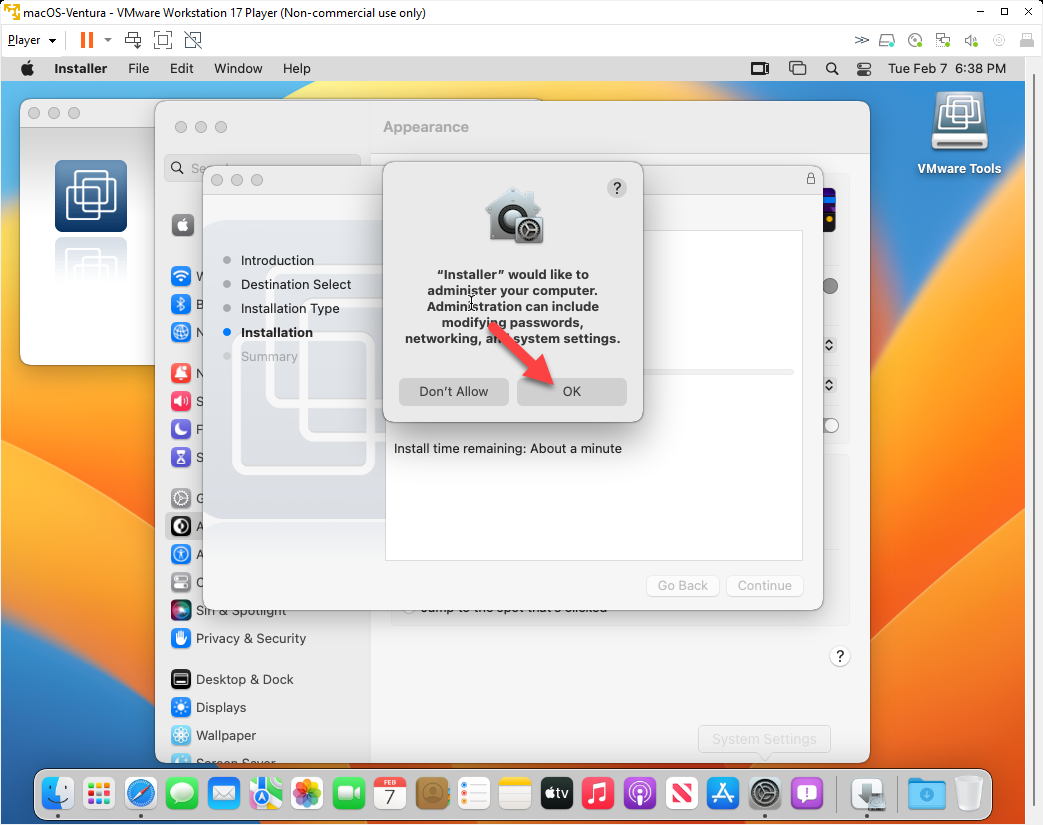
Allow Administration.
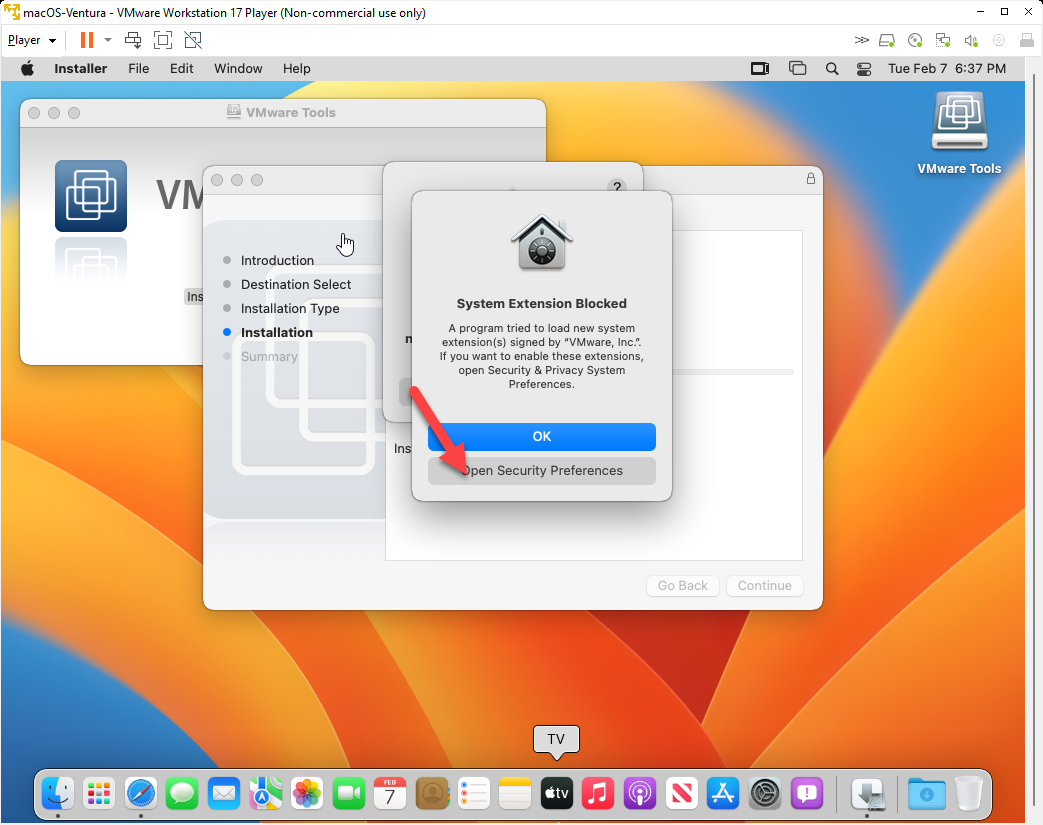
Allow Extension.
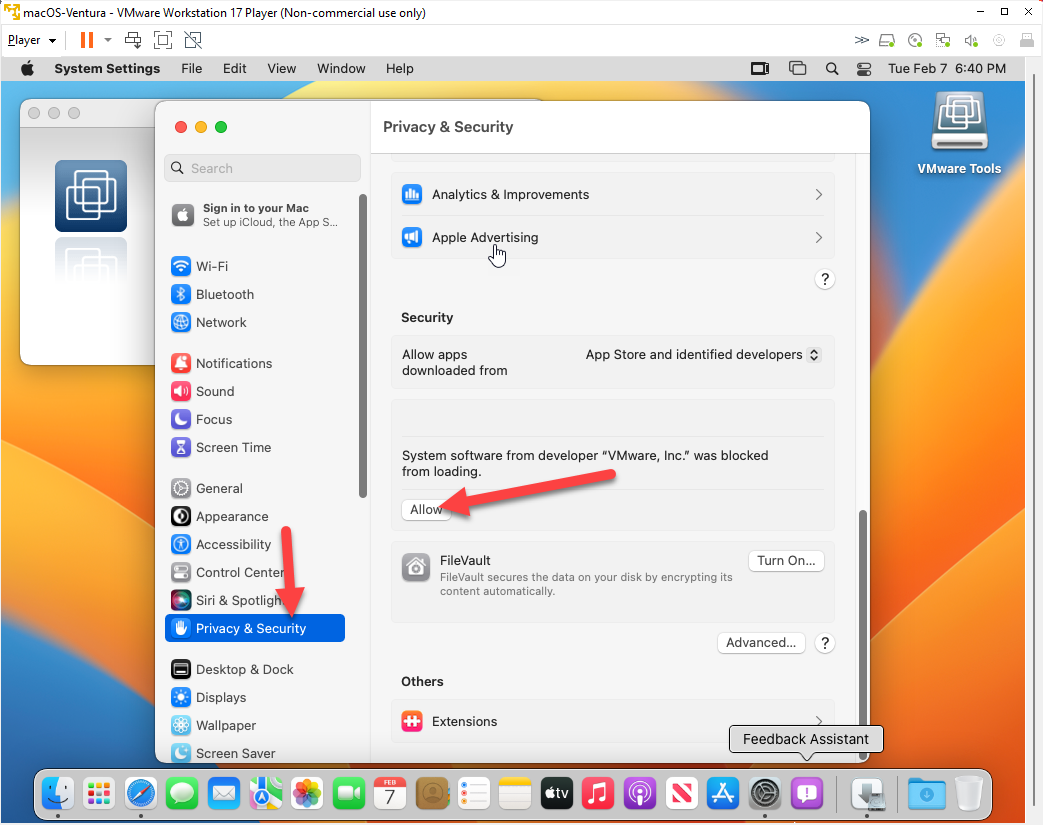
Allow Extension
The system will want to reboot. Choose later and close the system window. You should see installation failed. Just restart the installation.
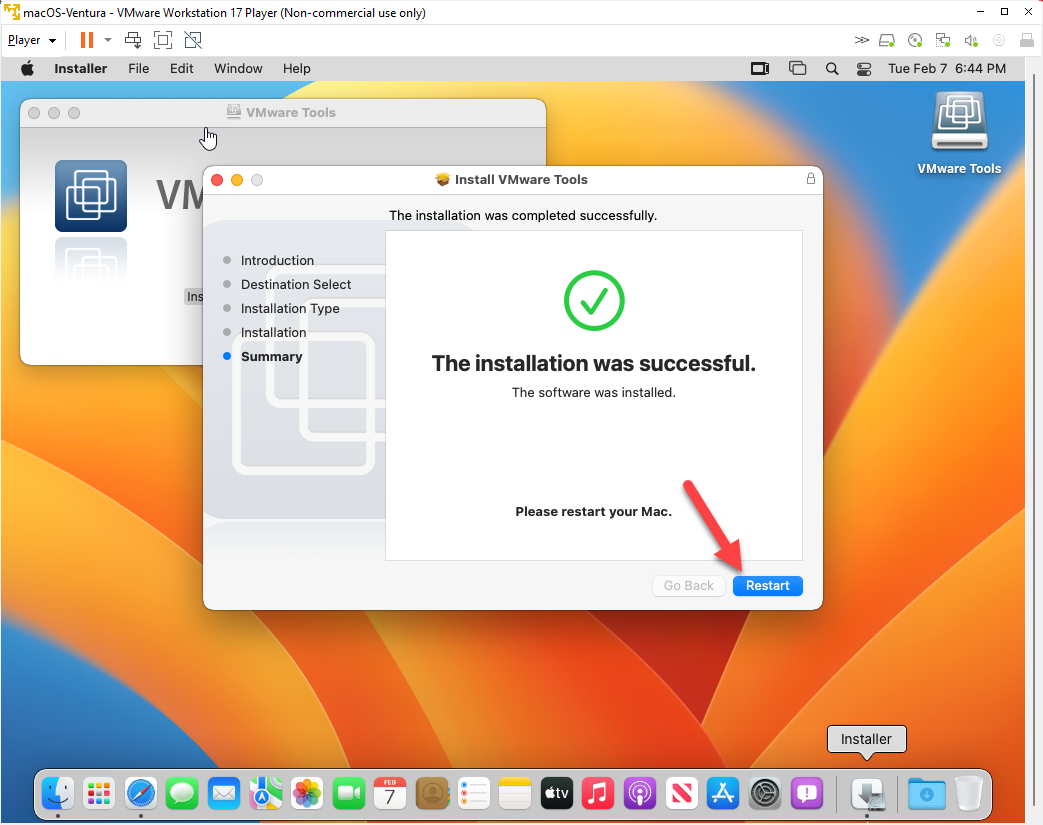
Success. Now Restart.
After reboot, you should be able to go full screen.
Excellent instructions! Question, can I add an AppleID account for updates?