How to expand a disk in Azure
Windows
https://querysurge.zendesk.com/hc/en-us/articles/115002530951-Azure-Expand-Disk-
Linux
https://docs.microsoft.com/en-us/azure/virtual-machines/linux/expand-disks
Linux, Windows, Software Tips, Articles and Hacks
How to expand a disk in Azure
Windows
https://querysurge.zendesk.com/hc/en-us/articles/115002530951-Azure-Expand-Disk-
Linux
https://docs.microsoft.com/en-us/azure/virtual-machines/linux/expand-disks
When booting an Azure VM, this error:
304.863321] —[ end Kernel panic – not syncing: VFS: Unable to mount root fs on unknown-block(0,0)
Solution: remove old linux kernels, your /boot drive is out of space.
-boot to grub and click on “Advanced options”
-Select a previous kernel (should boot fine)
login and enter command
$ df
See if your /boot directory is 100% used
Remove old linux kernels
$ sudo apt-get autoremove
Also, there may be an issue with the storage drivers (that should be built into initramfs) needed for Hyper-V / Azure.
Other Information: https://support.microsoft.com/en-us/help/4091524/how-recovery-azure-linux-vm-from-kernel-related-boot-related-issues
There is a small issue where a Plesk/CentOS 7 system is migrated to Azure and nginx fails to start.
This is the error in the nginx log
# cat /var/log/nginx/error.log
2018/06/14 22:11:41 [emerg] 9341#0: bind() to 10.144.114.11:443 failed (99: Cannot assign requested address)
If so then to edit:
# /etc/sysctl.conf
And add:
# net.ipv4.ip_nonlocal_bind = 1
Then Run:
# sysctl -p /etc/sysctl.conf
start Nginx:
#service nginx start
When setting up an Azure VM that will have mail functions, you may need to set up a rDNS record. The Azure portal at this time does not have that capability but you can set this up in with the Azure CLI or PowerShell.
Guide for creating Reverse DNS records:
https://docs.microsoft.com/en-us/azure/dns/dns-reverse-dns-for-azure-services
https://docs.microsoft.com/en-us/cli/azure/install-azure-cli?view=azure-cli-latest
This issue revolves around Azure and AWS outbound SMTP from their virtual machines / EC2 instances.
AZURE
Azure: https://blogs.msdn.microsoft.com/mast/2017/11/15/enhanced-azure-security-for-sending-emails-november-2017-update/
For Pay-As-You-Go or Microsoft Partner Network subscriptions created after November 15, 2017, there will be technical restrictions blocking e-mail sent directly from VMs in these subscriptions. Customers that need the ability to send e-mail from Azure VMs directly to external e-mail providers (not using an authenticated SMTP relay) can make a request to remove the restriction.
Requests will be reviewed and approved at Microsoft’s discretion and will be only granted after additional anti-fraud checks are performed. To make a request, open a support case with the issue type Technical –> Virtual Network –> Connectivity –> Cannot send e-mail (SMTP/Port 25).
Be sure to add details about why your deployment needs to send mail directly to mail providers instead of going through an authenticated relay.
AWS
AWS: https://aws.amazon.com/premiumsupport/knowledge-center/ec2-port-25-throttle/
Note: If you want AWS to create a reverse DNS record for you, you must first create a corresponding DNS A record before submitting this form.
1. Sign in and open the Request to Remove Email Sending Limitations form. https://aws-portal.amazon.com/gp/aws/html-forms-controller/contactus/ec2-email-limit-rdns-request
2. In the Use Case Description field, provide a description of your use case.
3. (Optional) Provide the AWS-owned Elastic IP addresses that you use to send outbound email, as well as any reverse DNS records AWS needs to associate with the Elastic IP addresses. AWS will use this information to help reduce the chance that email sent from the Elastic IP addresses is marked as spam.
4. Choose Submit.
You can replicate a sending error by attempting to connect to an external email server. E.g. smtp.gmail.com on 25/tcp.
For plesk, you can use port 587. See: https://support.plesk.com/hc/en-us/articles/213372829
This script creates an Azure Virtual Machine with an Ubuntu operating system. After running the script, you can access the virtual machine over SSH.
If needed, install the Azure PowerShell module using the instructions found in the Azure PowerShell guide, and then run Login-AzureRmAccount to create a connection with Azure. Also, you need to have an SSH public key named id_rsa.pub in the .ssh directory of your user profile.
# Variables for common values
$resourceGroup = "myResourceGroup"
$location = "westeurope"
$vmName = "myVM"

# Definer user name and blank password
$securePassword = ConvertTo-SecureString ' ' -AsPlainText -Force
$cred = New-Object System.Management.Automation.PSCredential ("azureuser", $securePassword)

# Create a resource group
New-AzureRmResourceGroup -Name $resourceGroup -Location $location

# Create a subnet configuration
$subnetConfig = New-AzureRmVirtualNetworkSubnetConfig -Name mySubnet -AddressPrefix 192.168.1.0/24

# Create a virtual network
$vnet = New-AzureRmVirtualNetwork -ResourceGroupName $resourceGroup -Location $location `
  -Name MYvNET -AddressPrefix 192.168.0.0/16 -Subnet $subnetConfig

# Create a public IP address and specify a DNS name
$pip = New-AzureRmPublicIpAddress -ResourceGroupName $resourceGroup -Location $location `
  -Name "mypublicdns$(Get-Random)" -AllocationMethod Static -IdleTimeoutInMinutes 4

# Create an inbound network security group rule for port 22
$nsgRuleSSH = New-AzureRmNetworkSecurityRuleConfig -Name myNetworkSecurityGroupRuleSSH  -Protocol Tcp `
  -Direction Inbound -Priority 1000 -SourceAddressPrefix * -SourcePortRange * -DestinationAddressPrefix * `
  -DestinationPortRange 22 -Access Allow

# Create a network security group
$nsg = New-AzureRmNetworkSecurityGroup -ResourceGroupName $resourceGroup -Location $location `
  -Name myNetworkSecurityGroup -SecurityRules $nsgRuleSSH

# Create a virtual network card and associate with public IP address and NSG
$nic = New-AzureRmNetworkInterface -Name myNic -ResourceGroupName $resourceGroup -Location $location `
  -SubnetId $vnet.Subnets[0].Id -PublicIpAddressId $pip.Id -NetworkSecurityGroupId $nsg.Id

# Create a virtual machine configuration
$vmConfig = New-AzureRmVMConfig -VMName $vmName -VMSize Standard_D1 | `
Set-AzureRmVMOperatingSystem -Linux -ComputerName $vmName -Credential $cred -DisablePasswordAuthentication | `
Set-AzureRmVMSourceImage -PublisherName Canonical -Offer UbuntuServer -Skus 14.04.2-LTS -Version latest | `
Add-AzureRmVMNetworkInterface -Id $nic.Id

# Configure SSH Keys
$sshPublicKey = Get-Content "$env:USERPROFILE\.ssh\id_rsa.pub"
Add-AzureRmVMSshPublicKey -VM $vmconfig -KeyData $sshPublicKey -Path "/home/azureuser/.ssh/authorized_keys"

# Create a virtual machine
New-AzureRmVM -ResourceGroupName $resourceGroup -Location $location -VM $vmConfig
Azure Mysql database in encrypted by default. The mysql connection fails when trying to login:
ERROR 9002 (28000): SSL connection is required. Please specify SSL options and retry.
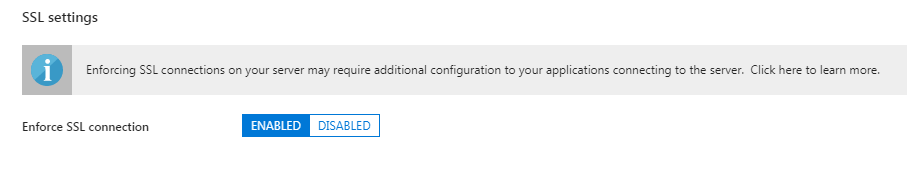
Azure Database for MySQL supports connecting your Azure Database for MySQL server to client applications using Secure Sockets Layer (SSL). Enforcing SSL connections between your database server and your client applications helps protect against “man in the middle” attacks by encrypting the data stream between the server and your application.
Here is how to set up the connection to use SSL.
Download the certificate needed to communicate over SSL with your Azure Database for MySQL server from https://www.digicert.com/CACerts/BaltimoreCyberTrustRoot.crt.pem and save the certificate file to your local drive.
Connecting to server using the MySQL CLI over SSL
# mysql -h mydemoserver.mysql.database.azure.com -u Username@mydemoserver -p --ssl-ca=BaltimoreCyberTrustRoot.crt.pem
Passive Mode
To enable FTP Passive Mode on Plesk systems, you will need to first edit the proftpd.conf file in /etc/
nano /etc/proftpd.conf
Then find the following lines
# delay on login off (are included on newest Plesk)
IdentLookups off
UseReverseDNS off
Under the lines above, add the following and save the file.
# Custom directives
PassivePorts 60000 65000
Now restart xinetd
service xinetd restart
Once xinetd is restarted, you need to add the port range to the Plesk Firewall. Modules > Firewall > Edit Firewall Configuration > Add Custom Rule
Select Incoming, Allow, then add the port range 60000-65000, TCP and OK.
WHM/ cPanel
nano /etc/pure-ftp.conf
PassivePortRange 60000 65000
service pure-ftp restart
Now, log into WHM and edit the firewall:
ConfigServer Security & Firewall > Firewall Configuration. Add port range 60000:65000 to the TCP_IN rules and save!
Update: Configuring the Passive FTP Mode on a Microsoft Azure Instance
See this article: https://docs.plesk.com/en-US/onyx/deployment-guide/plesk-installation-and-upgrade-on-public-cloud-services/installing-plesk-on-microsoft-azure/configuring-the-passive-ftp-mode-on-a-microsoft-azure-instance.79079/