How to Add Proftpd in CentOS 7 for ftp access.

Step 1: Add the EPEL Repository
ProFTPD is part of Extra Packages for Enterprise Linux (EPEL), which is a community repository of non-standard packages for the RHEL distribution. First, we’ll install the EPEL repository:

# rpm -iUvh http://dl.fedoraproject.org/pub/epel/7/x86_64/e/epel-release-7-5.noarch.rpm

Step 2: Install ProFTPD

Let’s update first:

# yum -y update

Then let’s install ProFTPD and any required packages:

# yum -y install proftpd

Step 3: Configure ProFTPD
For a refresher on editing files with vim see: New User Tutorial: Overview of the Vim Text Editor

Let’s edit the configuration file for ProFTPD:

# nano /etc/proftpd.conf

Change the ServerName to the hostname of your server. In the case below, ftp.domainname.com is an example:

ServerName “ftp.domainname.com”

Enabling TLS In ProFTPD
Add and modify the lines as below.


# nano /etc/proftpd.conf
[...]
DefaultRoot                     ~ !adm
PassivePorts 60000 65535
[...] 

#
  TLSEngine                     on
  TLSRequired                   on
  TLSRSACertificateFile         /etc/pki/tls/certs/proftpd.pem
  TLSRSACertificateKeyFile      /etc/pki/tls/certs/proftpd.pem
  TLSCipherSuite                ALL:!ADH:!DES
  TLSOptions                    NoCertRequest
  TLSVerifyClient               off
  TLSRenegotiate                ctrl 3600 data 512000 required off timeout 300
  TLSLog                        /var/log/proftpd/tls.log
#  
#    TLSSessionCache            shm:/file=/var/run/proftpd/sesscache
#  
#
[...] 

Exit and save the file with the command :wq .

Restart the ProFTPD service:

# systemctl restart proftpd

Then set the ProFTPD service to start at boot:

# systemctl enable proftpd

And verify your work by checking the status of ProFTPD:

# systemctl status proftpd

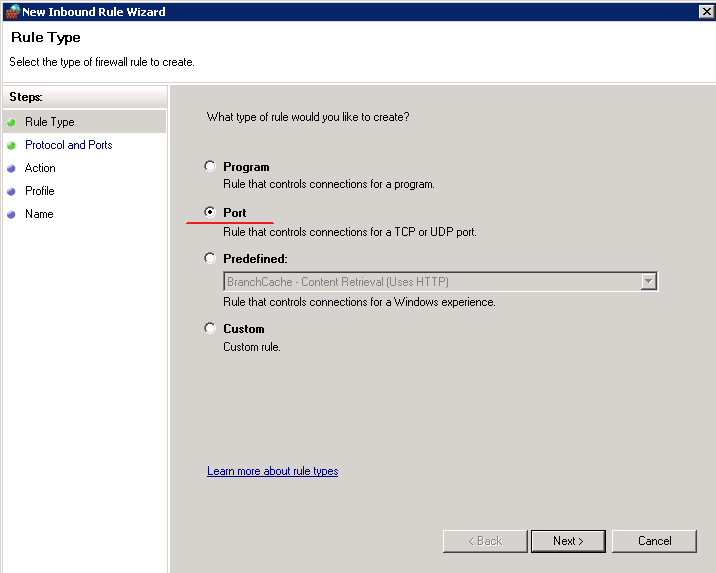
Step 4: Allow ProFTPD Through the Firewall
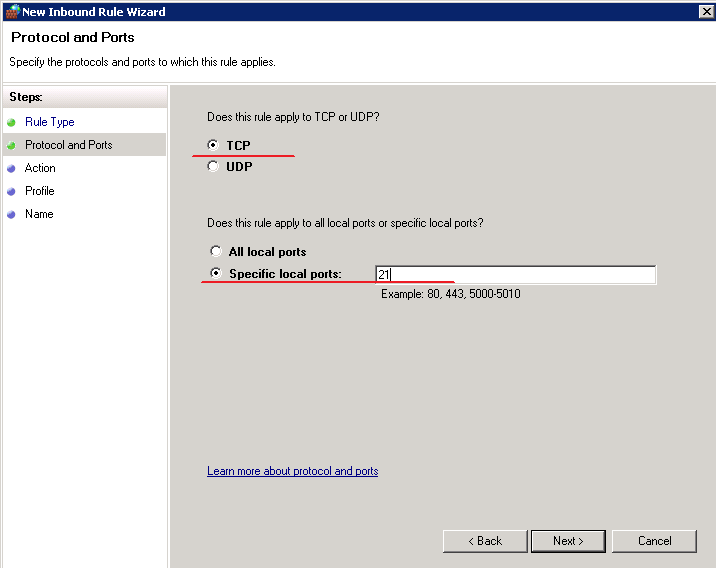
Allow the default FTP port, port 21, through firewalld:

# firewall-cmd --permanent --add-port=21/tcp
# firewall-cmd --add-port=60000-65535/tcp --permanent

And reload the firewall:

firewall-cmd --reload

In order to use TLS, we must create an SSL certificate. Create it in /etc/pki/tls/certs, we can generate the SSL certificate as follows:

# openssl req -x509 -nodes -newkey rsa:1024 -keyout /etc/pki/tls/certs/proftpd.pem -out /etc/pki/tls/certs/proftpd.pem

[root@webhost certs]# openssl req -x509 -nodes -newkey rsa:1024 -keyout /etc/pki/tls/certs/proftpd.pem -out /etc/pki/tls/certs/proftpd.pem -nodes -days 365
Generating a 1024 bit RSA private key
.++++++
...........................................................++++++
writing new private key to '/etc/pki/tls/certs/proftpd.pem'
-----
You are about to be asked to enter information that will be incorporated
into your certificate request.
What you are about to enter is what is called a Distinguished Name or a DN.
There are quite a few fields but you can leave some blank
For some fields there will be a default value,
If you enter '.', the field will be left blank.
-----
Country Name (2 letter code) [XX]:US
State or Province Name (full name) []:Texas
Locality Name (eg, city) [Default City]:Austin
Organization Name (eg, company) [Default Company Ltd]:TestCo
Organizational Unit Name (eg, section) []:IT
Common Name (eg, your name or your server's hostname) []:webhost.domainname.com
Email Address []:test@gmail.com

# chmod  0440 /etc/pki/tls/certs/proftpd.pem

Restart:

# systemctl restart proftpd.service

Getting an ftp connection error on a plesk server:

15:04:41 Status: Resolving address of 66.226.xx.xx
15:04:41 Status: Connecting to 66.226.72.xx.xx
15:04:41 Status: Connection established, waiting for welcome message...
15:04:48 Status: Initializing TLS...
15:04:50 Status: Verifying certificate...
15:04:53 Status: TLS connection established.
15:04:59 Status: Connected
15:04:59 Status: Retrieving directory listing...
15:05:02 Command: PWD
15:05:02 Response: 257 "/" is the current directory
15:05:02 Command: TYPE I
15:05:02 Response: 200 Type set to I
15:05:02 Command: PASV
15:05:02 Response: 227 Entering Passive Mode (66,226,xx,xx1,46,242).
15:05:02 Command: MLSD
15:05:02 Error: The data connection could not be established: ECONNREFUSED - Connection refused by server
15:05:21 Error: Connection timed out after 20 seconds of inactivity
15:05:21 Error: Failed to retrieve directory listing
15:05:21 Status: Disconnected from server 

Edit your configuration file and comment out MasqueradeAddress:

# nano /etc/proftpd.conf
#MasqueradeAddress 66.226.xx.xx

Restart xinetd

# service xinetd restart

When using ftp to access the server, the following error logs:

# Error: The data connection could not be established: ETIMEDOUT - Connection attempt timed out

If you are on a plesk server, Plesk has an article here: https://docs.plesk.com/en-US/onyx/administrator-guide/server-administration/plesk-for-linux-configuring-passive-ftp-mode.74643/
To enable passive FTP mode in Plesk for Linux:
Log in to your server via SSH as the root user.
Create the /etc/proftpd.d/55-passive-ports.conf file, add the following lines to it, and then save the changes:

# nano /etc/proftpd.d/55-passive-ports.conf
PassivePorts 49152 65535

Run the following command:

# systemctl restart xinetd

Now your Plesk server accepts passive FTP connections. If you have installed the Plesk Firewall and switched on its default configuration, you need to add a firewall rule allowing passive FTP:

  1. Direction: Incoming
  2. Action: Allow
  3. Ports: TCP 49152-65535
  4. Sources: (any host)

Save and connect via ftp to test.

Still having issues?

Check is firewalld is loaded but not enabled? Try to start and then and stop firewalld service.

AI_NODATA – No address associated with nodename error in your FTP client. Sometimes an EAI_NODATA error is also related to either a EHOSTUNREACH error, or an ECONNABORTED error as well.

Command: MLSDError: Connection timed outError: Failed to retrieve directory listing

Status: Waiting to retry…Status: Disconnected from serverStatus: Resolving address of robertlacylv.comStatus: Connection attempt failed with “EAI_NODATA – No address associated with nodename”.Error: Could not connect to server.

Check iptables:

Make sure firewall is not blocking your access

Run following command to see what iptables rules are setup:


# /sbin/iptables -L -n

# Generated by iptables-save v1.4.7 on Wed Feb  4 23:44:12 2015
*filter
:INPUT ACCEPT [0:0]
:FORWARD ACCEPT [0:0]
:OUTPUT ACCEPT [88:48078]
:acctboth - [0:0]
:cP-Firewall-1-INPUT - [0:0]
-A INPUT -j cP-Firewall-1-INPUT
-A INPUT -j acctboth
-A INPUT -m state --state RELATED,ESTABLISHED -j ACCEPT
-A INPUT -p icmp -j ACCEPT
-A INPUT -i lo -j ACCEPT
-A INPUT -p tcp -m state --state NEW -m tcp --dport 22 -j ACCEPT
-A INPUT -p tcp -m state --state NEW -m tcp --dport 21 -j ACCEPT
-A INPUT -j REJECT --reject-with icmp-host-prohibited
-A FORWARD -j cP-Firewall-1-INPUT
-A FORWARD -j REJECT --reject-with icmp-host-prohibited
-A OUTPUT -j acctboth
-A cP-Firewall-1-INPUT -p tcp -m state --state NEW -m tcp --dport 993 -j ACCEPT
-A cP-Firewall-1-INPUT -p tcp -m state --state NEW -m tcp --dport 2082 -j ACCEPT
-A cP-Firewall-1-INPUT -p tcp -m state --state NEW -m tcp --dport 2078 -j ACCEPT
-A cP-Firewall-1-INPUT -p tcp -m state --state NEW -m tcp --dport 53 -j ACCEPT
-A cP-Firewall-1-INPUT -p tcp -m state --state NEW -m tcp --dport 443 -j ACCEPT
-A cP-Firewall-1-INPUT -p tcp -m state --state NEW -m tcp --dport 2077 -j ACCEPT
-A cP-Firewall-1-INPUT -p tcp -m state --state NEW -m tcp --dport 80 -j ACCEPT
-A cP-Firewall-1-INPUT -p tcp -m state --state NEW -m tcp --dport 26 -j ACCEPT
-A cP-Firewall-1-INPUT -p tcp -m state --state NEW -m tcp --dport 8080 -j ACCEPT
-A cP-Firewall-1-INPUT -p tcp -m state --state NEW -m tcp --dport 143 -j ACCEPT
-A cP-Firewall-1-INPUT -p tcp -m state --state NEW -m tcp --dport 995 -j ACCEPT
-A cP-Firewall-1-INPUT -p tcp -m state --state NEW -m tcp --dport 110 -j ACCEPT
-A cP-Firewall-1-INPUT -p tcp -m state --state NEW -m tcp --dport 25 -j ACCEPT
-A cP-Firewall-1-INPUT -p tcp -m state --state NEW -m tcp --dport 2086 -j ACCEPT
-A cP-Firewall-1-INPUT -p tcp -m state --state NEW -m tcp --dport 2087 -j ACCEPT
-A cP-Firewall-1-INPUT -p tcp -m state --state NEW -m tcp --dport 2095 -j ACCEPT
-A cP-Firewall-1-INPUT -p tcp -m state --state NEW -m tcp --dport 465 -j ACCEPT
-A cP-Firewall-1-INPUT -p tcp -m state --state NEW -m tcp --dport 2096 -j ACCEPT
-A cP-Firewall-1-INPUT -p tcp -m state --state NEW -m tcp --dport 3306 -j ACCEPT
-A cP-Firewall-1-INPUT -p tcp -m state --state NEW -m tcp --dport 2083 -j ACCEPT
-A cP-Firewall-1-INPUT -p udp -m state --state NEW -m udp --dport 53 -j ACCEPT
COMMIT

Add the passive port range:

-A INPUT -p tcp -m tcp --dport 30000:50000 -j ACCEPT
-A INPUT -p tcp -m tcp --dport 30000:50000

Restart ftp on cpanel

# /usr/local/cpanel/scripts/restartsrv_ftpserver

You can temporary clear all iptables rules so that you can troubleshoot problem. If you are using Red Hat or Fedora Linux type command:


# /etc/init.d/iptables save
# /etc/init.d/iptables stop

If you are using other Linux distribution type following commands:


# iptables -F
# iptables -X
# iptables -t nat -F
# iptables -t nat -X
# iptables -t mangle -F
# iptables -t mangle -X

Source: https://documentation.cpanel.net/display/CKB/How+to+Enable+FTP+Passive+Mode#HowtoEnableFTPPassiveMode-HowdoIenablethepassiveportrangeforPure-FTPd?


Startup Log:
     Starting proftpd: 2014-11-10 17:08:26,390 server4.atwaretech.com proftpd[24369]: mod_auth_file/1.0: unable to use world-readable AuthUserFile '/etc/proftpd/passwd.vhosts' (perms 0644): Operation not permitted
     2014-11-10 17:08:26,390 server4.atwaretech.com proftpd[24369]: fatal: AuthUserFile: unable to use /etc/proftpd/passwd.vhosts: Operation not permitted on line 7 of '/etc/proftpd.conf'
     [FAILED]

Check permissions

root@server4 [~]# cd /etc/proftpd/
root@server4 [/etc/proftpd]# ls -la
total 32
drwxr-x--x   2 root proftpd  4096 Nov 10 17:08 ./
drwxr-xr-x. 89 root root    12288 Nov 10 17:19 ../
-rw-r-----   1 root proftpd   180 Nov 10 17:08 atware
-rw-r-----   1 root proftpd   180 Nov 10 17:08 lennys
-rw-r--r--   1 root root     1180 Nov 10 17:08 passwd.vhosts
-rw-------   1 root root     1501 Nov 10 17:08 passwd.vhosts.cache

Change to owner read writable

root@server4 # chmod o-rwx /etc/proftpd/passwd.vhosts
root@server4 # service proftpd restart

Info: http://ubuntuforums.org/showthread.php?t=2238794

If you have a Windows server and FileZilla Server as your FTP server (the default for our Managed Windows servers), you can easily add additional FTP users as needed. Each user will be ‘jailed’ into their shared folder.

Open FileZilla Server Interface (start menu or desktop icon), then click ‘OK’ on the ‘Connect to Server’ dialog.’
Go to Edit -> Users.
Click Add, type in username, then click ‘OK’.
Click the ‘password’ checkbox and enter the password.
Click ‘Shared folders’, then click ‘Add’ and choose a folder.
Check (enable) all permissions under ‘Files’ and ‘Directories’.
Click ‘OK’ towards the bottom.

The users/settings will be updated on the last step.

Open Server Manager, go to Roles and click “Add Roles”

1


In the Add Role Wizard, select Web Server (IIS) role to install

2

Click Next until you reach Select Role Services page, leave the default and check FTP Server, FTP Service and FTP Extensibility at the bottom. Click Next, follow the wizard and finish the role installation.

3

Now open IIS Manager from Start > Administrative Tools, expand the server, right click Sites, and click Add FTP Site, give it a site name and configure the physical path as needed.

4

Configure Binding and SSL. In our case, we’d like to bind to all unassigned IP addresses and do not use SSL.

5

Enable Basic Authentication and configure authorization. In our case I’ll start with allowing All users both Read and Write permission as long as all users on the server are password protected.

6

Click Finish to finish the configuration.


Open Windows Firewall with Advanced Security from Start > Administrative Tools, go to Inbound Rules in the left pane, and create a new rule by clicking New Rule in the Action Pane, select Port and click next.

7

Apply this rule to TCP port 21, and click Next

8

  • Keep the default configure for the rest of steps to Allow the connection and apply it to all profiles, name the rule and finish the wizard.


  • Now the FTP should be up and running, please test the connection to confirm.

To add ftp users – see here: http://www.iis.net/learn/publish/using-the-ftp-service/configure-ftp-with-iis-manager-authentication-in-iis-7

Passive Mode

To enable FTP Passive Mode on Plesk systems, you will need to first edit the proftpd.conf file in /etc/

nano /etc/proftpd.conf

Then find the following lines

# delay on login off (are included on newest Plesk) 
IdentLookups off
UseReverseDNS off

Under the lines above, add the following and save the file.

# Custom directives
PassivePorts 60000 65000

Now restart xinetd

service xinetd restart

Once xinetd is restarted, you need to add the port range to the Plesk Firewall. Modules > Firewall > Edit Firewall Configuration > Add Custom Rule
Select Incoming, Allow, then add the port range 60000-65000, TCP and OK.

WHM/ cPanel

nano /etc/pure-ftp.conf

PassivePortRange 60000 65000

service pure-ftp restart

Now, log into WHM and edit the firewall:

ConfigServer Security & Firewall > Firewall Configuration. Add port range 60000:65000 to the TCP_IN rules and save!

Update: Configuring the Passive FTP Mode on a Microsoft Azure Instance
See this article: https://docs.plesk.com/en-US/onyx/deployment-guide/plesk-installation-and-upgrade-on-public-cloud-services/installing-plesk-on-microsoft-azure/configuring-the-passive-ftp-mode-on-a-microsoft-azure-instance.79079/