Training Videos
A Technical Introduction To IPFS
IPFS Simply Explained. Let’s take a look at how IPFS works, how it can solve issue’s like censorship and if it would really work across multiple planets!
DEVCON1: IPFS – Juan Batiz-Benet
Linux, Windows, Software Tips, Articles and Hacks
Training Videos
A Technical Introduction To IPFS
IPFS Simply Explained. Let’s take a look at how IPFS works, how it can solve issue’s like censorship and if it would really work across multiple planets!
DEVCON1: IPFS – Juan Batiz-Benet
First lets install UFW
$ sudo apt-get install ufw
Check the Status
$ sudo ufw status verbose
By default, UFW is disabled so you should see something like this:
$ Status: inactive
Let’s set your UFW rules back to the defaults so we can be sure that you’ll be able to follow along with this tutorial. To set the defaults used by UFW, use these commands:
$ sudo ufw default deny incoming
Output:
Default incoming policy changed to ‘deny’
(be sure to update your rules accordingly)
$ sudo ufw default allow outgoing
Output:
Default outgoing policy changed to ‘allow’
(be sure to update your rules accordingly)
Allow SSH Connections
To configure your server to allow incoming SSH connections, you can use this UFW command:
$ sudo ufw allow ssh
Output:
Rules updated
Rules updated (v6)
this command works the same as the one above:
$ sudo ufw allow 22
Or if ssh is on a different port
$ sudo ufw allow 2222
Now that your firewall is configured to allow incoming SSH connections, we can enable it
$ sudo ufw enable
Command may disrupt existing ssh connections. Proceed with operation (y|n)? y
Firewall is active and enabled on system startup
Now lets add the port access for IPFS
4001 – default libp2p swarm port – should be open to public for all nodes if possible
5001 – API port – provides write/admin access to the node – should be locked down or only to your IP.
8080 – Gateway
$ sudo ufw allow 4001
$ sudo ufw allow 5001
$ sudo ufw allow 8080/tcp
Reload
$ sudo ufw reload
Remove a Port
$ sudo ufw status numbered
Status: active

     To                         Action      From
     --                         ------      ----
[ 1] 22/tcp                     ALLOW IN    Anywhere
[ 2] 4001                       ALLOW IN    Anywhere
[ 3] 5001                       ALLOW IN    Anywhere
[ 4] 8080/tcp                   ALLOW IN    Anywhere
[ 5] 22/tcp (v6)                ALLOW IN    Anywhere (v6)
[ 6] 4001 (v6)                  ALLOW IN    Anywhere (v6)
[ 7] 5001 (v6)                  ALLOW IN    Anywhere (v6)
[ 8] 8080/tcp (v6)              ALLOW IN    Anywhere (v6)
$ sudo ufw delete 2
Delete all firewall rules
$ sudo ufw reset
To Allow connections for the Webui on a specific IP:
$ sudo ufw allow from 1.2.3.4 to any port 5001
sudo ufw reload
Setting Up a Private IPFS Network with IPFS and IPFS-Cluster
Create 2 New Vm’s with Debian. In this case, these are 2 kvm VM’s but you can use any ones.
node0 bootstrap node, 192.168.0.95
node1 – client node, 192.168.0.116
Create a new user “ipfs”. Add sudo rights to the user ipfs.
Installing IPFS through the command-line is handy if you plan on building applications and services on top of an IPFS node. This method is also useful if you’re setting up a node without a user interface, usually the case with remote servers or virtual machines. Using IPFS through the command-line allows you to do everything that IPFS Desktop can do, but at a more granular level since you can specify which commands to run.
For this article, I have created a new user “ipfs”
# adduser ipfs
Adding user `ipfs' ...
Adding new group `ipfs' (1001) ...
Adding new user `ipfs' (1001) with group `ipfs' ...
Creating home directory `/home/ipfs' ...
Copying files from `/etc/skel' ...
New password:
Retype new password:
passwd: password updated successfully
Changing the user information for ipfs
Enter the new value, or press ENTER for the default
        Full Name []: IPFS
        Room Number []: 1001
        Work Phone []:
        Home Phone []:
        Other []:
Is the information correct? [Y/n] y
By default sudo is not installed on Debian, but you can install it. First enable su-mode:
$ su -
Install sudo by running:
# apt-get install sudo -y
After that you would need to play around with users and permissions. Give sudo right to your own user.
# usermod -aG sudo ipfs
Make sure your sudoers file has sudo group added. Run:
# visudo
Allow members of group sudo to execute any command
ipfs ALL=(ALL:ALL) ALL
You need to re-login or reboot device completely for changes to take effect.
IPFS Install
Download the Linux binary from dist.ipfs.tech (opens new window).
# cd /home/ipfs
wget https://dist.ipfs.tech/kubo/v0.15.0/kubo_v0.15.0_linux-amd64.tar.gz
Unzip the file:
tar -xvzf kubo_v0.15.0_linux-amd64.tar.gz

> x kubo/install.sh
> x kubo/ipfs
> x kubo/LICENSE
> x kubo/LICENSE-APACHE
> x kubo/LICENSE-MIT
> x kubo/README.md
Move into the kubo folder and run the install script:
cd kubo
sudo bash install.sh
> Moved ./ipfs to /usr/local/bin
Test that IPFS has installed correctly:
ipfs --version
> ipfs version 0.15.0
For the purpose of this tutorial, we will install two nodes: a bootstrap node and a client node. The bootstrap node is an IPFS node that other nodes can connect to in order to find other peers. Since we are creating our own private network, we cannot use the bootstrap nodes from the public IPFS network, so we will change these settings later. Select one of your machines as bootstrap node and one as client node.
IPFS is initialized in a hidden directory in your user home directory: ~/.ipfs. This directory will be used to initialize the nodes. On both machines, bootstrap node and client node, run the following.
IPFS_PATH=~/.ipfs ipfs init --profile server
Repeat steps 1 and 2 for all your VMs.
To generate the swarm key there are two options: use a bash script, or install a key generator.
Create a swarm key
Swarm key allows us to create a private network and tell network peers to communicate only with those peers who share this secret key.
This command should be run only on your Node0. We generate swarm.key on the bootstrap node and then just copy it to the rest of the nodes. Works on Linux. On Mac, use a generator.
$ echo -e "/key/swarm/psk/1.0.0/\n/base16/\n`tr -dc 'a-f0-9' < /dev/urandom | head -c64`" > ~/.ipfs/swarm.key
The second option is to install the swarm key generator. Do this is you have a mac.
Follow Instructions here – https://golang.org/doc/install
To install the swarm key generator we use go get, which uses git. If you have not installed git yet on your bootstrap node, do so with
$ sudo apt-get install git
Run the following command to install the swarm key generator:
$ go get -u github.com/Kubuxu/go-ipfs-swarm-key-gen/ipfs-swarm-key-gen
Run the swarm key generator to create the swarm file in your .ipfs directory:
$ ./go/bin/ipfs-swarm-key-gen > ~/.ipfs/swarm.key
Copy the generated swarm file to the .ipfs directory of all client nodes.
From Node0 home directory
$ cd .ipfs/
$ cat swarm.key
/key/swarm/psk/1.0.0/
/base16/
25f64b1cf31f649817d495e446d4cbcc99000b8cc032a89b681e5f86f995fa28
On node1, create swarm.key in /home/ipfs/.ipfs
$ nano swarm.key
Add to file the 3 lines from node0 swarm.key:
/key/swarm/psk/1.0.0/
/base16/
25f64b1cf31f649817d495e446d4cbcc99000b8cc032a89b681e5f86f995fa28
A bootstrap node is used by client nodes to connect to the private IPFS network. The bootstrap connects clients to other nodes available on the network. In our private network we cannot use the bootstrap of the public IPFS network, so in this section we will replace the existing bootstrap with the ip address and peer identity of the bootstrap node.
First, remove the default entries of bootstrap nodes from both the bootnode and the client node. Use the command on both machines:
IPFS_PATH=~/.ipfs ipfs bootstrap rm --all
Check the result to see the bootstrap is empty with:
IPFS_PATH=~/.ipfs ipfs config show | grep "Bootstrap"
  "Bootstrap": null,
Now add the ip address and the Peer Identity (hash address) of your bootstrap node to each of the nodes including the bootstrap node.
The ip address of the bootnode can be found with hostname -I.
$ hostname -I
192.168.0.95 2603:8081:2301:3b54:5054:ff:fe4c:c469
The Peer Identity was created during the initialization of IPFS and can be found with the following statement.
$ IPFS_PATH=~/.ipfs ipfs config show | grep "PeerID"
    "PeerID": "12D3KooWM5oWJ2Z55dCSvyB3Zo6nS1zW1GvnoZSdxNdDCuDAGvb3"
Use your results as follows:
Assemble the add bootstrap statement as follows.
Example:
$ IPFS_PATH=~/.ipfs ipfs bootstrap add /ip4/192.168.0.95/tcp/4001/ipfs/12D3KooWM5oWJ2Z55dCSvyB3Zo6nS1zW1GvnoZSdxNdDCuDAGvb3
Run your statement on both the bootstrap node and the client node.
You should see:
$ IPFS_PATH=~/.ipfs ipfs bootstrap add /ip4/192.168.0.95/tcp/4001/ipfs/12D3KooWM5oWJ2Z55dCSvyB3Zo6nS1zW1GvnoZSdxNdDCuDAGvb3
added /ip4/192.168.0.95/tcp/4001/ipfs/12D3KooWM5oWJ2Z55dCSvyB3Zo6nS1zW1GvnoZSdxNdDCuDAGvb3
The private network is installed, so we can test this network.
We will use an environment variable to make sure that if there is a mistake in our configuration or the private network is not fully configured, the nodes don’t connect to the public IPFS network and the daemons just fail.
The environment variable is LIBP2PFORCEPNET and to start the IPFS nodes you just need to start the daemon using the “ipfs daemon”.
Run on both nodes.
$ export LIBP2P_FORCE_PNET=1
To start daemon:
$ IPFS_PATH=~/.ipfs ipfs daemon
Do note the message log stating…”Swarm is limited to private network of peers with the swarm key”, which means that our private network is working perfectly.
Note: Each console is now showing te daemon command. Open 2 new consoles to node0 and node1.
Now add a file to our private network on one node and try to access it from the other node.
$ echo "Hello World!" > file1.txt
$ ipfs add file1.txt
added QmfM2r8seH2GiRaC4esTjeraXEachRt8ZsSeGaWTPLyMoG file1.txt
 13 B / 13 B [==========================================================] 100.00%
$ ipfs cat QmfM2r8seH2GiRaC4esTjeraXEachRt8ZsSeGaWTPLyMoG
Hello World!
Take the printed hash and try to the cat file from client node – node1.
$ ipfs cat QmfM2r8seH2GiRaC4esTjeraXEachRt8ZsSeGaWTPLyMoG
Hello World!
You should see the contents of the added file from the first node node0. To check and be sure that we have a private network we can try to access our file by its CID from the public IPFS gateway. You can choose one of the public gateways from this list: https://ipfs.github.io/public-gateway-checker.
If you did everything right, then the file won’t be accessible. Also, you can run the “ipfs swarm peers”command, and it will display a list of the peers in the network it’s connected to. In our example, each peer sees the other one.
From bootstrap node – node0
$ ipfs swarm peers
/ip4/192.168.0.116/tcp/52784/p2p/12D3KooWFbTdbLXbucZMekBxyqqhRKPboZvYKiX1yBVmtikiUXCG
From client node – node1
$ ipfs swarm peers
/ip4/192.168.0.95/tcp/4001/p2p/12D3KooWM5oWJ2Z55dCSvyB3Zo6nS1zW1GvnoZSdxNdDCuDAGvb3
If the same file is uploaded on an other node, the same hash is generated, so the file is not stored twice on the network.
To upload a complete directory, add the directory name and the -r option (recursive). The directory and the files in it are hashed:
$ ipfs add directory_name -r
Create systemctl service for ipfs on both nodes – node0 and node1:
$ sudo nano /etc/systemd/system/ipfs.service
Add the following (The user is “ipfs”. Change here is using a different user):
[Unit]
Description=IPFS Daemon
After=syslog.target network.target remote-fs.target nss-lookup.target
[Service]
Type=simple
ExecStart=/usr/local/bin/ipfs daemon --enable-namesys-pubsub
User=ipfs
[Install]
WantedBy=multi-user.target
restart systemctl daemon so it finds new service:
$ sudo systemctl daemon-reload
tell systemctl that ipfs should be started on startup:
$ sudo systemctl enable ipfs
Reboot both nodes and run below:
$ sudo systemctl status ipfs
should see something like
$ sudo systemctl status ipfs
[sudo] password for ipfs:
● ipfs.service - IPFS Daemon
   Loaded: loaded (/etc/systemd/system/ipfs.service; enabled; vendor preset: ena
   Active: active (running) since Thu 2021-06-10 09:23:46 CDT; 2min 24s ago
 Main PID: 387 (ipfs)
    Tasks: 9 (limit: 1149)
   Memory: 77.8M
   CGroup: /system.slice/ipfs.service
           └─387 /usr/local/bin/ipfs daemon --enable-namesys-pubsub

Jun 10 09:23:46 ipfs3 ipfs[387]: Swarm listening on /ip4/192.168.0.95/tcp/4001
Jun 10 09:23:46 ipfs3 ipfs[387]: Swarm listening on /ip6/::1/tcp/4001
Jun 10 09:23:46 ipfs3 ipfs[387]: Swarm listening on /p2p-circuit
Jun 10 09:23:46 ipfs3 ipfs[387]: Swarm announcing /ip4/127.0.0.1/tcp/4001
Jun 10 09:23:46 ipfs3 ipfs[387]: Swarm announcing /ip4/192.168.0.95/tcp/4001
Jun 10 09:23:46 ipfs3 ipfs[387]: Swarm announcing /ip6/::1/tcp/4001
Jun 10 09:23:46 ipfs3 ipfs[387]: API server listening on /ip4/127.0.0.1/tcp/5001
Jun 10 09:23:46 ipfs3 ipfs[387]: WebUI: http://127.0.0.1:5001/webui
Jun 10 09:23:46 ipfs3 ipfs[387]: Gateway (readonly) server listening on /ip4/127
Jun 10 09:23:46 ipfs3 ipfs[387]: Daemon is ready
Try to add the file from one node and access it from another as in above.
On node0
$ echo IPFS Rocks! > rocks.txt
$ ipfs add rocks.txt
added QmQCzFx1YUpBjDStPczthtzKEoQY3gGDvSx1RJiz33abcR rocks.txt
 12 B / 12 B [=========================================================] 100.00%
On node1 check for file
$ ipfs cat QmQCzFx1YUpBjDStPczthtzKEoQY3gGDvSx1RJiz33abcR
IPFS Rocks!
We have completed part of creating a private IPFS network and running its demons as a service. At this phase, you should have two IPFS nodes (node0 and node1) organized in one private network.
Let’s create our IPFS-CLUSTER for data replication.
After we create a private IPFS network, we can start deploying IPFS-Cluster on top of IPFS for automated data replication and better management of our data.
There are two ways how to organize IPFS cluster, the first one is to set a fixed peerset (so you will not be able to increase your cluster with more peers after the creation) and the other one – to bootstrap nodes (you can add new peers after cluster was created). In this case we will be bootstrapping nodes.
IPFS-Cluster includes two components:
Check the URL’s for new versions at:
https://dist.ipfs.io/#ipfs-cluster-service
https://dist.ipfs.io/ipfs-cluster-ctl
https://dist.ipfs.io/go-ipfs
Repeat this step for all of your nodes (node0 and node1).
$ wget https://dist.ipfs.tech/ipfs-cluster-service/v1.0.4/ipfs-cluster-service_v1.0.4_linux-amd64.tar.gz
IPFS cluster-ctl
$ wget https://dist.ipfs.tech/ipfs-cluster-ctl/v1.0.4/ipfs-cluster-ctl_v1.0.4_linux-amd64.tar.gz
Un-compress them.
$ tar xvfz ipfs-cluster-service_v1.0.4_linux-amd64.tar.gz
ipfs-cluster-service/LICENSE
ipfs-cluster-service/LICENSE-APACHE
ipfs-cluster-service/LICENSE-MIT
ipfs-cluster-service/README.md
ipfs-cluster-service/ipfs-cluster-service
$ tar xvfz ipfs-cluster-ctl_v1.0.4_linux-amd64.tar.gz
ipfs-cluster-ctl/LICENSE
ipfs-cluster-ctl/LICENSE-APACHE
ipfs-cluster-ctl/LICENSE-MIT
ipfs-cluster-ctl/README.md
ipfs-cluster-ctl/ipfs-cluster-ctl
Install
$ sudo cp ipfs-cluster-service/ipfs-cluster-service /usr/local/bin
$ sudo cp ipfs-cluster-ctl/ipfs-cluster-ctl /usr/local/bin
Confirm things are installed correctly:
$ ipfs-cluster-service help
$ ipfs-cluster-ctl help
Now we need to generate CLUSTERSECRET and set it as an environment variable for all peers participating in the cluster. Sharing the same CLUSTERSECRET allow peers to understand that they are part of one IPFS-Cluster. We will generate this key on the bootstrap node (node0) and then copy it to all other nodes. This is a private key and the secret key which is 32-bit hex encoded random string is what keeps it private. Only peers that have this key can communicate with the cluster. Generate it and display:
On your first node (bootstrap node , node0) run the following commands:
$ export CLUSTER_SECRET=$(od -vN 32 -An -tx1 /dev/urandom | tr -d ' \n')
$ echo $CLUSTER_SECRET
7d33cbf9b48845db5b8ba07eacb7898eea44f888576b9a19098fe33a7524d774
You should see something like this:
7d33cbf9b48845db5b8ba07eacb7898eea44f888576b9a19098fe33a7524d774
In order for CLUSTER_SECRET to not disappear after you exit the console session, you must add it as a constant environment variable to the .bashrc file. Copy the printed key after echo command and add it to the end of .bashrc file on all of your nodes.Run this on node0 and node1.
export CLUSTER_SECRET=7d33cbf9b48845db5b8ba07eacb7898eea44f888576b9a19098fe33a7524d774
And don’t forget to update your .bashrc file with command:
$ source ~/.bashrc
After we have installed IPFS-Cluster service and set a CLUSTER_SECRET environment variable, we are ready to initialize and start first cluster peer (Node0).
Note: make sure that your ipfs daemon is running before you start the ipfs-cluster-service daemon.
On node0 run:
$ systemctl status ipfs
● ipfs.service - IPFS Daemon
   Loaded: loaded (/etc/systemd/system/ipfs.service; enabled; vendor preset: ena
   Active: active (running) since Thu 2021-06-10 09:23:46 CDT; 41min ago
 Main PID: 387 (ipfs)
    Tasks: 9 (limit: 1149)
   Memory: 78.3M
   CGroup: /system.slice/ipfs.service
           └─387 /usr/local/bin/ipfs daemon --enable-namesys-pubsub
To initialize cluster peer, we need to run the command below on node0 only:
$ ipfs-cluster-service init
2021-06-10T10:06:36.240-0500    INFO    config  config/config.go:481    Saving configuration
configuration written to /home/ipfs/.ipfs-cluster/service.json.
2021-06-10T10:06:36.242-0500    INFO    config  config/identity.go:73   Saving identity
new identity written to /home/ipfs/.ipfs-cluster/identity.json
new empty peerstore written to /home/ipfs/.ipfs-cluster/peerstore.
You should see the output above in the console. Please note the following:
…new identity written to /home/ipfs/.ipfs-cluster/identity.json
Let display and note the identity as we will need this later. This is the cluser peer id. On node0 run:
$ grep id /home/ipfs/.ipfs-cluster/identity.json
    "id": "12D3KooWMHkMEccR9XXaJDnoWZtXb2zEdmoUtmbGCsM21DjfxHud",
The “id” is the cluster peer id.
To start cluster peer, run below on node0 only:
$ ipfs-cluster-service daemon
You should see the following:
$ ipfs-cluster-service daemon
2021-06-10T10:13:40.672-0500    INFO    service ipfs-cluster-service/daemon.go:4
6       Initializing. For verbose output run with "-l debug". Please wait...
2021-06-10T10:13:40.816-0500    INFO    cluster ipfs-cluster@v0.13.3/cluster.go:
136     IPFS Cluster v0.13.3 listening on:
        /ip4/192.168.0.95/tcp/9096/p2p/12D3KooWSEaZydrYik9gKenUhezTi2z8NBXYHB2Rm                                                                                                             sknQePoMUxc
        /ip4/127.0.0.1/tcp/9096/p2p/12D3KooWSEaZydrYik9gKenUhezTi2z8NBXYHB2Rmskn                                                                                                             QePoMUxc

2021-06-10T10:13:40.817-0500    INFO    restapi rest/restapi.go:521     REST API
(HTTP): /ip4/127.0.0.1/tcp/9094
2021-06-10T10:13:40.818-0500    INFO    ipfsproxy       ipfsproxy/ipfsproxy.go:3
20      IPFS Proxy: /ip4/127.0.0.1/tcp/9095 -> /ip4/127.0.0.1/tcp/5001
2021-06-10T10:13:40.819-0500    INFO    crdt    go-ds-crdt@v0.1.20/crdt.go:278 c
rdt Datastore created. Number of heads: 0. Current max-height: 0
2021-06-10T10:13:40.819-0500    INFO    crdt    crdt/consensus.go:300   'trust a
ll' mode enabled. Any peer in the cluster can modify the pinset.
2021-06-10T10:13:40.862-0500    INFO    cluster ipfs-cluster@v0.13.3/cluster.go:
651     Cluster Peers (without including ourselves):
2021-06-10T10:13:40.862-0500    INFO    cluster ipfs-cluster@v0.13.3/cluster.go:
653         - No other peers
2021-06-10T10:13:40.863-0500    INFO    cluster ipfs-cluster@v0.13.3/cluster.go:
666     ** IPFS Cluster is READY **
Open a new console window and connect to the client node (node1). Note: make sure that your ipfs daemon is running before you start the ipfs-cluster-service daemon.
$ systemctl status ipfs
● ipfs.service - IPFS Daemon
   Loaded: loaded (/etc/systemd/system/ipfs.service; enabled; vendor preset: ena
   Active: active (running) since Thu 2021-06-10 09:23:53 CDT; 59min ago
 Main PID: 390 (ipfs)
    Tasks: 8 (limit: 1149)
   Memory: 78.3M
   CGroup: /system.slice/ipfs.service
           └─390 /usr/local/bin/ipfs daemon --enable-namesys-pubsub
Run the following commands to initialize IPFS-Cluster on node1.
$ ipfs-cluster-service init
2021-06-10T10:24:20.276-0500    INFO    config  config/config.go:481    Saving configuration
configuration written to /home/ipfs/.ipfs-cluster/service.json.
2021-06-10T10:24:20.278-0500    INFO    config  config/identity.go:73   Saving identity
new identity written to /home/ipfs/.ipfs-cluster/identity.json
new empty peerstore written to /home/ipfs/.ipfs-cluster/peerstore.
Now we add the node1 to the cluster bootstrap it to node0 as follows:
$ ipfs-cluster-service daemon –bootstrap /ip4/first_node_IP/tcp/9096/ipfs/peer_id
So login to node0 on a new ssh console. The peer id can be found with the following Run this on node0:
$ cd .ipfs-cluster/
$ cat identity.json
{
    "id": "12D3KooWSEaZydrYik9gKenUhezTi2z8NBXYHB2RmsknQePoMUxc",
    "private_key": "CAESQBHGvM9TBWBRHcl8J4qiuQMk0ka4N8gcSyVCyDRkYgJ/8+7znFeoKBw2Z+a6CQik//4dKCX1REwF2Awrqh3B2uU="
Bear in mind that it should be IPFS-Cluster peer ID, not an IPFS peer ID.
The ip can be displayed as:
hostname -I
192.168.0.116 2603:8081:2301:3b54:5054:ff:fe99:a8ad
Here is the full command in our case Run this on node1:
$ ipfs-cluster-service daemon –bootstrap /ip4/192.168.0.116/tcp/9096/ipfs/12D3KooWSEaZydrYik9gKenUhezTi2z8NBXYHB2RmsknQePoMUxc
2021-06-10T10:40:51.361-0500    INFO    service ipfs-cluster-service/daemon.go:4
6       Initializing. For verbose output run with "-l debug". Please wait...
2021-06-10T10:40:51.485-0500    INFO    cluster ipfs-cluster@v0.13.3/cluster.go:
136     IPFS Cluster v0.13.3 listening on:
        /ip4/192.168.0.116/tcp/9096/p2p/12D3KooWD6gwpVwW31p2Wan3BnYEkQy5X8QpL51aoiPdAR3X2wnZ
        /ip4/127.0.0.1/tcp/9096/p2p/12D3KooWD6gwpVwW31p2Wan3BnYEkQy5X8QpL51aoiPdAR3X2wnZ


2021-06-10T10:40:51.486-0500    INFO    restapi rest/restapi.go:521     REST API
(HTTP): /ip4/127.0.0.1/tcp/9094
2021-06-10T10:40:51.486-0500    INFO    ipfsproxy       ipfsproxy/ipfsproxy.go:3
20      IPFS Proxy: /ip4/127.0.0.1/tcp/9095 -> /ip4/127.0.0.1/tcp/5001
2021-06-10T10:40:51.487-0500    INFO    crdt    go-ds-crdt@v0.1.20/crdt.go:278 c
rdt Datastore created. Number of heads: 0. Current max-height: 0
2021-06-10T10:40:51.487-0500    INFO    crdt    crdt/consensus.go:300   'trust a
ll' mode enabled. Any peer in the cluster can modify the pinset.
2021-06-10T10:40:51.545-0500    INFO    cluster ipfs-cluster@v0.13.3/cluster.go:
651     Cluster Peers (without including ourselves):
2021-06-10T10:40:51.545-0500    INFO    cluster ipfs-cluster@v0.13.3/cluster.go:
653         - No other peers
2021-06-10T10:40:51.546-0500    INFO    cluster ipfs-cluster@v0.13.3/cluster.go:
666     ** IPFS Cluster is READY **
To check that we have two peers in our cluster, run command on both nodes in a different terminal:
On node0
$ ipfs-cluster-ctl peers ls
12D3KooWD6gwpVwW31p2Wan3BnYEkQy5X8QpL51aoiPdAR3X2wnZ | node1| Sees 1 other peers
  > Addresses:
    - /ip4/127.0.0.1/tcp/9096/p2p/12D3KooWD6gwpVwW31p2Wan3BnYEkQy5X8QpL51aoiPdAR3X2wnZ
    - /ip4/192.168.0.116/tcp/9096/p2p/12D3KooWD6gwpVwW31p2Wan3BnYEkQy5X8QpL51aoiPdAR3X2wnZ
  > IPFS: 12D3KooWFbTdbLXbucZMekBxyqqhRKPboZvYKiX1yBVmtikiUXCG
    - /ip4/127.0.0.1/tcp/4001/p2p/12D3KooWFbTdbLXbucZMekBxyqqhRKPboZvYKiX1yBVmtikiUXCG
    - /ip4/192.168.0.116/tcp/4001/p2p/12D3KooWFbTdbLXbucZMekBxyqqhRKPboZvYKiX1yBVmtikiUXCG
    - /ip6/2603:8081:2301:3b54:5054:ff:fe99:a8ad/tcp/4001/p2p/12D3KooWFbTdbLXbucZMekBxyqqhRKPboZvYKiX1yBVmtikiUXCG
    - /ip6/::1/tcp/4001/p2p/12D3KooWFbTdbLXbucZMekBxyqqhRKPboZvYKiX1yBVmtikiUXCG
12D3KooWSEaZydrYik9gKenUhezTi2z8NBXYHB2RmsknQePoMUxc | node0 | Sees 1 other peers
  > Addresses:
    - /ip4/127.0.0.1/tcp/9096/p2p/12D3KooWSEaZydrYik9gKenUhezTi2z8NBXYHB2RmsknQePoMUxc
    - /ip4/192.168.0.95/tcp/9096/p2p/12D3KooWSEaZydrYik9gKenUhezTi2z8NBXYHB2RmsknQePoMUxc
  > IPFS: 12D3KooWM5oWJ2Z55dCSvyB3Zo6nS1zW1GvnoZSdxNdDCuDAGvb3
    - /ip4/127.0.0.1/tcp/4001/p2p/12D3KooWM5oWJ2Z55dCSvyB3Zo6nS1zW1GvnoZSdxNdDCuDAGvb3
    - /ip4/192.168.0.95/tcp/4001/p2p/12D3KooWM5oWJ2Z55dCSvyB3Zo6nS1zW1GvnoZSdxNdDCuDAGvb3
    - /ip6/2603:8081:2301:3b54:5054:ff:fe4c:c469/tcp/4001/p2p/12D3KooWM5oWJ2Z55dCSvyB3Zo6nS1zW1GvnoZSdxNdDCuDAGvb3
    - /ip6/::1/tcp/4001/p2p/12D3KooWM5oWJ2Z55dCSvyB3Zo6nS1zW1GvnoZSdxNdDCuDAGvb3
On node1
$ ipfs-cluster-ctl peers ls
12D3KooWD6gwpVwW31p2Wan3BnYEkQy5X8QpL51aoiPdAR3X2wnZ | node1 | Sees 1 other peers
  > Addresses:
    - /ip4/127.0.0.1/tcp/9096/p2p/12D3KooWD6gwpVwW31p2Wan3BnYEkQy5X8QpL51aoiPdAR3X2wnZ
    - /ip4/192.168.0.116/tcp/9096/p2p/12D3KooWD6gwpVwW31p2Wan3BnYEkQy5X8QpL51aoiPdAR3X2wnZ
  > IPFS: 12D3KooWFbTdbLXbucZMekBxyqqhRKPboZvYKiX1yBVmtikiUXCG
    - /ip4/127.0.0.1/tcp/4001/p2p/12D3KooWFbTdbLXbucZMekBxyqqhRKPboZvYKiX1yBVmtikiUXCG
    - /ip4/192.168.0.116/tcp/4001/p2p/12D3KooWFbTdbLXbucZMekBxyqqhRKPboZvYKiX1yBVmtikiUXCG
    - /ip6/2603:8081:2301:3b54:5054:ff:fe99:a8ad/tcp/4001/p2p/12D3KooWFbTdbLXbucZMekBxyqqhRKPboZvYKiX1yBVmtikiUXCG
    - /ip6/::1/tcp/4001/p2p/12D3KooWFbTdbLXbucZMekBxyqqhRKPboZvYKiX1yBVmtikiUXCG
12D3KooWSEaZydrYik9gKenUhezTi2z8NBXYHB2RmsknQePoMUxc | node0 | Sees 1 other peers
  > Addresses:
    - /ip4/127.0.0.1/tcp/9096/p2p/12D3KooWSEaZydrYik9gKenUhezTi2z8NBXYHB2RmsknQePoMUxc
    - /ip4/192.168.0.95/tcp/9096/p2p/12D3KooWSEaZydrYik9gKenUhezTi2z8NBXYHB2RmsknQePoMUxc
  > IPFS: 12D3KooWM5oWJ2Z55dCSvyB3Zo6nS1zW1GvnoZSdxNdDCuDAGvb3
    - /ip4/127.0.0.1/tcp/4001/p2p/12D3KooWM5oWJ2Z55dCSvyB3Zo6nS1zW1GvnoZSdxNdDCuDAGvb3
    - /ip4/192.168.0.95/tcp/4001/p2p/12D3KooWM5oWJ2Z55dCSvyB3Zo6nS1zW1GvnoZSdxNdDCuDAGvb3
    - /ip6/2603:8081:2301:3b54:5054:ff:fe4c:c469/tcp/4001/p2p/12D3KooWM5oWJ2Z55dCSvyB3Zo6nS1zW1GvnoZSdxNdDCuDAGvb3
    - /ip6/::1/tcp/4001/p2p/12D3KooWM5oWJ2Z55dCSvyB3Zo6nS1zW1GvnoZSdxNdDCuDAGvb3
And you should see the list of cluster peers.
In the 2 terminal for each node that have the ipfs daemon running, hit “ctrl-c” to stop the daemon.
Lets add the ipfs-cluster-service daemon as a service. On both nodes, run the following:
$ sudo nano /etc/systemd/system/ipfs-cluster-service.service
Add the following:
[Unit]
Description=IPFS Cluster Service
After=network.target

[Service]
LimitNOFILE={{ ipfs_cluster_fd_max }}
Environment="IPFS_CLUSTER_FD_MAX={{ ipfs_cluster_fd_max}}"
ExecStart=/usr/local/bin/ipfs-cluster-service daemon
Restart=on-failure
User=ipfs

[Install]
WantedBy=multi-user.target
Restart systemctl daemon so it finds new service. Do this on both nodes.
$ sudo systemctl daemon-reload
$ sudo systemctl enable ipfs-cluster-service.service
Created symlink /etc/systemd/system/multi-user.target.wants/ipfs-cluster-service.service → /etc/systemd/system/ipfs-cluster-service.service.
$ sudo systemctl start ipfs-cluster-service
$ sudo systemctl status ipfs-cluster-service
● ipfs-cluster-service.service - IPFS Cluster Service
   Loaded: loaded (/etc/systemd/system/ipfs-cluster-service.service; enabled; ven
   Active: active (running) since Thu 2021-06-10 11:04:23 CDT; 20s ago
 Main PID: 584 (ipfs-cluster-se)
    Tasks: 6 (limit: 1149)
   Memory: 39.7M
   CGroup: /system.slice/ipfs-cluster-service.service
           └─584 /usr/local/bin/ipfs-cluster-service daemon

Jun 10 11:04:23 ipfs3 ipfs-cluster-service[584]: 2021-06-10T11:04:23.613-0500
Jun 10 11:04:23 ipfs3 ipfs-cluster-service[584]:         /ip4/192.168.0.95/tcp/90
Jun 10 11:04:23 ipfs3 ipfs-cluster-service[584]:         /ip4/127.0.0.1/tcp/9096/
Jun 10 11:04:23 ipfs3 ipfs-cluster-service[584]: 2021-06-10T11:04:23.672-0500
Jun 10 11:04:23 ipfs3 ipfs-cluster-service[584]: 2021-06-10T11:04:23.672-0500
Jun 10 11:04:23 ipfs3 ipfs-cluster-service[584]: 2021-06-10T11:04:23.673-0500
Jun 10 11:04:23 ipfs3 ipfs-cluster-service[584]: 2021-06-10T11:04:23.673-0500
Jun 10 11:04:23 ipfs3 ipfs-cluster-service[584]: 2021-06-10T11:04:23.674-0500
Jun 10 11:04:23 ipfs3 ipfs-cluster-service[584]: 2021-06-10T11:04:23.674-0500
Jun 10 11:04:23 ipfs3 ipfs-cluster-service[584]: 2021-06-10T11:04:23.674-0500
Reboot both nodes.
$ sudo shutdown -r now
Login after reboot and check that both IPFS and IPFS-Cluster services are running.
$ sudo systemctl status ipfs
$ sudo systemctl status ipfs-cluster-service
To test data replication, create the file on node0 and add it to the cluster:
$ echo Hello World! > myfile.txt
$ cd ipfs-cluster-ctl/
$ ipfs-cluster-ctl add /home/ipfs/myfile.txt
added QmfM2r8seH2GiRaC4esTjeraXEachRt8ZsSeGaWTPLyMoG myfile.txt
Take hash id of the recently added file and check its status:
$ ipfs-cluster-ctl status QmfM2r8seH2GiRaC4esTjeraXEachRt8ZsSeGaWTPLyMoG
You should see that this file has been PINNED among all cluster nodes.
$ ipfs-cluster-ctl status QmfM2r8seH2GiRaC4esTjeraXEachRt8ZsSeGaWTPLyMoG
QmfM2r8seH2GiRaC4esTjeraXEachRt8ZsSeGaWTPLyMoG:
    > node1                : PINNED | 2021-06-10T16:18:20.744805693Z
    > node0                : PINNED | 2021-06-10T11:18:20.740298488-05:00
 Installing IPFS through the command-line is handy if you plan on building applications and services on top of an IPFS node. This method is also useful if you’re setting up a node without a user interface, usually the case with remote servers or virtual machines. Using IPFS through the command-line allows you to do everything that IPFS Desktop can do, but at a more granular level since you can specify which commands to run.
You can install as root or in Debian add or modify a user for sudo.
By default sudo is not installed on Debian, but you can install it. First login as root.
Install sudo by running:
# apt-get install sudo -y
Add a user ipfs ( or use one of your own users).
# adduser ipfs
Adding user `ipfs' ...
Adding new group `ipfs' (1000) ...
Adding new user `ipfs' (1000) with group `ipfs' ...
Creating home directory `/home/ipfs' ...
Copying files from `/etc/skel' ...
New password:
Retype new password:
passwd: password updated successfully
Changing the user information for ipfs
Enter the new value, or press ENTER for the default
        Full Name []: IPFS
        Room Number []:
        Work Phone []:
        Home Phone []:
        Other []:
Is the information correct? [Y/n] y
# usermod -aG sudo ipfs
Make sure your sudoers file have sudo group added. Run:
# visudo
Allow members of group sudo to execute any command
%sudo ALL=(ALL:ALL) ALL
Copy ssh keys to ipfs user from root(optional step)
# cp -r .ssh/ /home/ipfs/
Set permissions
# chown -R ipfs:ipfs /home/ipfs/.ssh/
You need to relogin or reboot device completely for changes to take effect.
IPFS Install
Login as the IPFS user.
Download the Linux binary from dist.ipfs.io
$ wget https://dist.ipfs.io/go-ipfs/v0.8.0/go-ipfs_v0.8.0_linux-amd64.tar.gz
Unzip the file:
$ tar xvfz go-ipfs_v0.8.0_linux-amd64.tar.gz
go-ipfs/install.s
go-ipfs/ipfs
go-ipfs/LICENSE
go-ipfs/LICENSE-APACHE
go-ipfs/LICENSE-MIT
go-ipfs/README.md
Move into the go-ipfs folder and run the install script:
$ cd go-ipfs
$ sudo ./install.sh
Moved ./ipfs to /usr/local/bin
Move to HOME
cd ..
Test that IPFS has installed correctly:
$ ipfs --version
ipfs version 0.8.0
Initialize the repository
ipfs stores all its settings and internal data in a directory called the repository. Before using IPFS for the first time, you’ll need to initialize the repository with the “ipfs init” command. There are 2 was to Initialize. Local and Data Center Installations. If you are in a Data Center skip to the Datacenter Installation below.
Local Installation (Only for local installations):
$ IPFS_PATH=~/.ipfs ipfs init
Datacenter Installation:
If you are running on a server in a data center, you should initialize IPFS with the server profile. Doing so will prevent IPFS from creating a lot of data center-internal traffic trying to discover local nodes:
$ IPFS_PATH=~/.ipfs ipfs init --profile server
generating ED25519 keypair...done
peer identity: 12D3KooWKQn2n8Yee75qJqUHAc6cpfZypby2qhczWhXYx2k4FEtM
initializing IPFS node at /home/username/.ipfs
to get started, enter:

        ipfs cat /ipfs/QmQPeNsJPyVWPFDVHb77w8G42Fvo15z4bG2X8D2GhfbSXc/readme
The hash after peer identity is your node’s ID and will be different from the one shown in the above output. Other nodes on the network use it to find and connect to you. You can run ipfs id at any time to get it again if you need it.
Now, run the command in the output of ipfs init. The one that looks like this…
$ ipfs cat /ipfs/QmQPeNsJPyVWPFDVHb77w8G42Fvo15z4bG2X8D2GhfbSXc/readme
You should see something like this:

You can explore other objects in the repository. In particular, the quick-start directory which shows example commands to try:
$ ipfs cat /ipfs/QmQPeNsJPyVWPFDVHb77w8G42Fvo15z4bG2X8D2GhfbSXc/quick-start
Take your node online
Option 1
Once you’re ready to join your node to the public network, run the ipfs daemon in another terminal and wait for all three lines below to appear to know that your node is ready. This is a way to manually start it. See below to have the service set up to start automatically.
$ IPFS_PATH=~/.ipfs ipfs daemon
Initializing daemon...
go-ipfs version: 0.9.0
Repo version: 11
System version: amd64/linux
Golang version: go1.15.8
API server listening on /ip4/127.0.0.1/tcp/5001
WebUI: http://127.0.0.1:5001/webui
Gateway (readonly) server listening on /ip4/1127.0.0.1/tcp/8080
Daemon is ready
Make a note of the TCP ports you receive. If they are different, use yours in the commands below.
Now, switch back to your original terminal. If you’re connected to the network, you should be able to see the IPFS addresses of your peers when you run:
$ ipfs swarm peers
Option 2
It would be better to start IPFS daemon as a service instead of the terminal attached process.
You can create a service so that the daemon runs automatically. Edit user profile for setting env variables:
Create systemctl service for ipfs:
$ sudo nano /etc/systemd/system/ipfs.service
Add the following (Change User and Group Accordingly):
[Unit]
Description=IPFS Daemon
After=syslog.target network.target remote-fs.target nss-lookup.target

[Service]
Type=simple
ExecStart=/usr/local/bin/ipfs daemon --enable-namesys-pubsub
User=ipfs
[Install]
WantedBy=multi-user.target
restart systemctl daemon so it finds new service:
$ sudo systemctl daemon-reload
tell systemctl that ipfs should be started on startup:
$ sudo systemctl enable ipfs
start ipfs:
$ sudo systemctl start ipfs
check status:
$ sudo systemctl status ipfs
should see something like
● ipfs.service - ipfs daemon
   Loaded: loaded (/lib/systemd/system/ipfs.service; enabled; vendor preset: enabled)
   Active: active (running) since Wed 2019-08-28 20:38:04 UTC; 4s ago
 Main PID: 30133 (ipfs)
    Tasks: 9 (limit: 4915)
   CGroup: /system.slice/ipfs.service
           └─30133 /usr/local/bin/ipfs daemon --enable-gc

ipfs[30133]: Swarm listening on /ip4/127.0.0.1/tcp/4001
ipfs[30133]: Swarm listening on /ip4/172.31.43.10/tcp/4001
ipfs[30133]: Swarm listening on /ip6/::1/tcp/4001
ipfs[30133]: Swarm listening on /p2p-circuit
ipfs[30133]: Swarm announcing /ip4/127.0.0.1/tcp/4001
ipfs[30133]: Swarm announcing /ip6/::1/tcp/4001
ipfs[30133]: API server listening on /ip4/127.0.0.1/tcp/5001
ipfs[30133]: WebUI: http://127.0.0.1:5001/webui
ipfs[30133]: Gateway (readonly) server listening on /ip4/127.0.0.1/tcp/80
ipfs[30133]: Daemon is ready
How to see documents from other that a local web URL.
By default, the files are only visible for a browser at localhost. To change this, change the gateway and restart the daemon.
Make gateway publicly accessible. This allows you and everyone to view files.
If you want to, you can make your IPFS gateway and webui publicly accessible (Note: This should not be done unless locked down with a firewall rule restricting access). Change gateway configuration to listen on all available IP addresses.
In the file at ~/.ipfs/config change the following:
$ nano ~/.ipfs/config
"API": "/ip4/127.0.0.1/tcp/5001",
"Gateway": "/ip4/127.0.0.1/tcp/8080"
to…
"API": "/ip4/0.0.0.0/tcp/5001",
"Gateway": "/ip4/0.0.0.0/tcp/8080"
You can also run the commands below from the cli:
$ ipfs config --json API.HTTPHeaders.Access-Control-Allow-Origin '["http://your_domain_name-or_ip_address.com:5001", "http://localhost:3000", "http://127.0.0.1:5001", "https://webui.ipfs.io"]'
$ ipfs config --json API.HTTPHeaders.Access-Control-Allow-Methods '["PUT", "GET", "POST"]'
$ ipfs config Addresses.API /ip4/0.0.0.0/tcp/5001
$ ipfs config Addresses.Gateway /ip4/0.0.0.0/tcp/8080
Restart IPFS after the changes
$ sudo systemctl restart ipfs
Load the URL to your site. In this case, I have an AWS instance but you can use the IP of your server or your domain name.
http://ip_address:8080/ipfs/QmQPeNsJPyVWPFDVHb77w8G42Fvo15z4bG2X8D2GhfbSXc

Webui
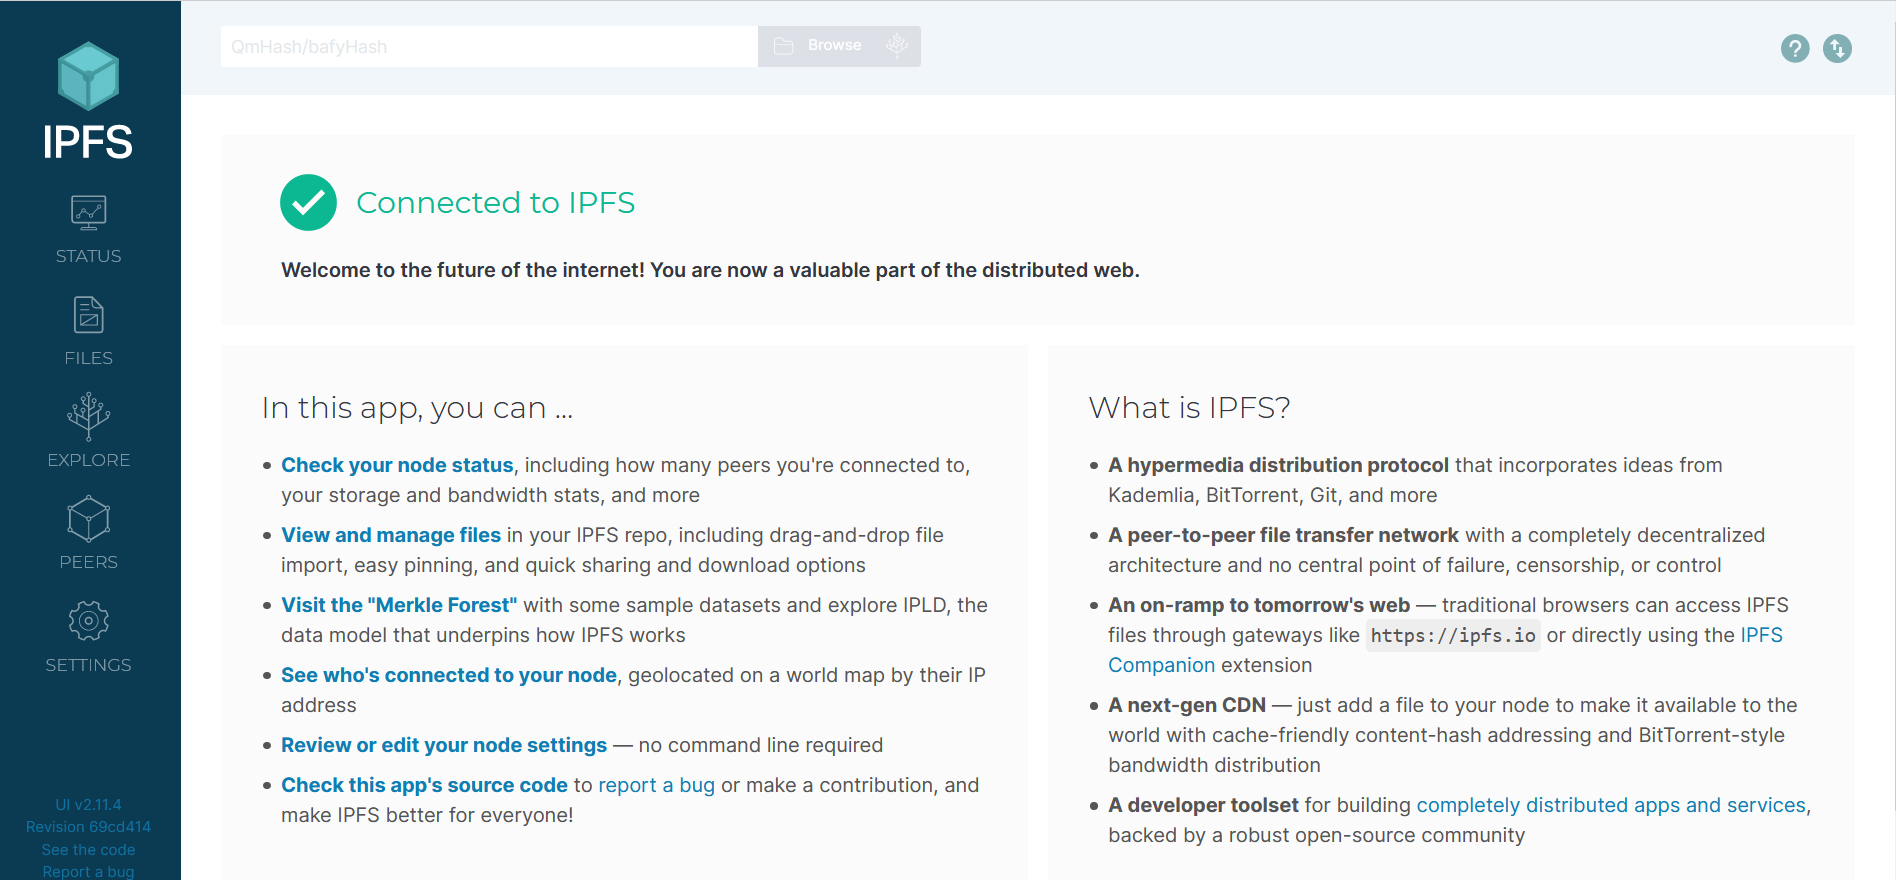
The webui is located at the following URL
http://ip_address:5001/webui
http://domain-name.com:5001/webui