If you ever set up a new domain hosting or migrate a domain to a new server, you will want to check to make sure that the changes are good before changing the DNS to the new server.
How it it done?
We often get asked this question a lot as in many cases. Sometimes, clients change the DNS before checking to see if there site actually works. This can lead to frustration, downtime and lost revenue and customers.
With the information in this article, we will outline how to map a domain name to the local hosts file, thus overriding temporarily the DNS record for a domain.
How The Hosts File Works
All operation systems come with a hosts file. The default hosts file is quite simple. It’s comprised of two things:
IP Address – this is the IP address of the server or computer that you want to map a domain to.
Hostname – usually, this is the domain name that you want to map to the associated IP address.
Whys does changing the hosts file work? Let’s take a look.
Imagine a long time ago in the networking world. There are no DNS servers. So hosts files were used on early computer networks for name resolution before DNS was developed.
So when you ping or load a website, you computer does something interesting:
- It checks to see if the name queried is its own.
- It then searches a local Hosts file, a list of IP address and names stored on the local computer.
- It then checks the Domain Name System (DNS) servers which are queried.
How To Edit Hosts File On Mac
To edit the hosts file on Mac, you’ll need to be logged in as a user with administrator privileges. You’ll also need the password for your administrator account.
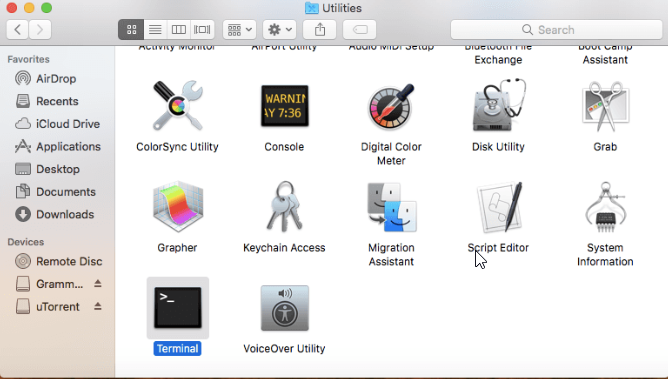
Open the Terminal
To get started, open the Terminal application. You can find it by clicking on the Finder icon and then going to Applications > Utilities:
Now, enter the following command and then press enter:
sudo nano /private/etc/hosts
If prompted, enter your administrator password after running the command.
How to Add New Entries
Now, you can add as many entries as needed using the text editor. Just as with other operating systems, use the following format:
IP Address (tab) domain.com (tab) #Comments
Example:
12.34.56.78 yoursite.com
Enter each IP address on its own line. For each IP address, you can add multiple hostnames on the same line.
Here’s an example of what it might look like:
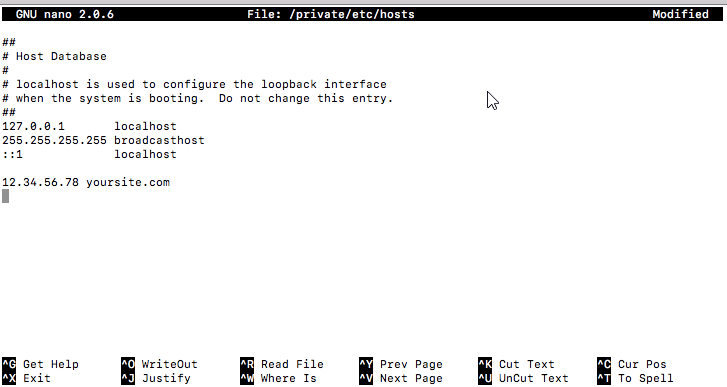
Be sure to replace the above example with your IP and domain name.
Now save the file. You can test with a ping test. Also, you can clear your browser cache and the reload the domain to see the new location. Also, using a private window will usually load the new IP for the domain.
Changing the hosts file is extremally useful for developing new sites and for migrating sites to new servers. Once the migration or changes look good with the new site, you can then change the DNS for the site to the new IP. Be sure to comment out the hosts entry or you can remove it altogether.
Another option is to use the tool at: https://www.skipdns.link
I you have any questions, feel free to leave a comment or contact us.