When trying to Enabling Physical GPUs in Hyper-V, the option is not there in the GUI. In Windows 2016 there is an option as in the below screenshot:

In Windows Server 2019, here is the screenshot and there is no option to enable it:
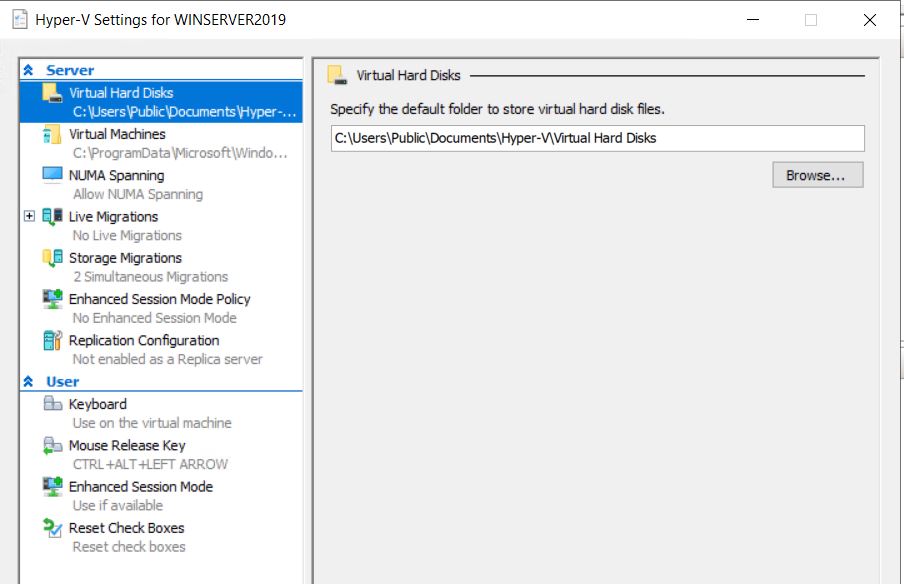
So, Here is how to enable it in Windows server 2019. You can also use RemoteFX vGPU feature on Windows Server 2019. Although the config UI of RemoteFX vGPU has been removed from Hyper-V Manager of Windows Server 2019, you can configure RemoteFX vGPU by using Powershell on Windows Server 2019.
Check your Host GPU – You need RemoteFX Compatible GPU Card and you need to install the Remote Desktop Virtualization Host role in Windows Server Manager.
To install the Remote Desktop Virtualization Host role, open Server Manager, and select the Add Roles and Features option from the Manage menu. This will cause Windows to launch the Add Roles and Features Wizard. Click Next to skip the wizard’s Before You Begin screen. You will now be taken to the Installation Type screen. Select the Role-Based or Feature-Based Installation option and click Next. You will now be prompted to choose the server on which you wish to install the role. Choose the Select a Server from the Server Pool option. Make sure that the correct server is selected, and click Next. You should now see the Select Server Roles screen. Select the Remote Desktop Services role, and click Next. Click Next again to bypass the Features screen, and once again to bypass the Remote Desktop Services introduction.
The next screen that you will see asks you to select the role services that you wish to install. Select the Remote Desktop Virtualization Host checkbox, as shown below. If prompted to install the Media Foundation and the Remote Server Administration Tools, be sure to click the Add Features button.
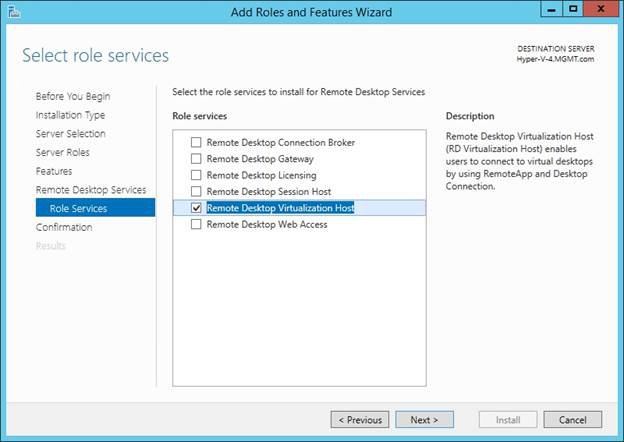
Click Next, followed by Install, and the required role services will be installed onto the server. When the process completes, click Close. You will need to reboot the server in order to finish the installation.
Now open powershell as Administrator.
Run the following commands:
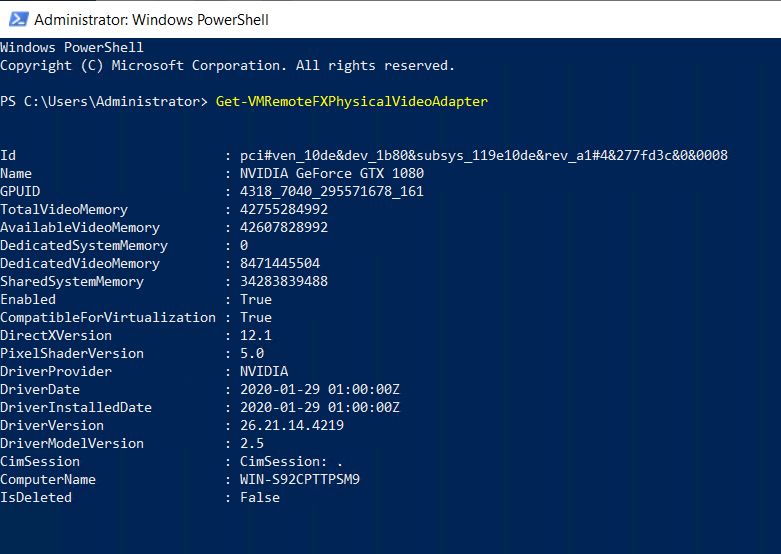
Get-VMRemoteFXPhysicalVideoAdapter
CompatibleForVirtualization: True
Enabled: True
Here is the screenshot for the Nvidia card I have. Make a note of the name of the card as well.
You can also use the name of the card directly or with a wildcard as below:
Next, Enable/Disable Host GPU for RemoteFX vGPU. To Enable, run this:
Get-VMRemoteFXPhysicalVideoAdapter -Name *Nvidia* | Enable-VMRemoteFXPhysicalVideoAdapter
Next, stop the VM on hyper V. Then, Add RemoteFX vGPU to your VM:
Example: Add-VMRemoteFx3dVideoAdapter -VMName [vm_name]
Add-VMRemoteFx3dVideoAdapter -VMName Windows1
Now, open the VM Settings in Hyper V so you can configure RemoteFX vGPU. You should see this: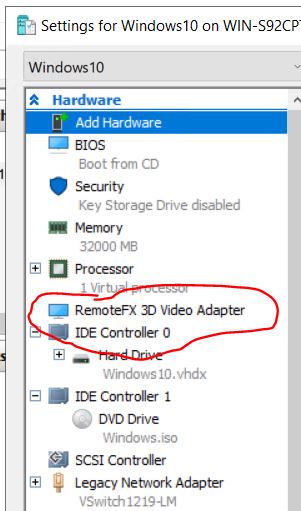
Now Start VM.
Other Resources:
1. https://techcommunity.microsoft.com/t5/windows-server-for-it-pro/server-2019-hyper-v-vm-using-gpu/m-p/303761
2. https://social.technet.microsoft.com/Forums/forefront/en-US/738f05a3-a8d2-49ca-a82a-d356b83e1cd4/hyperv-quotremotefx-3d-video-adapterquot-gone-in-windows-10-1809
3. http://techgenix.com/enabling-physical-gpus-hyper/
4. https://docs.microsoft.com/en-us/powershell/module/hyper-v/enable-vmremotefxphysicalvideoadapter?view=win10-ps
5. https://social.technet.microsoft.com/wiki/contents/articles/16652.remotefx-vgpu-setup-and-configuration-guide-for-windows-server-2012.aspx?wa=wsignin1.0&CommentPosted=true
This does not work