How to identify the processes that are keeping ports open
Windows OS
For Windows operating systems, you can use netstat, which is included with the OS. On the scanned server, open command prompt. Run the command:
netstat -ano
This will list all the network connections on the machine. The last column shows the process ID of the process for the specific network connection. You will probably want to filter this down using the ‘find’ command. For example, if you only want to list the network connections on port 135, use:
netstat -ano | find “:135”
This will list a network connection in LISTENING mode and the id of the process that opened the connection. Use “tasklist /SVC /FI “PID eq xxx” to show the name of the process and service for process id xxx.
For example, if you want to list the information about processed id 7424, use:
This article guides you how to assign Home Folder to Active Directory users.
Install the File Server Resource Manager
Open Server Manager
Go to “Add roles and features”
In “Server Roles” expand “File and Storage Services“, again expand “File and iSCI Services“, then tick “File Server Resource Manager” and click “next” to install.
Configure a Shared Folder
Create a shared folder ex:- D:\HOME
Open “HOME” folder properties by right clicking on it and go to properties > sharing.
Click on “Share” button and activate folder sharing. Add users. Find shared folder path ex:- “\\YOUR-SERVER\home\”
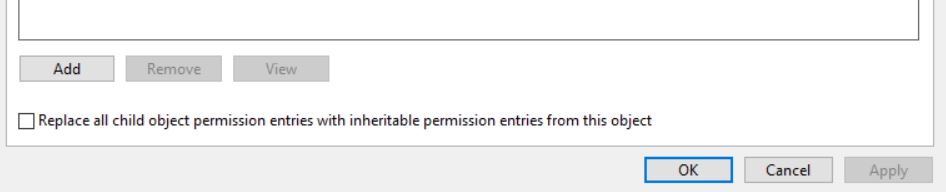
select “security” tab and then open “Advance Security”. Please make sure inheritance is disabled like below.
Configure Disk Quota
Open “File Server Resource Manager”
Expand “Quota Management” , you can configure “Quota Templates” if you wish or you can use existing template like here I did.
Click on “Quotas” –> “Create Quotas” from right hand side.
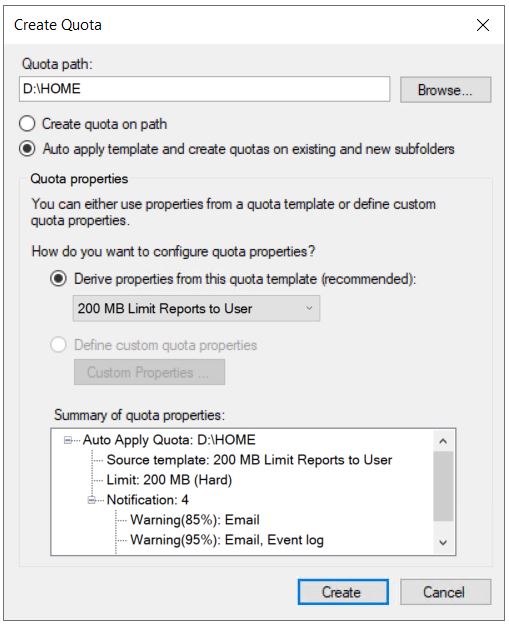
On then “Create Quota” window, browse and set Quota Path, select “Auto apply template and create quotas on existing and new sub folders” radio button, and make sure to select previously configured template from the drop down menu (200 MB Limit Reports to User – existing template).
Attach Network folder to Active directory user
Open “Active Directory Users and Computers”
Right click on user and open “properties” , then browse “profile” and set following Network path there.
When trying to Enabling Physical GPUs in Hyper-V, the option is not there in the GUI. In Windows 2016 there is an option as in the below screenshot:
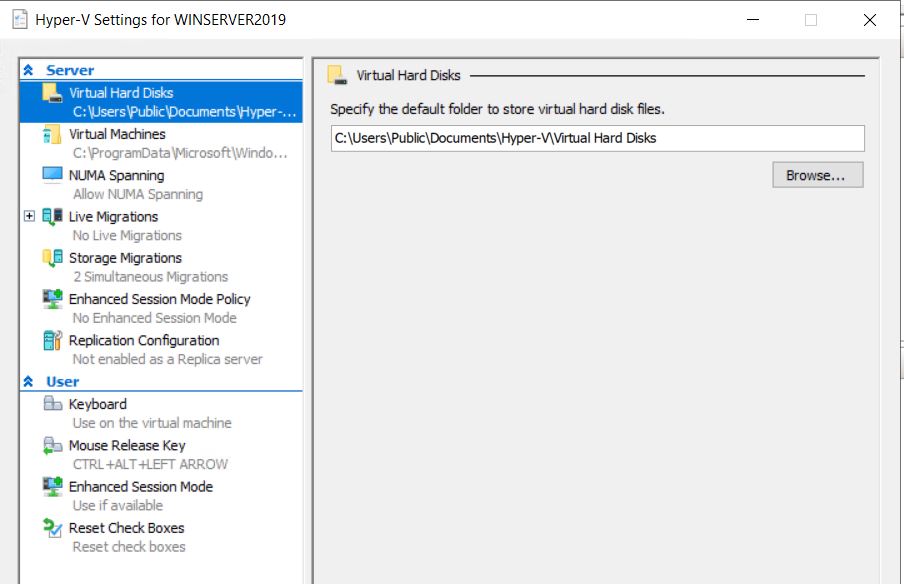
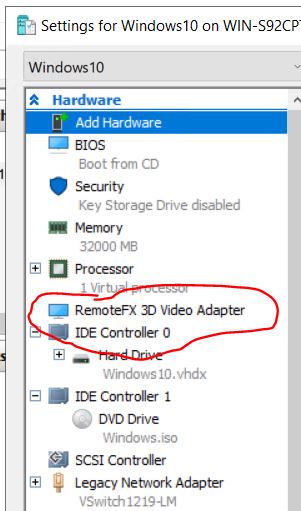
In Windows Server 2019, here is the screenshot and there is no option to enable it:
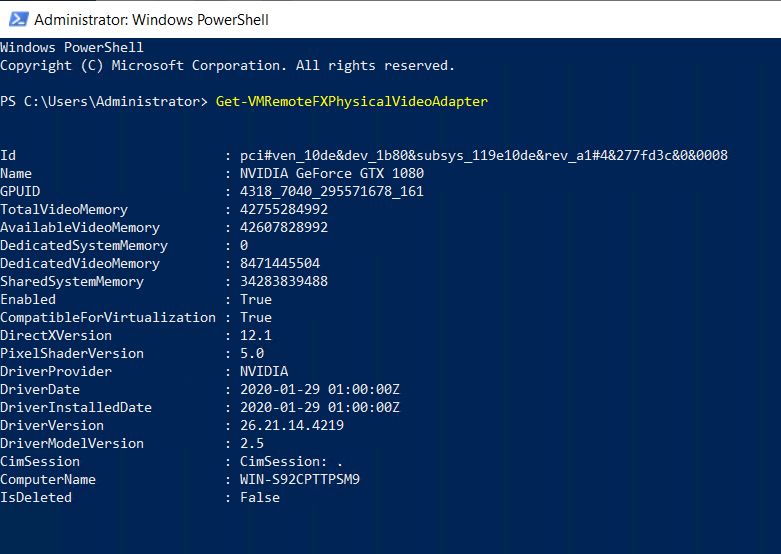
So, Here is how to enable it in Windows server 2019. You can also use RemoteFX vGPU feature on Windows Server 2019. Although the config UI of RemoteFX vGPU has been removed from Hyper-V Manager of Windows Server 2019, you can configure RemoteFX vGPU by using Powershell on Windows Server 2019.
Check your Host GPU – You need RemoteFX Compatible GPU Card and you need to install the Remote Desktop Virtualization Host role in Windows Server Manager.
To install the Remote Desktop Virtualization Host role, open Server Manager, and select the Add Roles and Features option from the Manage menu. This will cause Windows to launch the Add Roles and Features Wizard. Click Next to skip the wizard’s Before You Begin screen. You will now be taken to the Installation Type screen. Select the Role-Based or Feature-Based Installation option and click Next. You will now be prompted to choose the server on which you wish to install the role. Choose the Select a Server from the Server Pool option. Make sure that the correct server is selected, and click Next. You should now see the Select Server Roles screen. Select the Remote Desktop Services role, and click Next. Click Next again to bypass the Features screen, and once again to bypass the Remote Desktop Services introduction.
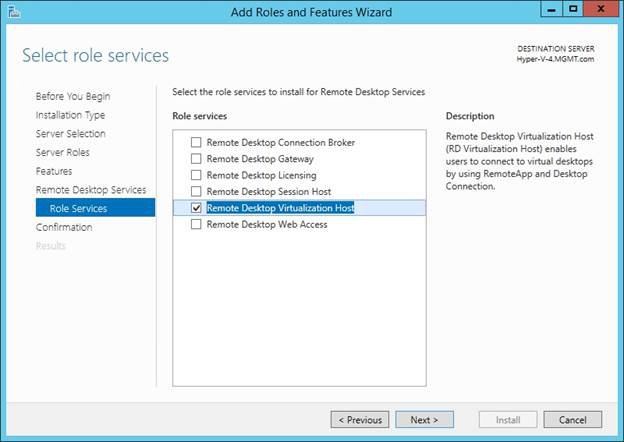
The next screen that you will see asks you to select the role services that you wish to install. Select the Remote Desktop Virtualization Host checkbox, as shown below. If prompted to install the Media Foundation and the Remote Server Administration Tools, be sure to click the Add Features button.
Click Next, followed by Install, and the required role services will be installed onto the server. When the process completes, click Close. You will need to reboot the server in order to finish the installation.
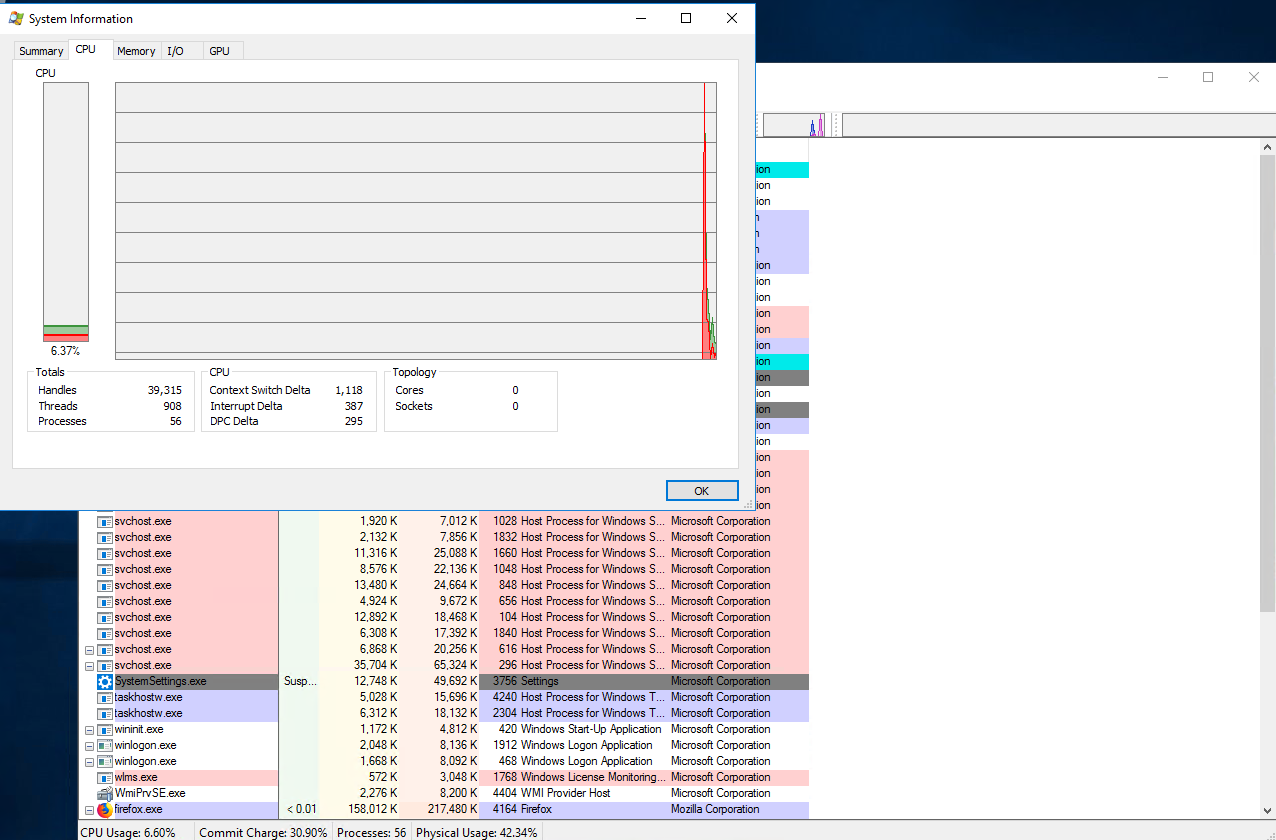
Ever wondered which program has a particular file or directory open? Now you can find out. Process Explorer shows you information about which handles and DLLs processes have opened or loaded.
Ever wondered which program has a particular file or directory open? Now you can find out. Process Explorer shows you information about which handles and DLLs processes have opened or loaded.
The Process Explorer display consists of two sub-windows. The top window always shows a list of the currently active processes, including the names of their owning accounts, whereas the information displayed in the bottom window depends on the mode that Process Explorer is in: if it is in handle mode you’ll see the handles that the process selected in the top window has opened; if Process Explorer is in DLL mode you’ll see the DLLs and memory-mapped files that the process has loaded. Process Explorer also has a powerful search capability that will quickly show you which processes have particular handles opened or DLLs loaded.
The unique capabilities of Process Explorer make it useful for tracking down DLL-version problems or handle leaks, and provide insight into the way Windows and applications work.
Taking Ownership of Files and Folders in Windows Server. Here are some notes on how to do this:
If you are an administrator, an authorized user, or a backup operator, you can take ownership of a file or folder by completing the following steps:
1. In Windows Explorer, open the file or folder’s Properties dialog box by right-clicking the file or folder and then clicking Properties.
2. On the Security tab, click Advanced to display the Advanced Security Settings dialog box.
3. On the Owner tab, click Edit.This opens the Advanced Security Settings dialog box for editing.
4. In the Change Owner To list, select the new owner.If you’re taking ownership of a folder, you can take ownership of all subfolders and files within the folder by selecting the Replace Owner On Subcontainers And Objects option.
5. Click OK twice when you have finished.
Assigning Ownership
If you are an administrator or the current owner of a file, you can assign ownership of a file or a folder to another user or group by completing these steps:
1. In Windows Explorer, open the file or folder’s Properties dialog box by right-clicking the file or folder and then clicking Properties.
2. On the Security tab, click Advanced to display the Advanced Security Settings dialog box.
3. On the Owner tab, click Edit. This opens the Advanced Security Settings dialog box for editing.
4. Click Other Users Or Groups to display the Select User, Computer, Service Account, Or Group dialog box.
5. Type the name of a user or a group, and then click Check Names. If multiple names match the value you entered, you’ll see a list of names and can choose the one you want to use. Otherwise, the name will be filled in for you, and you can click OK to close the Select User, Computer, Service Account, Or Group dialog box.
6. In the Change Owner To list, select the new owner. If you’re assigning ownership of a folder, you can assign ownership of all subfolders and files within the folder by selecting the Replace Owner On Subcontainers And Objects option.
7. Click OK twice when you have finished.
Codero
Robocopy (Robust File Copy) is a command-line file copying tool included with the Microsoft Windows Server 2003 Resource Kit, free to licensed users of Windows. The tool, as with much of the resource kit, works under Windows XP as well as under the Windows Server platform.
Download Robocopy Command Line Tool for Windows 2003 and 2008 Server / Windows XP / Vista / 7
Please visit Microsoft web site to download Robocopy (rktools.exe – 11.8M). It is part of Windows Server 2003 Resource Kit.
I recently added MailEnable to a Windows server and wanted to add SSL. I checked and there is an application that you can use to add the Let’s Encrypt SSL.
Quick Start
Download from https://certifytheweb.com/ and install it.
Click ‘New Certificate’, choose your IIS site (which must have 1 or more hostname bindings set). Save your settings and click ‘Request Certificate’
All done!