The installation of a supported Proxmox VE server should be done via bare-metal ISO installer. In some cases it makes sense to install Proxmox VE on top of a running Debian Bullseye 64-bit, especially if you want a custom partition layout. For this How-To any official Bullseye installation medium should work.
For this Demo, I am installing 3 KVM VM’s. As you can do VM nesting. Also, you can do this on Vmware or Hyper V. Here is the Architecture.
3 Nodes
Hardware: 1 CPU, 2048 RAM, 2 Drives, (10GB install OS, 100GB for Storage), 2 Network Cards
px-01 px-01.ipgw.io 192.168.0.50 10.10.10.1
px-02 px-02.ipgw.io 192.168.0.51 10.10.10.2
px-03 px-03.ipgw.io 192.168.0.52 10.10.10.3
Install a standard Debian Bullseye. Consider the Debian installation guide, and configure a static IP. It is recommended to only install the “standard system utilities” and “SSH server” package selection, as Proxmox VE brings its own packages for QEMU and LXC. A desktop environment is not necessary.
Once completed, ssh to the server. Add an /etc/hosts entry for your IP address. The hostname of your machine must be resolvable via /etc/hosts. This means that in /etc/hosts you need one of the following entries for your hostname. Note: This also means removing the address 127.0.1.1 that is present as default.
For instance, if your IP address is 192.168.0.52, and your hostname px-03.ipgw.io, then your /etc/hosts file could look like:
127.0.0.1       localhost
192.168.0.52    px-03.ipgw.io px-03
# The following lines are desirable for IPv6 capable hosts
::1     localhost ip6-localhost ip6-loopback
ff02::1 ip6-allnodes
ff02::2 ip6-allrouters
You can test if your setup is ok using the hostname command:
# hostname --ip-address
192.168.0.52
Install Proxmox VE
Adapt your sources.list
Add the Proxmox VE repository:
echo "deb [arch=amd64] http://download.proxmox.com/debian/pve bullseye pve-no-subscription" > /etc/apt/sources.list.d/pve-install-repo.list
Add the Proxmox VE repository key as root (or use sudo):
wget https://enterprise.proxmox.com/debian/proxmox-release-bullseye.gpg -O /etc/apt/trusted.gpg.d/proxmox-release-bullseye.gpg
Verify the download:
sha512sum /etc/apt/trusted.gpg.d/proxmox-release-bullseye.gpg
Output:
7fb03ec8a1675723d2853b84aa4fdb49a46a3bb72b9951361488bfd19b29aab0a789a4f8c7406e71a69aabbc727c936d3549731c4659ffa1a08f44db8fdcebfa /etc/apt/trusted.gpg.d/proxmox-release-bullseye.gpg
Update your repository and system by running:
apt update && apt full-upgrade
Install the Proxmox VE packages
apt install proxmox-ve postfix open-iscsi
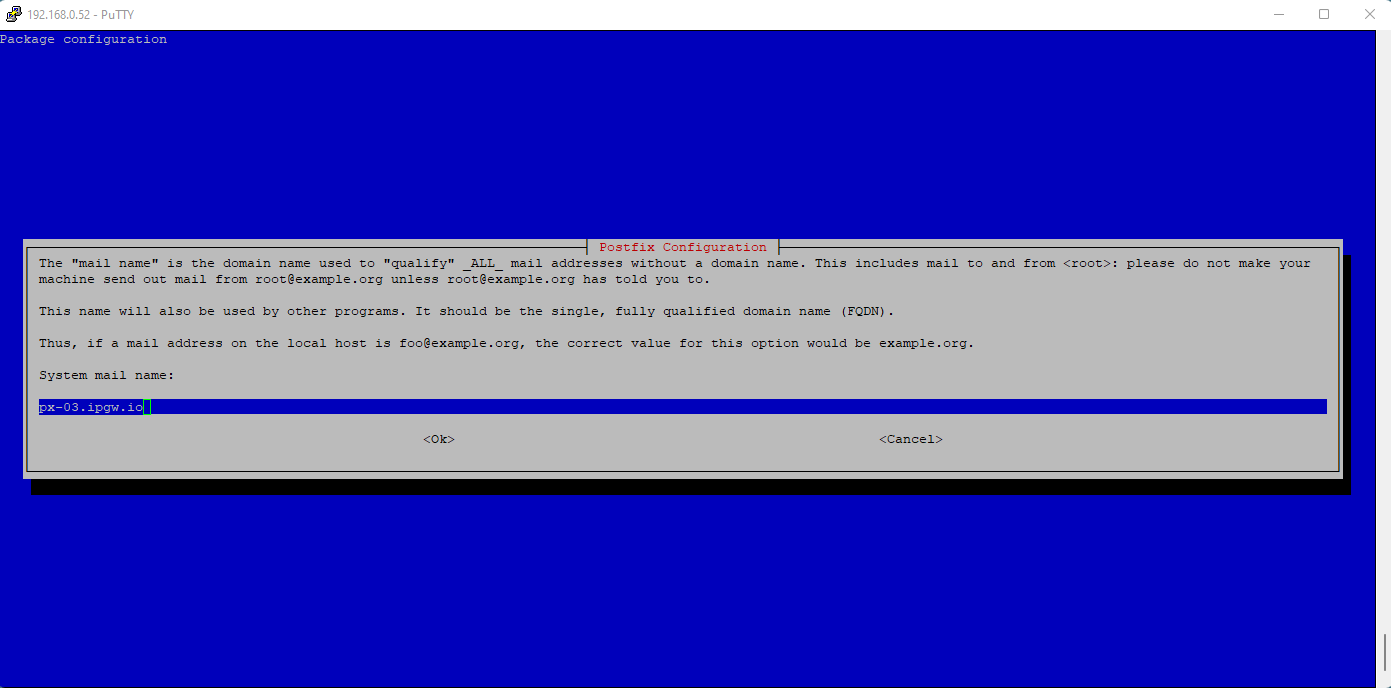
Mail Server
If you have a mail server in your network, you should configure postfix as a satellite system. Your existing mail server will then be the relay host which will route the emails sent by Proxmox VE to their final recipient. If you don’t know what to enter here, choose local only and leave the system name as is.

Postfix Configuration
Verify the hostname here.
Once finished, reboot your system.
Login the ssh and change the password for root
root@px-03:~# passwd
New password:
Retype new password:
passwd: password updated successfully
Next, remove the os-prober package. The os-prober package scans all the partitions of your host, including those assigned to guests VMs, to create dual-boot GRUB entries. If you didn’t install Proxmox VE as dual boot beside another Operating System, you can safely remove the os-prober package.
apt remove os-prober
Now, connect to the Proxmox VE web interface. Connect to the admin web interface (https://youripaddress:8006). If you have a fresh install and haven not added any users yet, you should use the root account with your linux root password, and select “PAM Authentication” to log in.
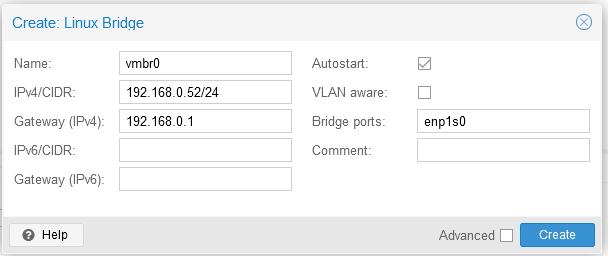
Create a Linux Bridge
Once logged in, create a Linux Bridge called vmbr0, and add your first network interface to it.
Here are the settings before we make changes:
Primary Network Interface ( The one that connects to the Internet)
enp1s0
Name:enp1s0
IPv4/CIDR: 192.168.0.52/24
Gateway(IPv4):192.168.0.1
Autostart: On
Secondary Network Adaptor (The One that is Private)
enp7s0

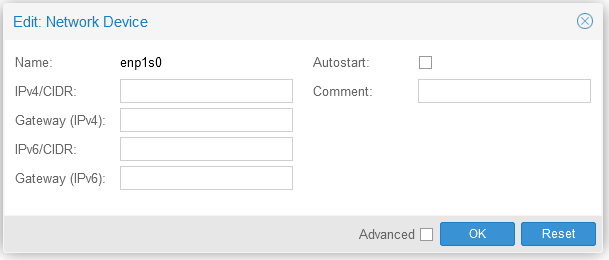
Change enp1s0 to below:
enp1s0
Name:enp1s0
IPv4/CIDR:
Gateway(IPv4):
Autostart: Off
Add the Linux Bridge
Name:vmbr0
IPv4/CIDR:192.168.0.52/24
Gateway(IPv4):192.168.0.1
Bridge ports:enp1s0
Autostart:On
Change Secondary Network Adaptor to this:
Name:enp7s0
IPv4/CIDR:10.10.10.1/24
Gateway(IPv4):
Bridge ports:
Autostart:On
Click “Apply Configuration” to save changes. If there are edit, edit and click Apply again.
Here are the settings after the changes.

You see that the IP is now on the Linux Bridge. Check ssh and GUI access.
Repeat these steps for nodes 2 and 3 and change the IP’s in increments as above.
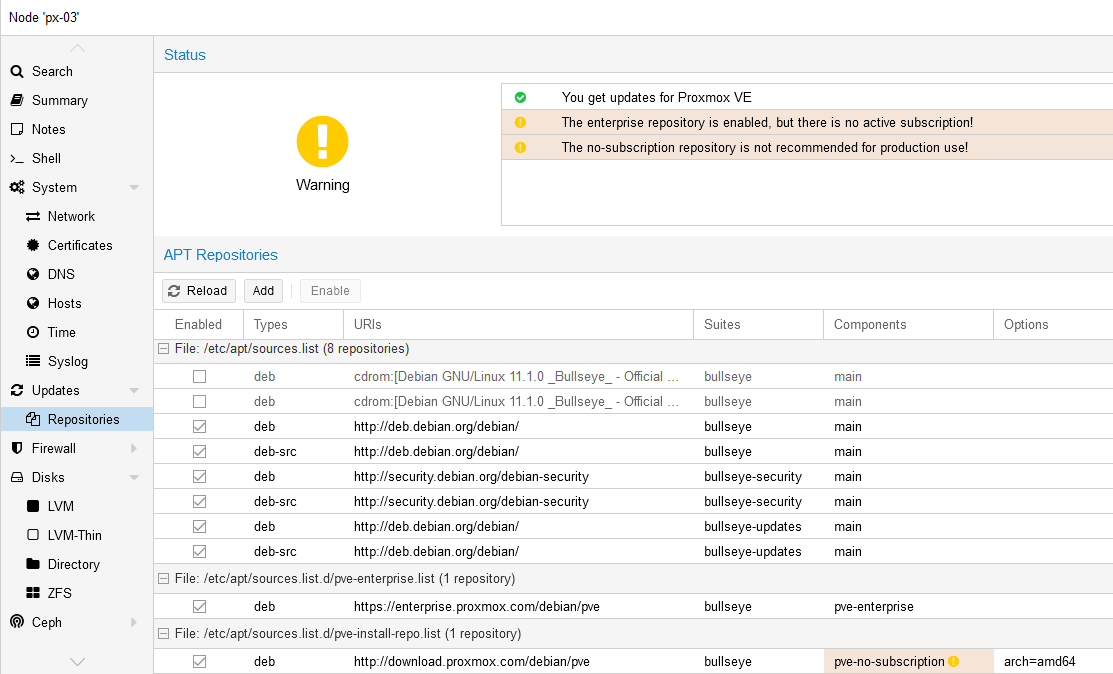
Now, lets change the repositories. Disable The Enterprise Repo. And click “Reload”. Click on “Updates” on the Left and Refresh all 3 nodes.
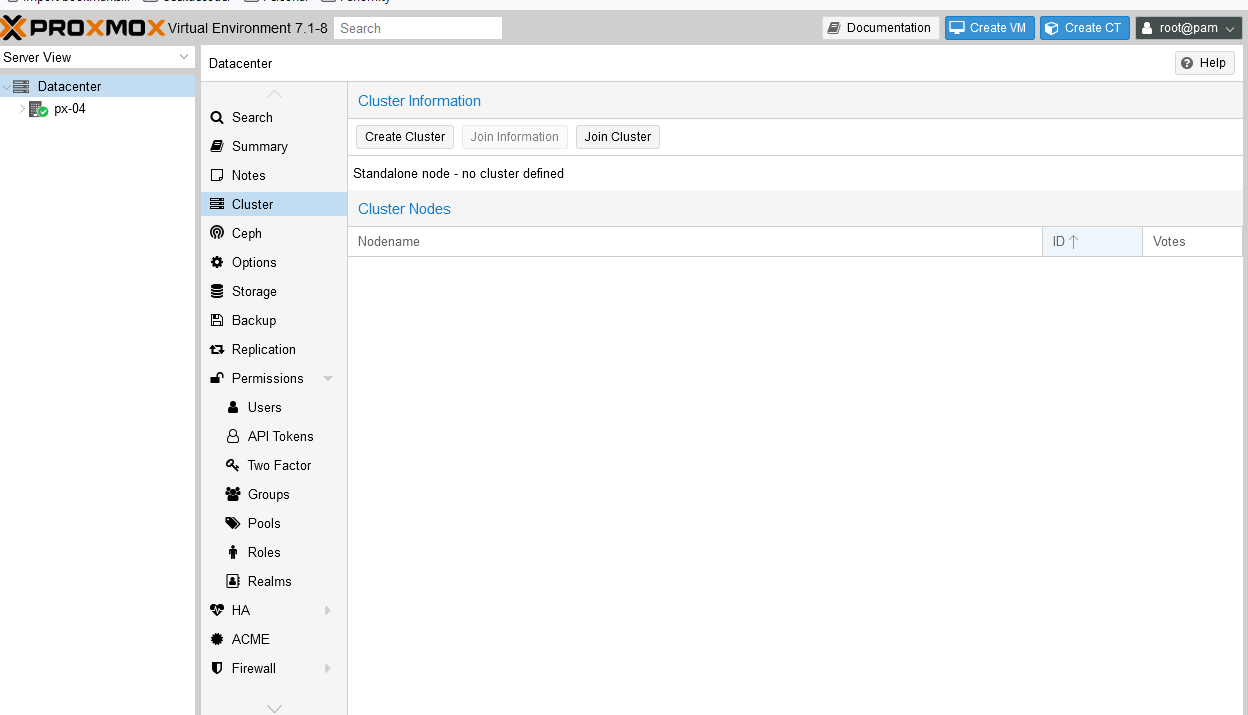
After all 3 nodes are installed and online, Create the cluster on node 1.
Click the DATACENTER on the Left side. Click “Cluster” > “Create Cluster”.
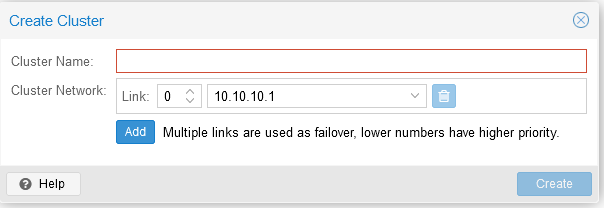
Then create as below. Give the cluster a name and choose the private IP for it.
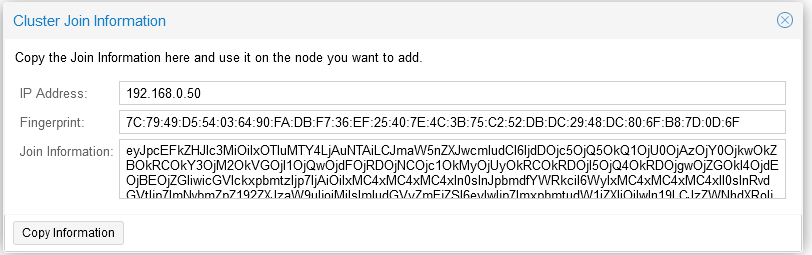
Once completed, go to node 1 and go to “Join Information”. Click Copy the info.
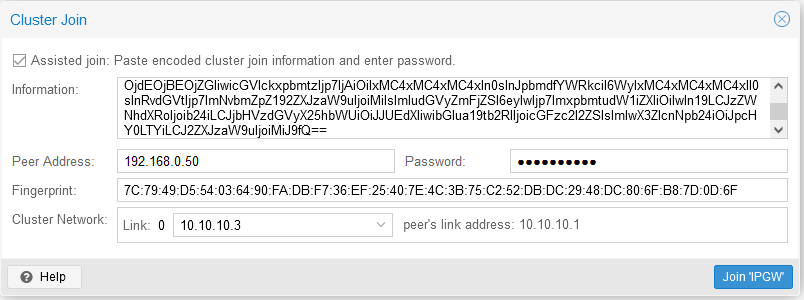
Go the nodes 2 and 3 and click “Join the cluster”. Be sure to select the private IP and enter the root password for it.
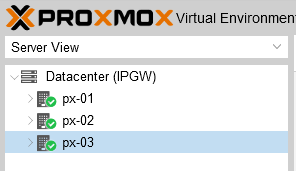
Once completed, you should see 3 nodes on px-01.
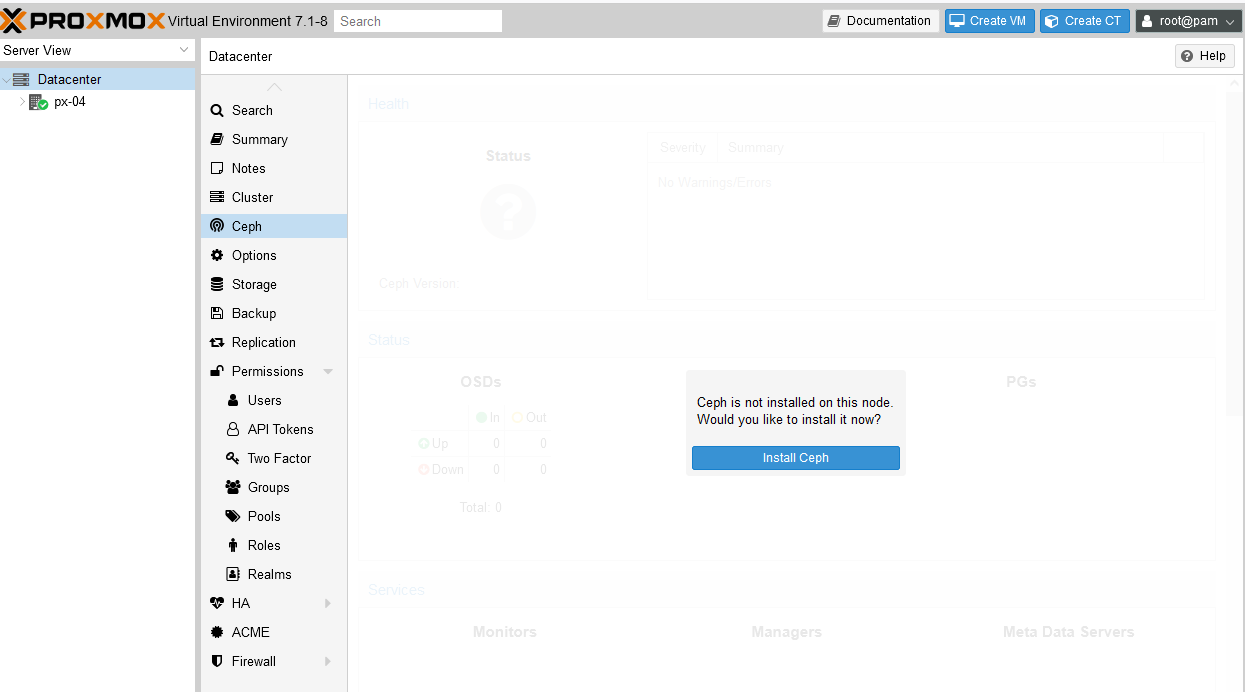
Install Ceph on All 3 Nodes. On each node, on the Left Side – Click “Ceph” > Click “Install Ceph”.
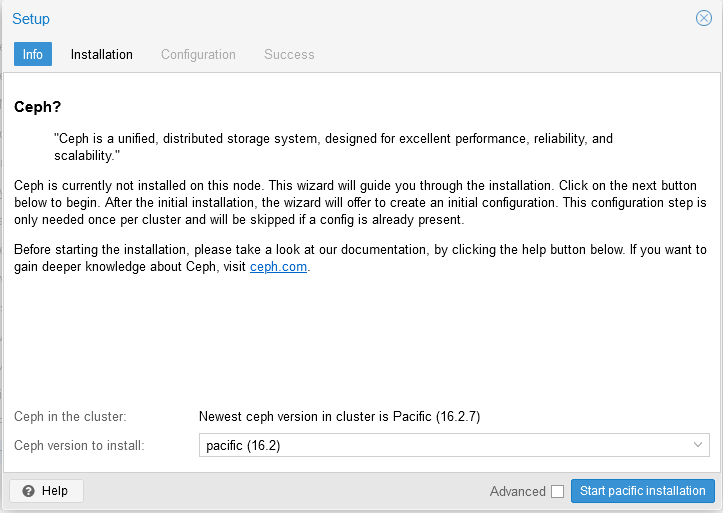
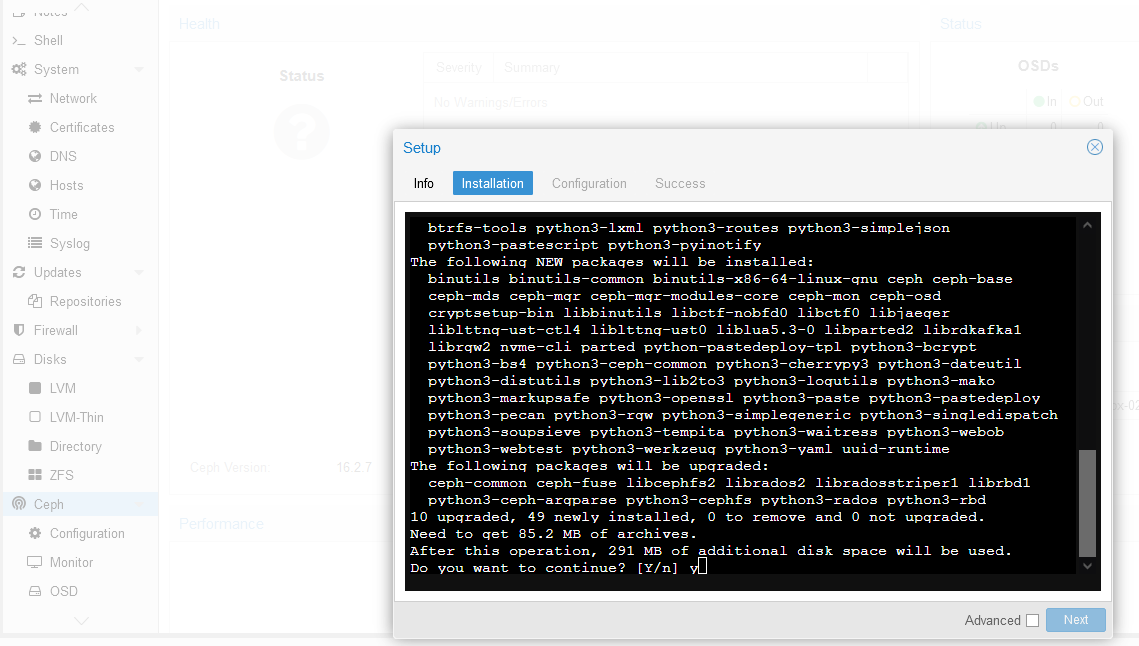
You will see a popup for Pacific. Click “Start Pacific Installation”. Once Completed, Click “Next”. The finish the configuration.
Next, create the Ceph Monitors. From the GUI.From px-01. click on Monitor > Create.
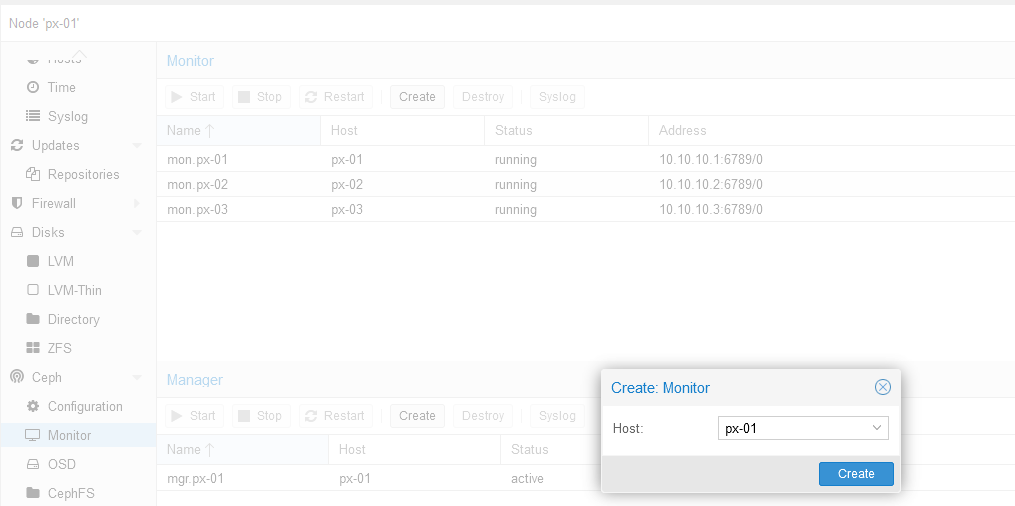
Do this 4 times to add 4 monitors for each node.

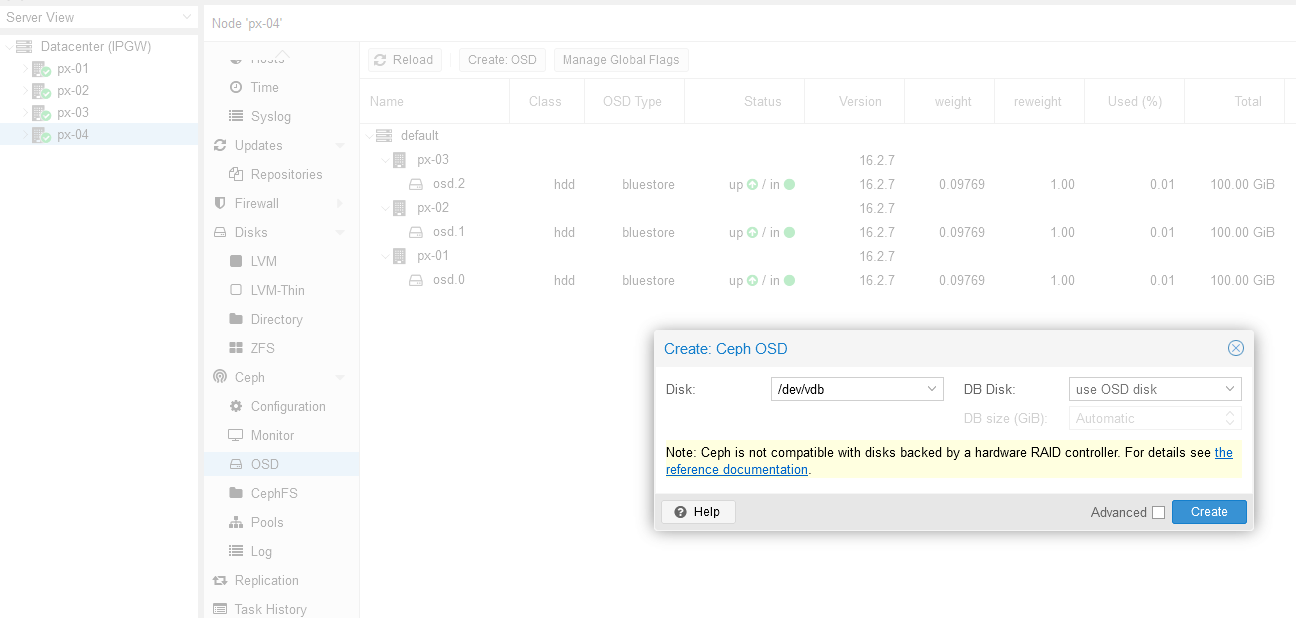
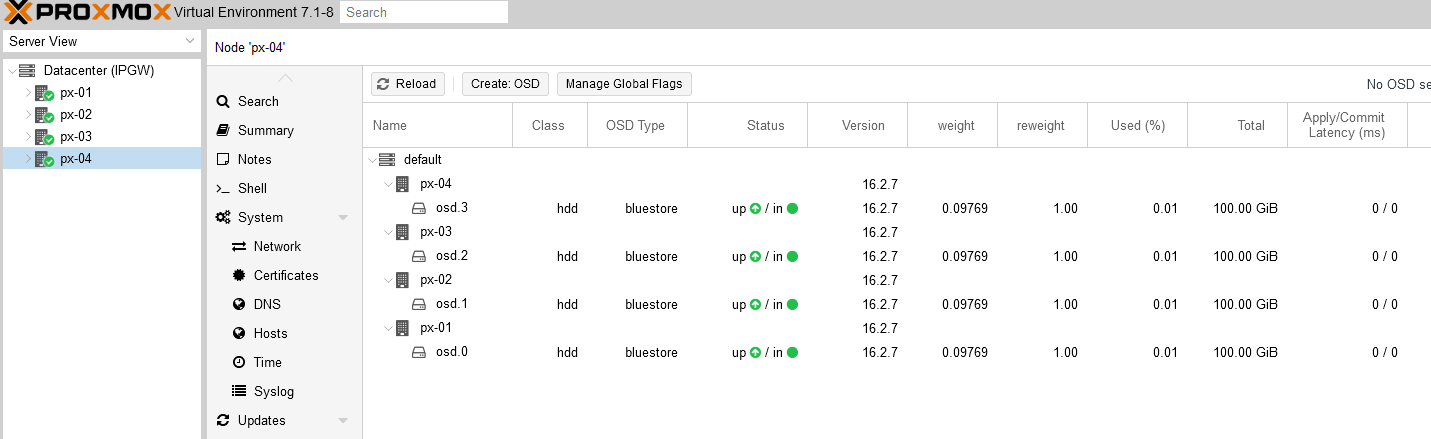
Now create the OSD’s. This is where the data will be stored. For this we use the second 100GB disks on each node. Clock on px-01. Under OSD, click “Create OSD”. To create the other OSD’s, click on each node to create it. Click “Reload” to view the OSD’s.
Here are the finished OSD’s.
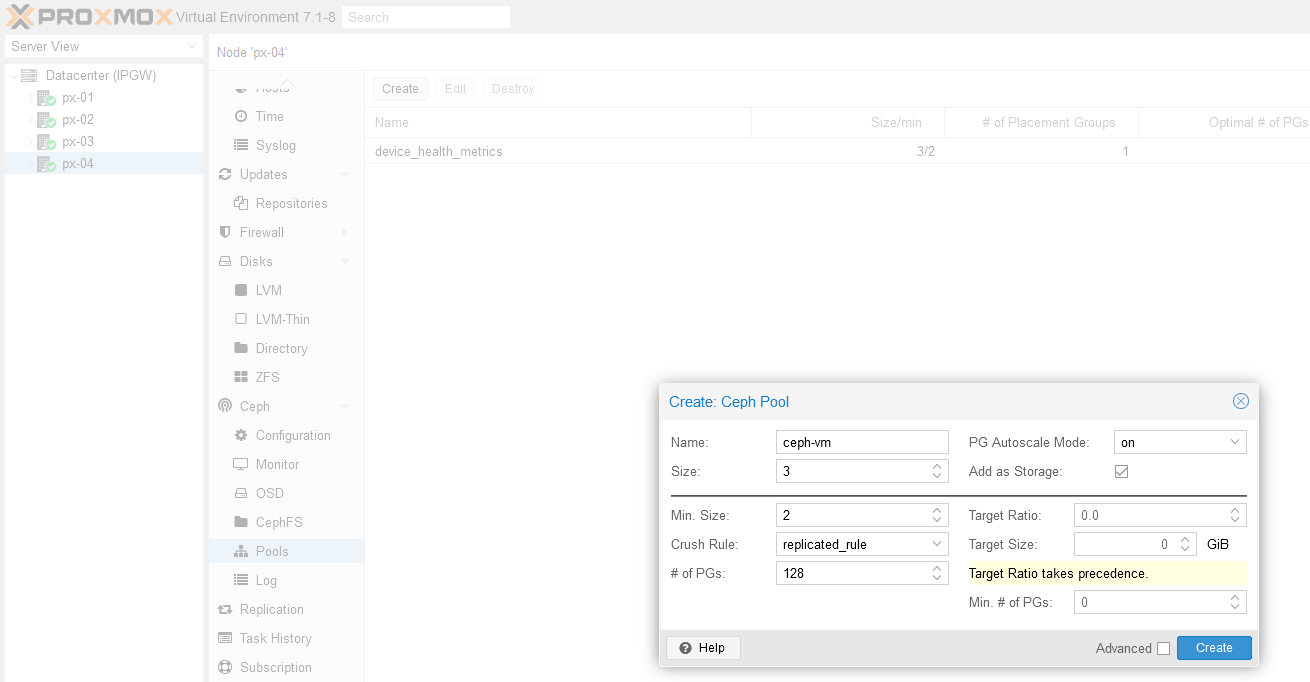
Next we create 2 Pools for storage. 1 For Virtual Machines and 1 for Containers.
Click on Pools on px-01. The “Create”. Create the Vm pool.
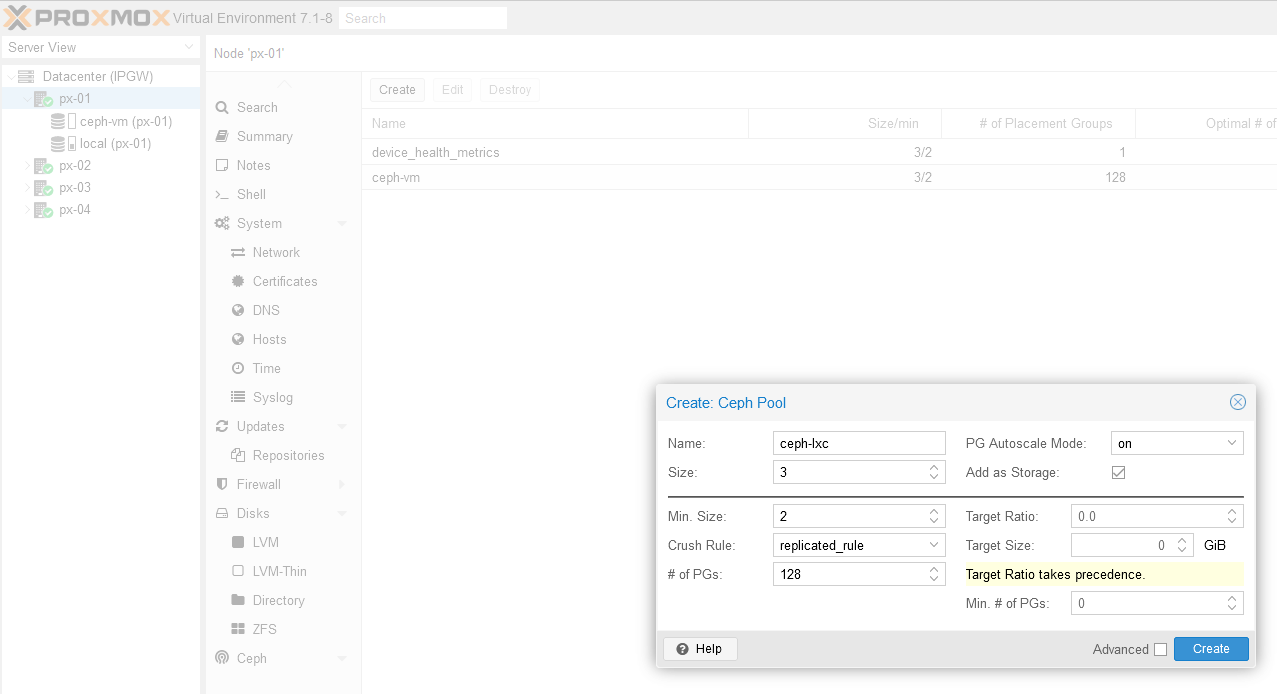
Next Create the lxc Pool.
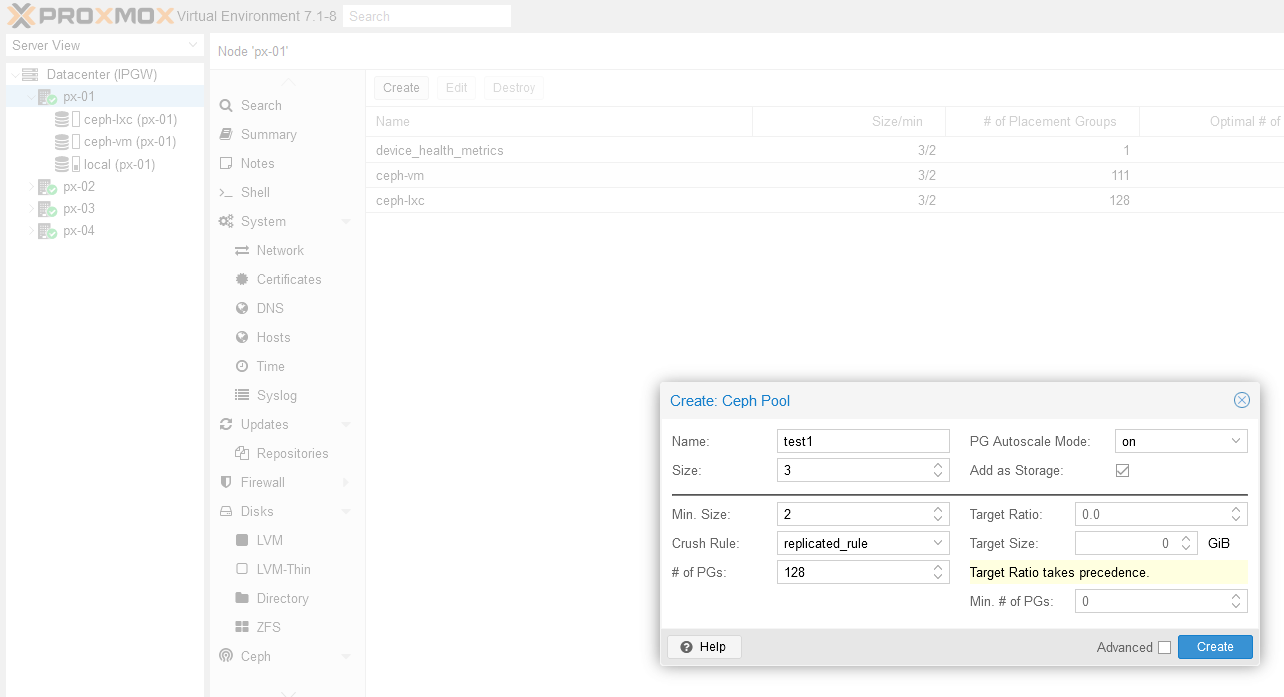
Next create a test Pool.
Now run a redos write benchmark. Click “Shell”. Run the following in the shell:
rados -p test1 bench 10 write --no-cleanup
Bandwidth is 10.8956
Next do a Read Test Type, Run:
rados -p test1 bench 10 seq
Write is 53.5305
Now we can remove the pool. Select pool “test1” and click “Destroy”.
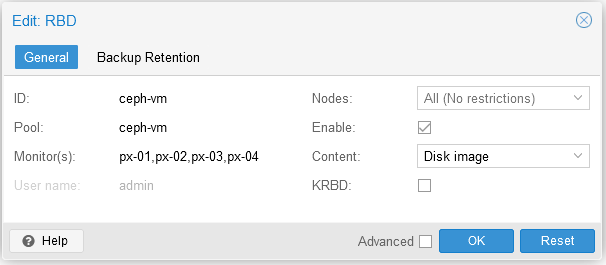
Now lets edit our Pools. Click on “Datacenter” > “Storage”. Edit as follows:
ceph-vm
ceph-lxc

Next, lets copy the keyrings.
cd /etc/pve/priv/
root@px-01:/etc/pve/priv# cp /etc/ceph/ceph.client.admin.keyring ceph/ceph-vm.keyring
root@px-01:/etc/pve/priv# cp /etc/ceph/ceph.client.admin.keyring ceph/ceph-lxc.keyring
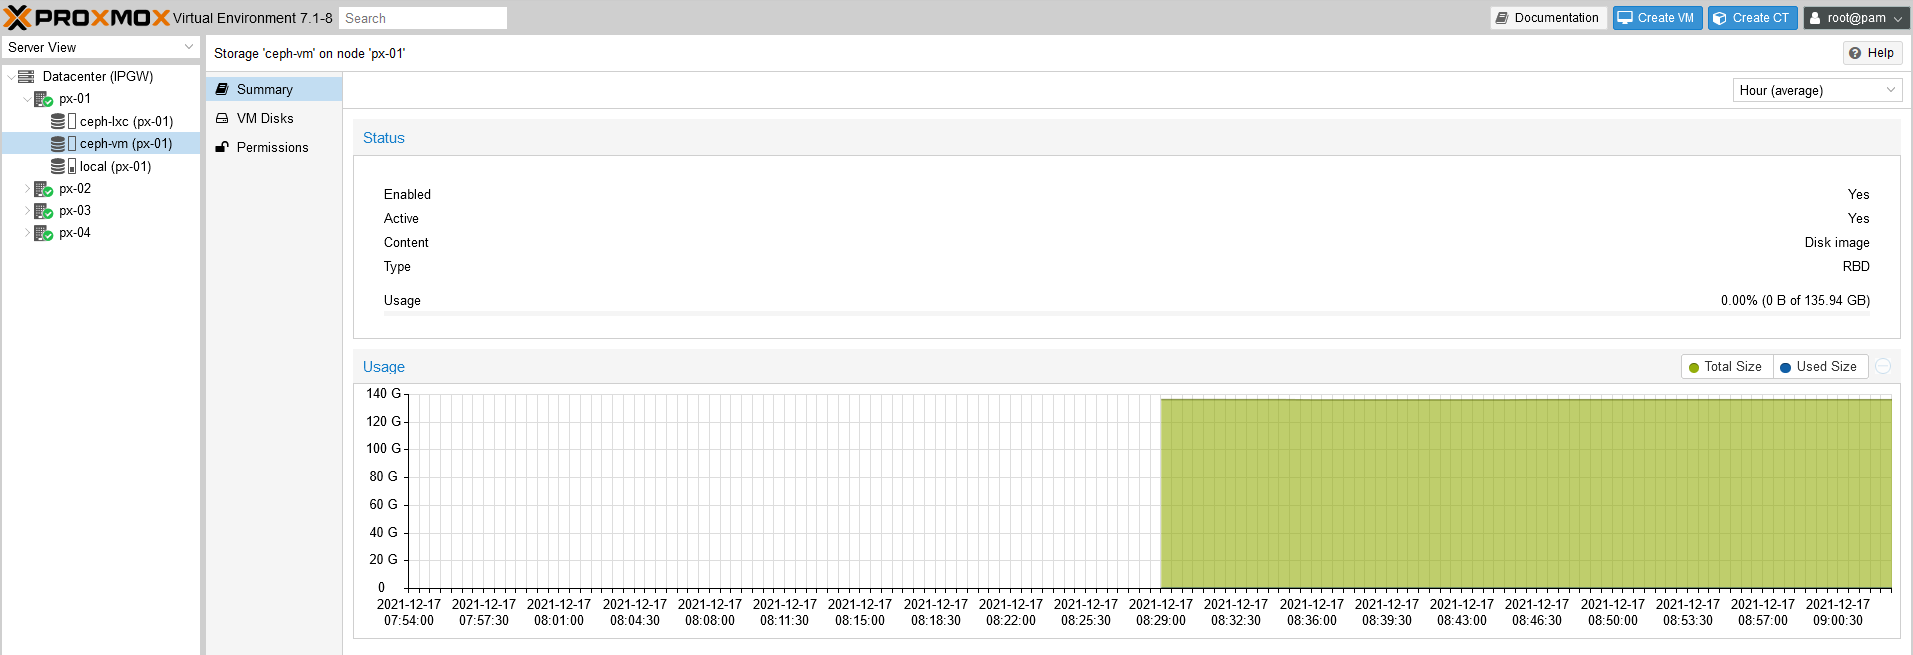
Now we can see the storage in the GUI summary.
Now we are complete.