In this KB, we will install the Zabbix Monitoring Server on CentOS 7.
Install the basics. Add this as install.sh on the server:
# yum install nano -y
# nano install.sh
Add the following to the file:
#!/bin/bash
yum update -y
yum install -y epel-release
yum -y groupinstall 'Development Tools'
yum -y install yum-utils
yum install httpd -y
systemctl enable httpd.service
systemctl start httpd.service
yum install mariadb-server mariadb -y
systemctl enable mariadb
systemctl start mariadb
sudo mysql_secure_installation
yum -y install httpd mod_ssl php php-zip php-fpm php-devel php-gd php-imap php-ldap php-mysql php-odbc php-pear php-xml php-xmlrpc php-pecl-apc php-mbstring php-mcrypt php-soap php-tidy curl curl-devel perl-libwww-perl ImageMagick libxml2 libxml2-devel mod_fcgid php-cli httpd-devel php-fpm php-intl php-imagick php-pspell wget
yum install php php-pear -y
systemctl restart httpd.service
yum install firewalld -y
systemctl enable firewalld
systemctl start firewalld
sudo firewall-cmd --permanent --zone=public --add-service=http
sudo firewall-cmd --permanent --zone=public --add-service=https
sudo firewall-cmd --reload
Make executable:
# chmod +x install.sh
Run the script:
# ./install.sh
Installl Zabbix:
# rpm --import http://repo.zabbix.com/RPM-GPG-KEY-ZABBIX
# rpm -ivh http://repo.zabbix.com/zabbix/3.4/rhel/7/x86_64/zabbix-release-3.4-1.el7.centos.noarch.rpm
# yum install zabbix-server-mysql zabbix-web-mysql zabbix-agent zabbix-get zabbix-sender zabbix-java-gateway -y
Create the database:
# mysql -u root -p
Enter password:
Welcome to the MariaDB monitor.  Commands end with ; or \g.
Your MariaDB connection id is 11
Server version: 5.5.56-MariaDB MariaDB Server
Copyright (c) 2000, 2017, Oracle, MariaDB Corporation Ab and others.
Type 'help;' or '\h' for help. Type '\c' to clear the current input statement.
MariaDB [(none)]> CREATE DATABASE zabbixdb CHARACTER SET utf8 COLLATE utf8_bin;
Query OK, 1 row affected (0.00 sec)
MariaDB [(none)]> GRANT ALL PRIVILEGES ON zabbixdb.* TO zabbixuser@localhost IDENTIFIED BY "password";
Query OK, 0 rows affected (0.00 sec)
MariaDB [(none)]> FLUSH PRIVILEGES;
Query OK, 0 rows affected (0.00 sec)
MariaDB [(none)]> quit
Import initial database:
# zcat /usr/share/doc/zabbix-server-mysql-3.4.7/create.sql.gz | mysql -uroot -p zabbixdb
edit database configuration in the zabbix server configuration file zabbix_server.conf
# nano /etc/zabbix/zabbix_server.conf
Specify the database name for zabbix , database user name and the password
DBHost=localhost
DBName=zabbixdb
DBUser=zabbixuser
DBPassword=Password
Set SELinux settings and adjust Firewall
Having SELinux status enabled in enforcing mode, you need to execute the following command to enable successful connection of Zabbix frontend to the server
# setsebool -P httpd_can_network_connect=1
# setsebool -P httpd_can_connect_zabbix=1
# setsebool -P zabbix_can_network=1
Restart Apache:
# systemctl start httpd
Start/Enable Zabbix
# systemctl enable zabbix-server
# systemctl start zabbix-server
# systemctl enable zabbix-agent
# systemctl start zabbix-agent
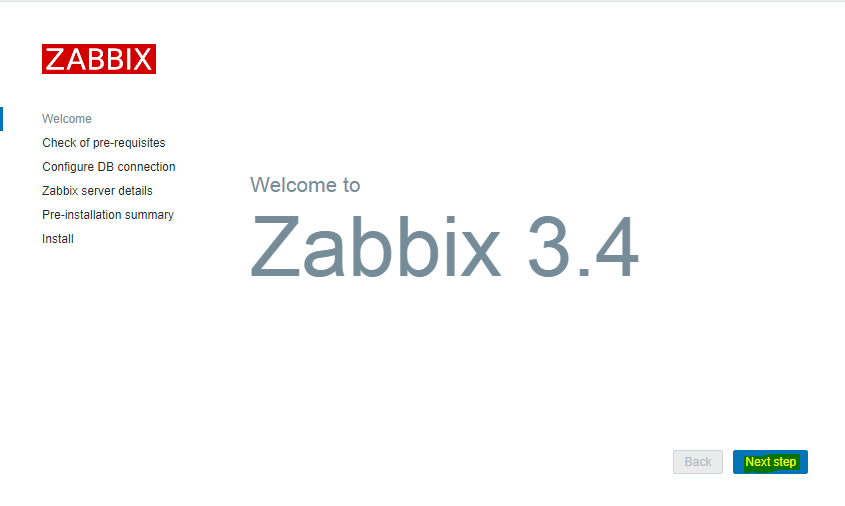
Configure Zabbix
Navigate to http://ip_address/zabbix or http://host_name/zabbix
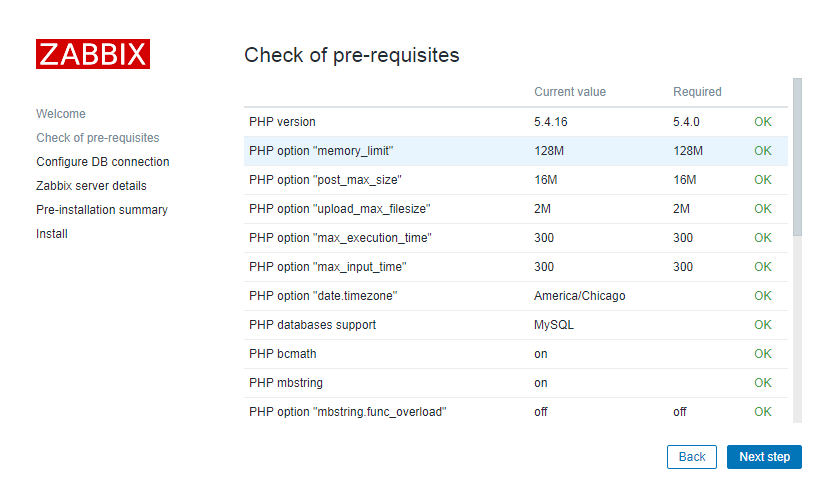
Make sure that all software prerequisites are met.
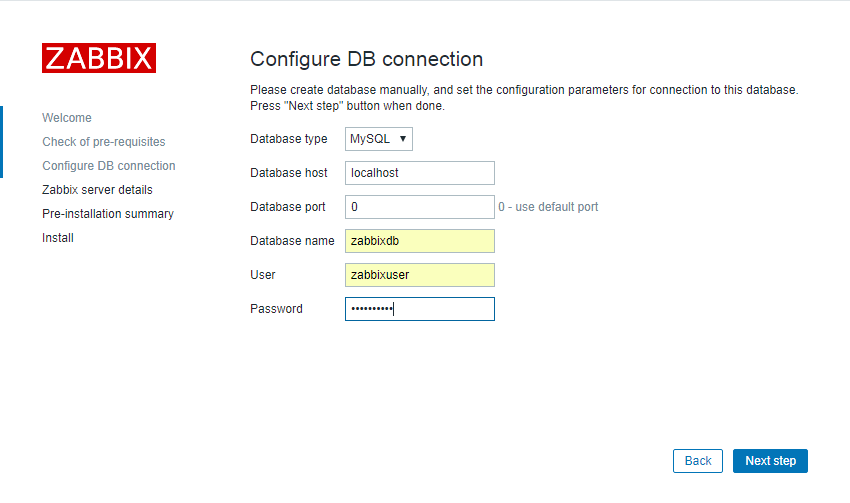
Enter details for connecting to the database. Zabbix database must already be created.
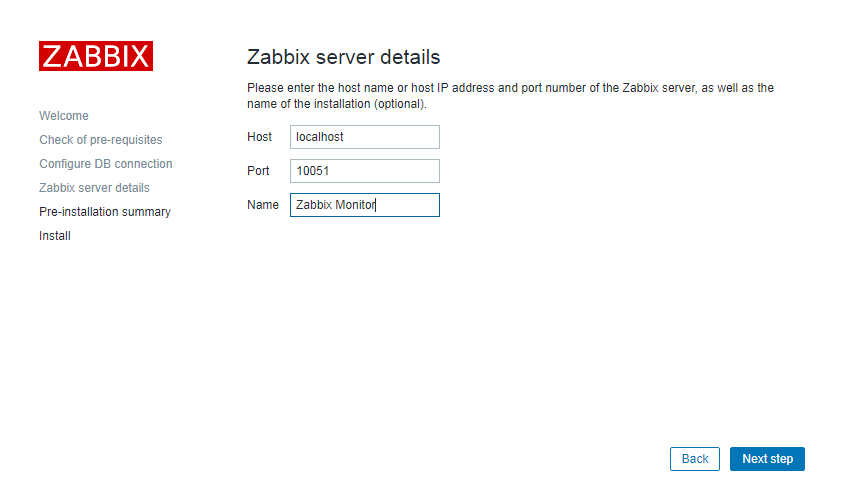
Enter Zabbix server details.
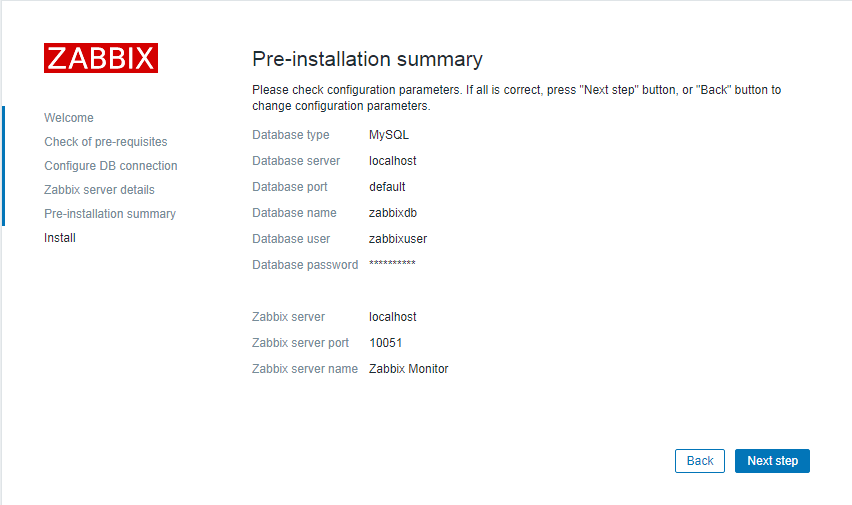
Review a summary of settings.
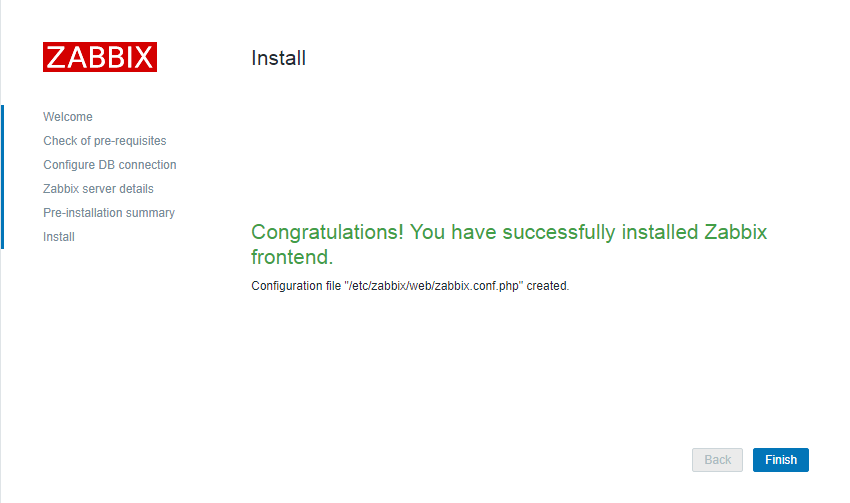
Finish the installation.
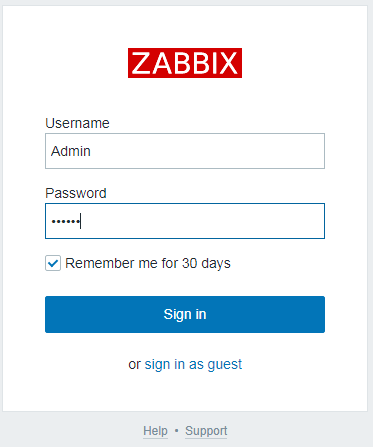
Login:
The default user name is Admin and the password is zabbix .
Last thing to do is to enable your server zabbix to be monitored: go to Configuration -> Hosts. Select the host (zabbix server) and click “Disabled”
