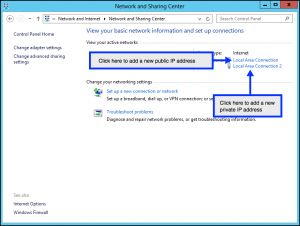
From the Windows desktop, move your mouse to the top right corner of the screen to bring up the Charms bar, and click on Start to bring up the Start screen. In the Start screen, click on the Control Panel tile, and then in the Control Panel screen click on View network status and tasks under the Network and Internet heading.
This opens the Network and Sharing Center screen. To add a new public IP address, click on Local Area Connection. To add a new private IP address, click on Local Area Connection 2.
(This example uses Local Area Connection and a public IP address – the steps for Local Area Connection 2 and a private IP address are identical)
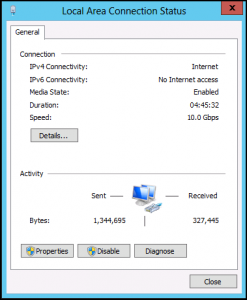
Clicking on Local Area Connection opens the Local Area Connection Status screen.
Click on Properties.
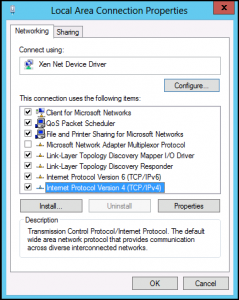
In the Local Area Connection Properties dialog, click on Internet Protocol Version 4 (TCP/IPv4)
Once you have clicked on Internet Protocol Version 4 (TCP/IPv4), click on Properties.
This takes you to the Internet Protocol Version 4 (TCP/IPv4) Properties screen, which shows the existing IP address, Subnet mask, and Default gateway. To add the new IP address, click on Advanced….
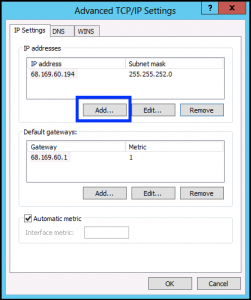
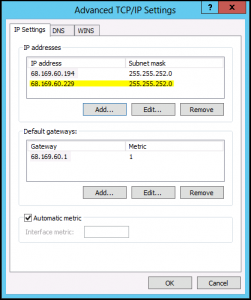
This takes you to the Advanced TCP/IP Settings page. Click on Add… to add the new IP address. Make sure to click the Add button under IP addresses (outlined in blue) and not the Add button under Default gateways.
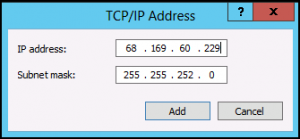
This opens the TCP/IP Address dialog. Add the new IP address, and also the Subnet mask, and click on Add.
his takes you back to the Advanced TCP/IP Settings screen, which should show the new IP address and Subnet mask (highlighted in yellow here).
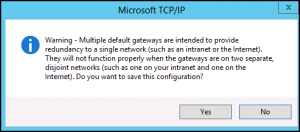
Click OK or Close to get back to the Network and Sharing Center screen. You may get a warning similar to this:
If so, just click on Yes to continue.
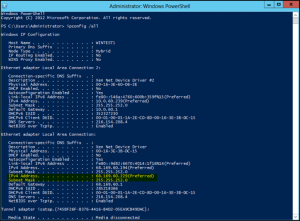
Once you get back to the Network and Sharing Center screen, close that screen. Your new IP address is now added to your Windows Server 2012 VS. You can verify this by opening Windows PowerShell and typing in the ipconfig /all command. Look for the new IP address under the Ethernet adapter Local Area Connection section (highlighted in yellow here). If you added a private IP address, it will be under Ethernet adapter Local Area Connection 2.
This shows that the new IP address has been successfully added to the Virtual Server and is ready for use.
