This article will show you how to install macOS Ventura with your Windows PC using VMware Workstation 17 Player
Web3 refers to the next generation of the internet, where the focus is on decentralized technologies and systems, such as blockchain and peer-to-peer networks.
In the traditional web (Web1.0), users primarily consume content and interact with websites through their web browsers. In the Web2.0 era, users became more involved in creating and sharing content, with the rise of social media platforms and cloud computing.
Web3, on the other hand, aims to enable a decentralized internet, where data and assets are owned and controlled by the users, without intermediaries. The use of blockchain technology in Web3 allows for secure and transparent transactions, as well as the creation of decentralized applications (dApps) that are not controlled by any central authority.
Some of the key concepts of Web3 include:
- Decentralization: The absence of intermediaries, enabling peer-to-peer transactions and interactions.
- Tokenization: The conversion of assets into digital tokens that can be easily transferred and traded.
- Interoperability: The ability of different blockchain systems to communicate and exchange data and assets.
- Privacy: The protection of user data and assets, through the use of encryption and other privacy-enhancing technologies.
Overall, Web3 aims to create a more open, transparent, and equitable internet, where users have greater control over their data and assets.
Download Unlocker and intall it from GitHub HERE
Unzip the archive
Open Power Shell as Administrator and navigate to the directory C:\Users\yourusername\Downloads\unlocker424\windows
Run the following:
c:\Users\rogerp\Downloads\unlocker424\windows>unlock.exe
Unlocker 4.2.4 for VMware Workstation/Player
============================================
© 2014-2022 David Parsons

VMware is installed at:  C:\Program Files (x86)\VMware\VMware Player\
VMware version:  20800274

Stopping VMware services and tasks...
Stopping service  VMUSBArbService
Stopping service  VMAuthdService

Installing unlock patches
Patching...
Patching C:\Program Files (x86)\VMware\VMware Player\vmwarebase.dll
C:\Program Files (x86)\VMware\VMware Player\vmwarebase.dll -> c:\Users\rogerp\Downloads\unlocker424\backup\17.0.0.20800274\vmwarebase.dll
Flag patched @ offset: 0x004e85e0  Flag: 0x3e -> 0x3f.........
Press Enter key to continue...
- Download macOS Catalina ISO
- macOS Catalina 10.15.5 ISO
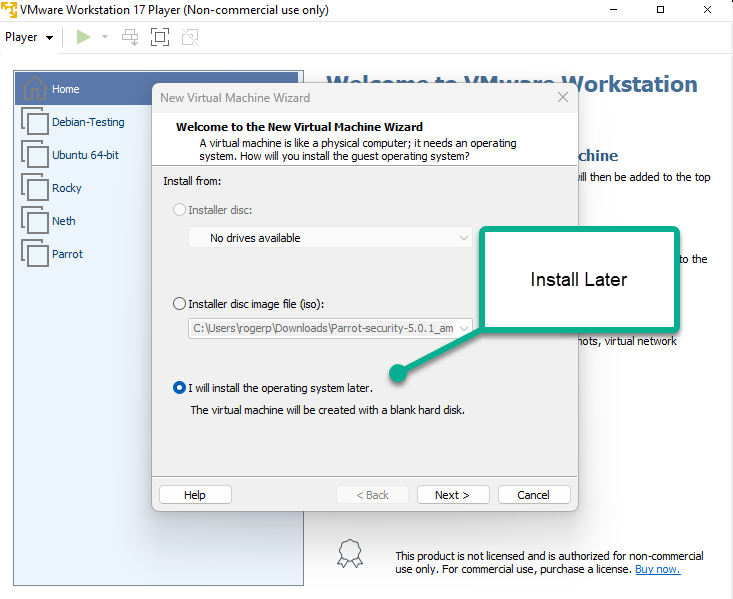
Create a New VM. Choose Install Later.
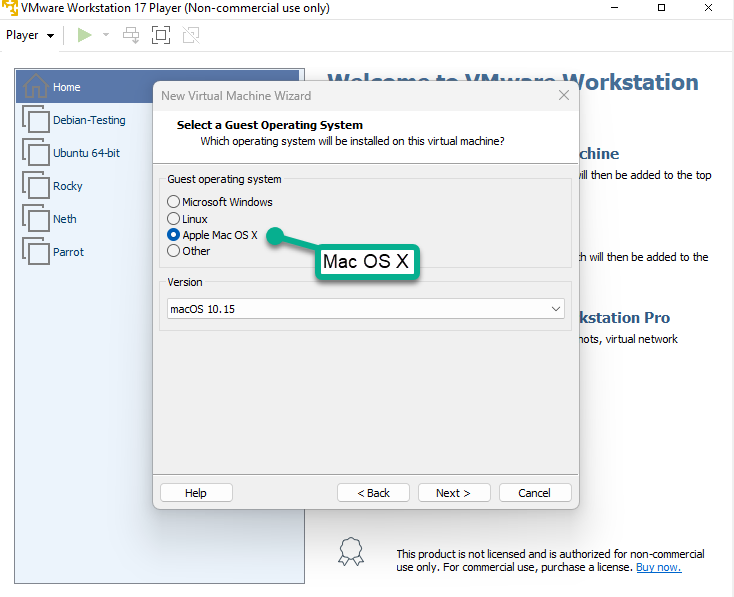
Choose Apple Mac OS X, Version 10.15
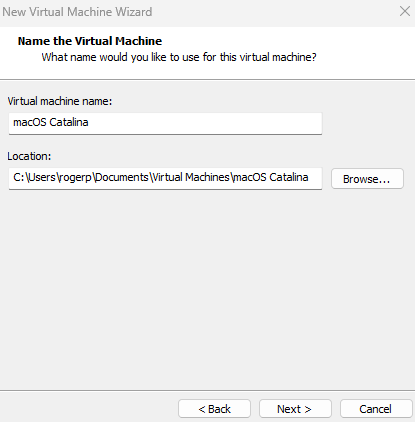
Name the virtual machine as you prefer like macOS Catalina. Click Browse then choose a location to save virtual machine files and click Next, or you may let it as default.
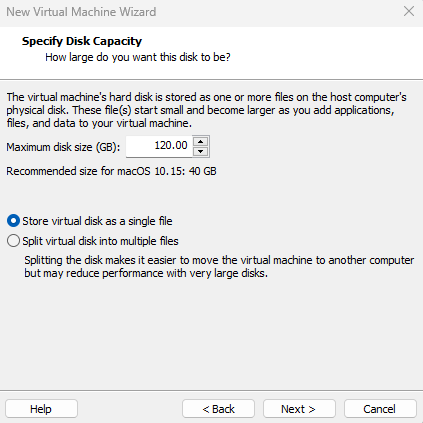
Specify the disk size of 120 GB or more than 50 GB. Then select Store virtual disk as a single file and click Next.
On Ready to Create Virtual Machine, Click Customize Hardware.
Increase the Memory from 4 GB to 8 GB or higher for better performance.
Select Processor menu then increase the CPU processor core from 2 cores to 4 or Higher cores for better performance.
Note: If you don’t have enough resources then you may not increase the Memory and Processor since the minimum requirement is 4 GB Memory and 2 Cores of Processor.
Select New CD/DVD (SATA) from the menu then click Use ISO image file: and click Browse.
Locate the macOS Catalina 10.15.5 (19F101).iso file then click Open. If you don’t have this file then you should download this from Step 1: Download the Prerequisites section.
After selecting the macOS Catalina ISO, to save all the changes click Close.

Finally on the New Virtual Machine Wizard Window, Click Finish.
Edit macOS Catalina VMX File (Optional)
- Do these 2 steps only if you can’t boot into macOS or have other issues. Navigate to the virtual machine folder which you select in step #4.3 of this guide. If you didn’t specify a new location, then the default location is in Document > Virtual Machine. Right-click on macOS Catalina.vmx then open it via Notepad or any third-party text editor of your choice.
- Scroll down to the bottom of texts and add the following code; then click on File > Save. After that, you may close it as you don’t need it anymore.
smbios.reflectHost = "TRUE"
hw.model = "MacBookPro14,3"
board-id = "Mac-551B86E5744E2388"
smc.version = "0"
Install macOS Catalina as VM on VMware
- Open VMware and on the macOS Catalina VM window Click Power on this Virtual Machine.

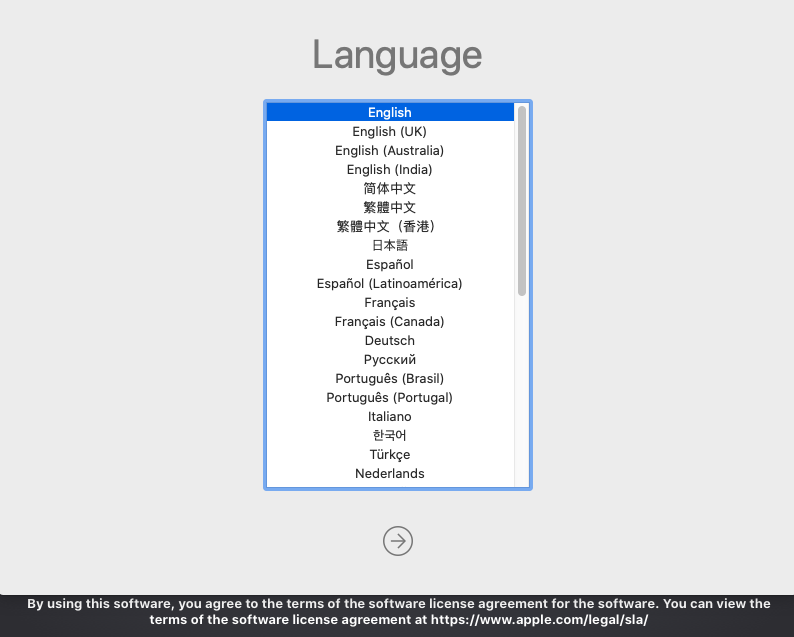
Select English on the language page then click Continue Arrow.
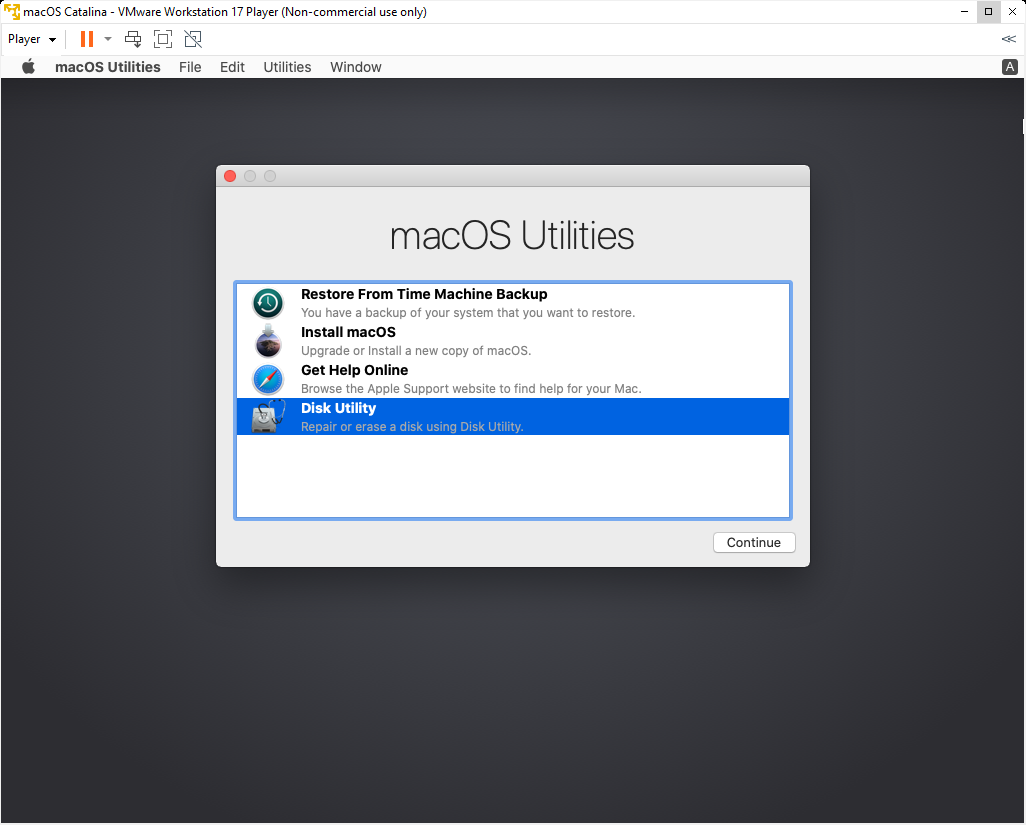
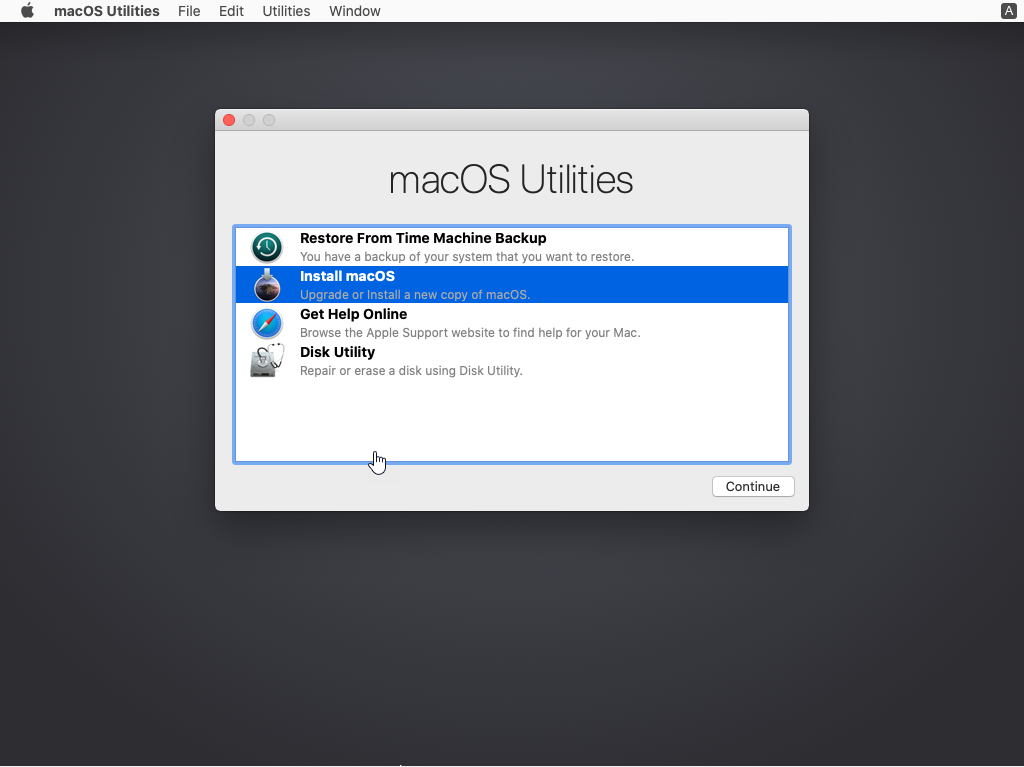
Now, you’ll see macOS Utilities Window. From the list, select Disk Utility and click Continue.
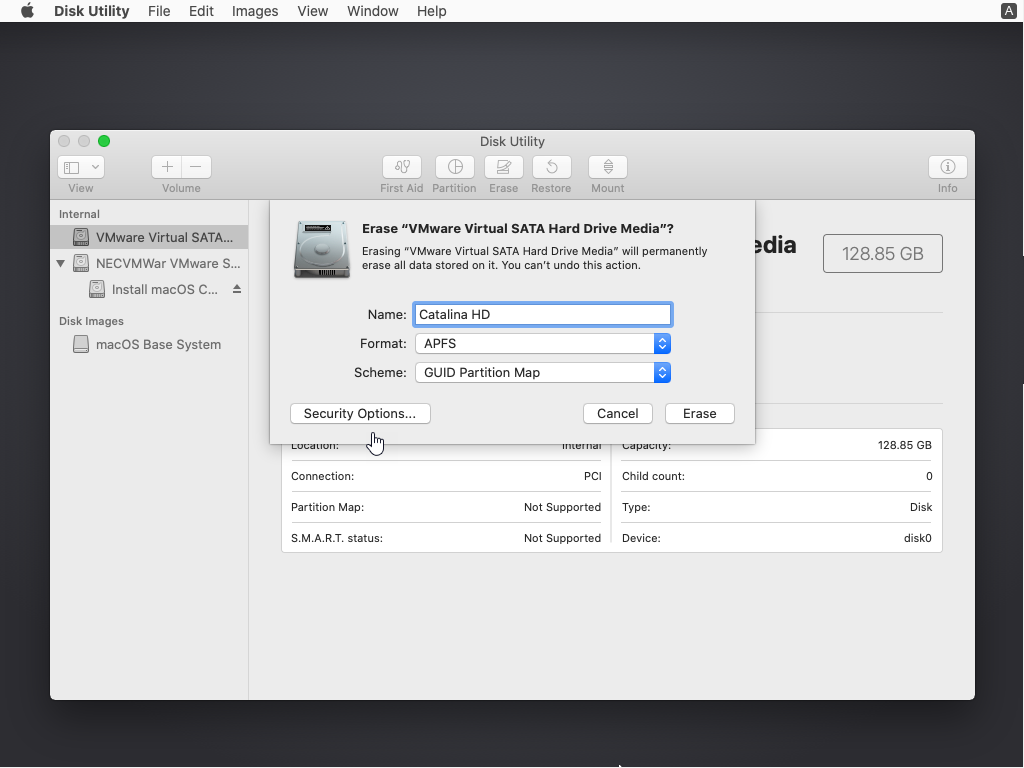
Select VMware Virtual SATA Hard Drive Media then click Erase. Choose the following options and again click Erase.
- Name: Catalina HD (You can type any name you want)
- Format: APFS (If you get an error, select Mac OS X Extended Journaled)
- Scheme: GUID Partition MAP
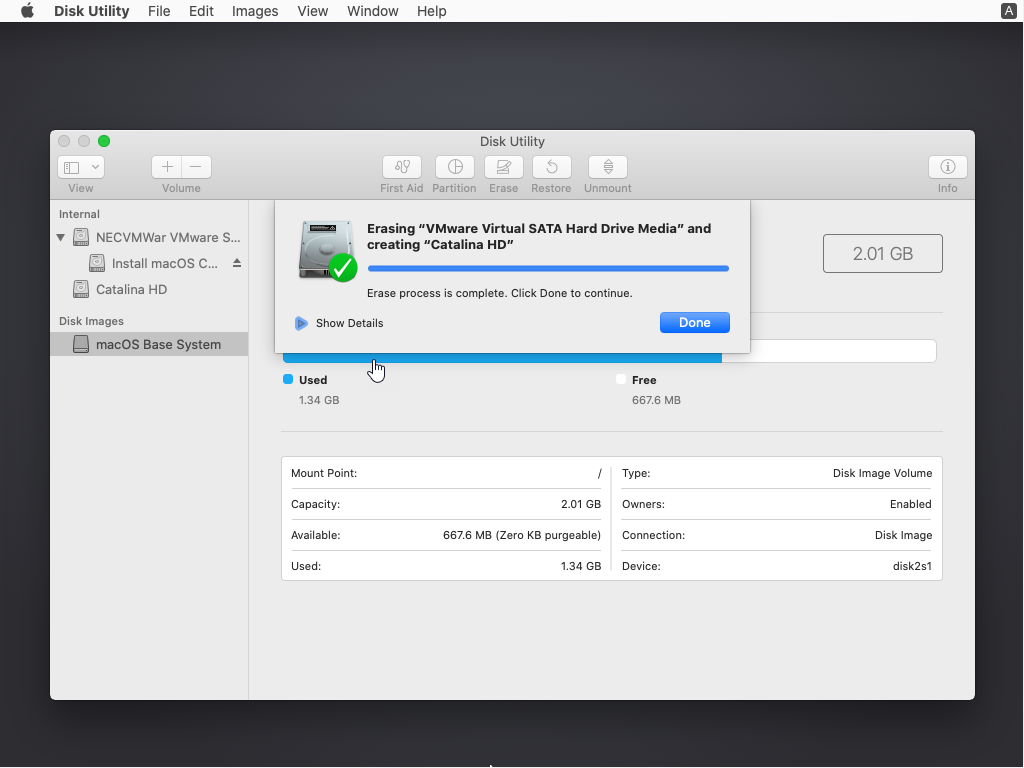
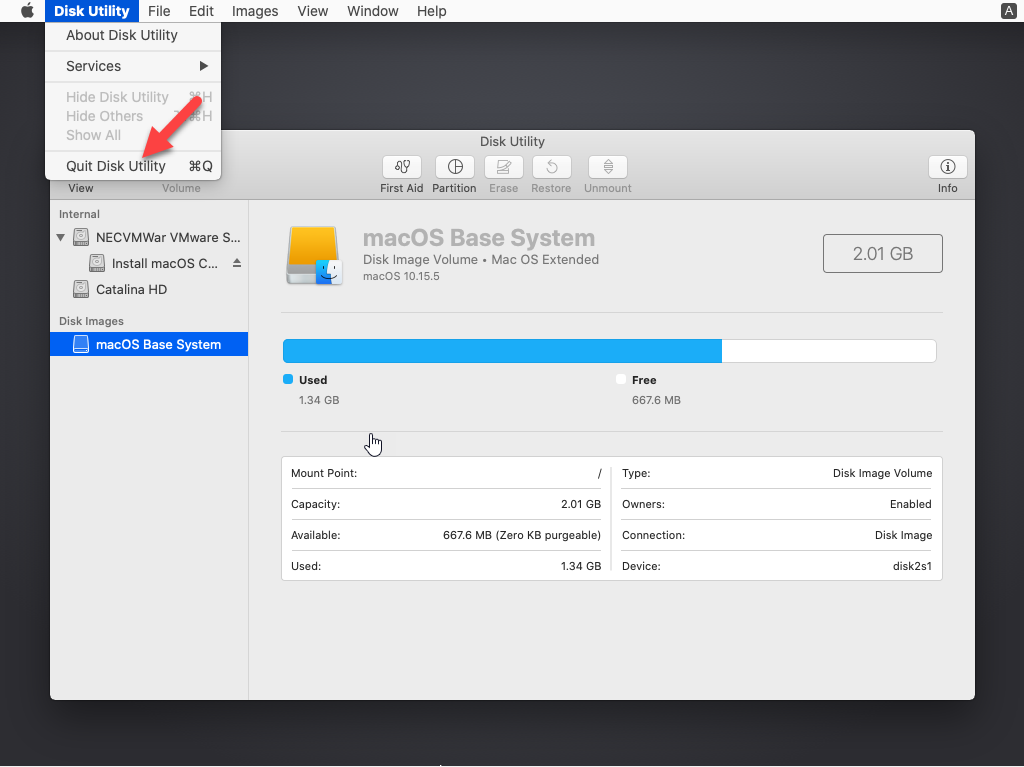
From Disk Utility Tab, click Quit Disk Utility
From macOS Utilities, select Install macOS and click Continue.
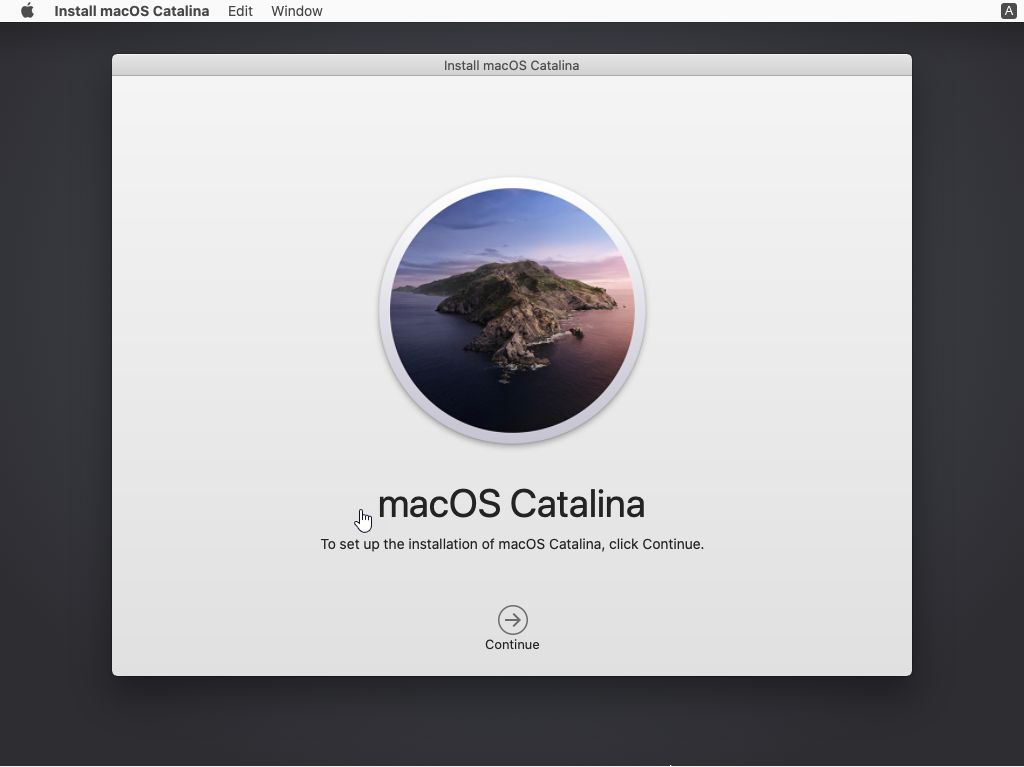
Click Continue on Install macOS Catalina screen.
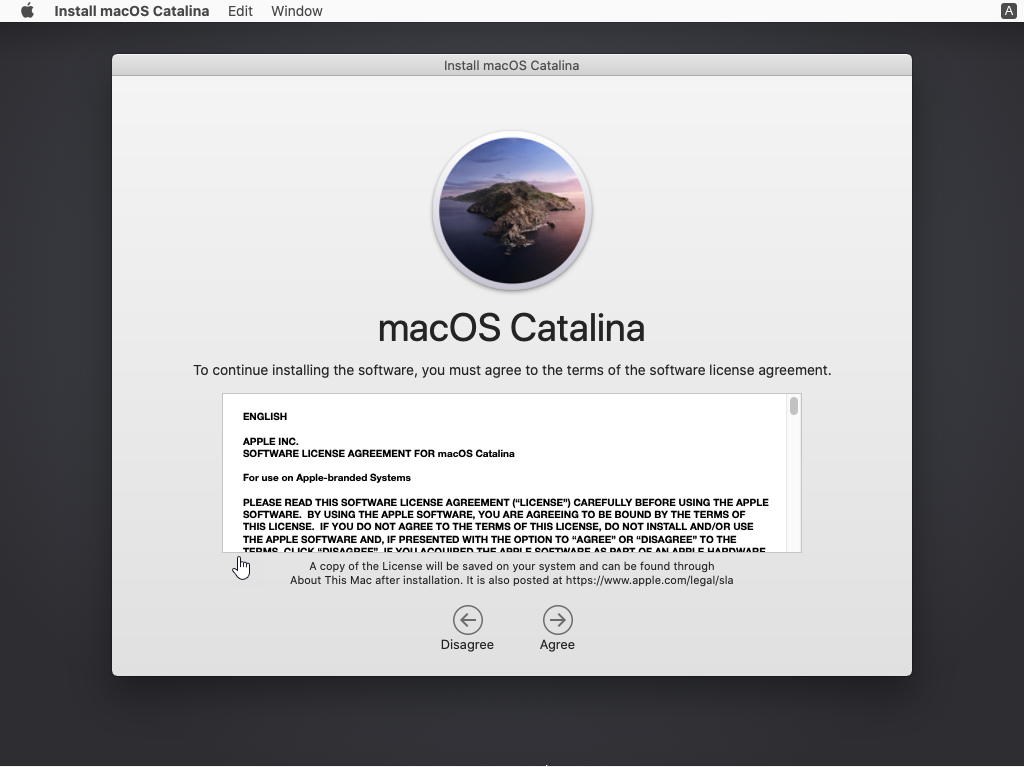
Agree to the macOS Catalina License agreement.
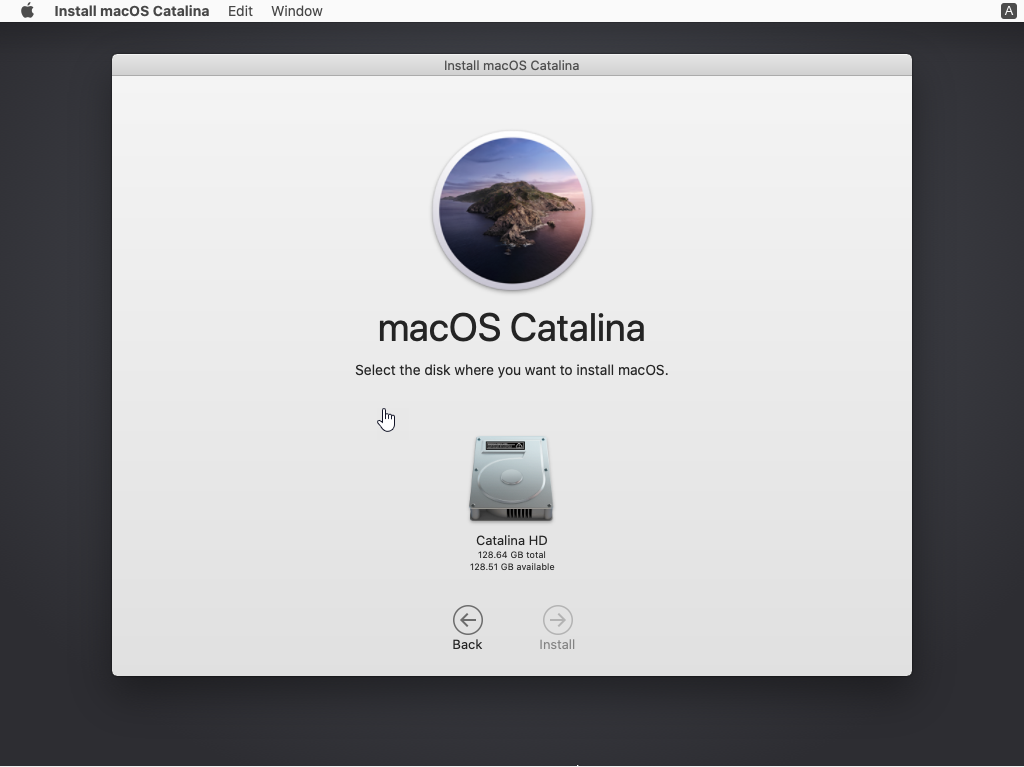
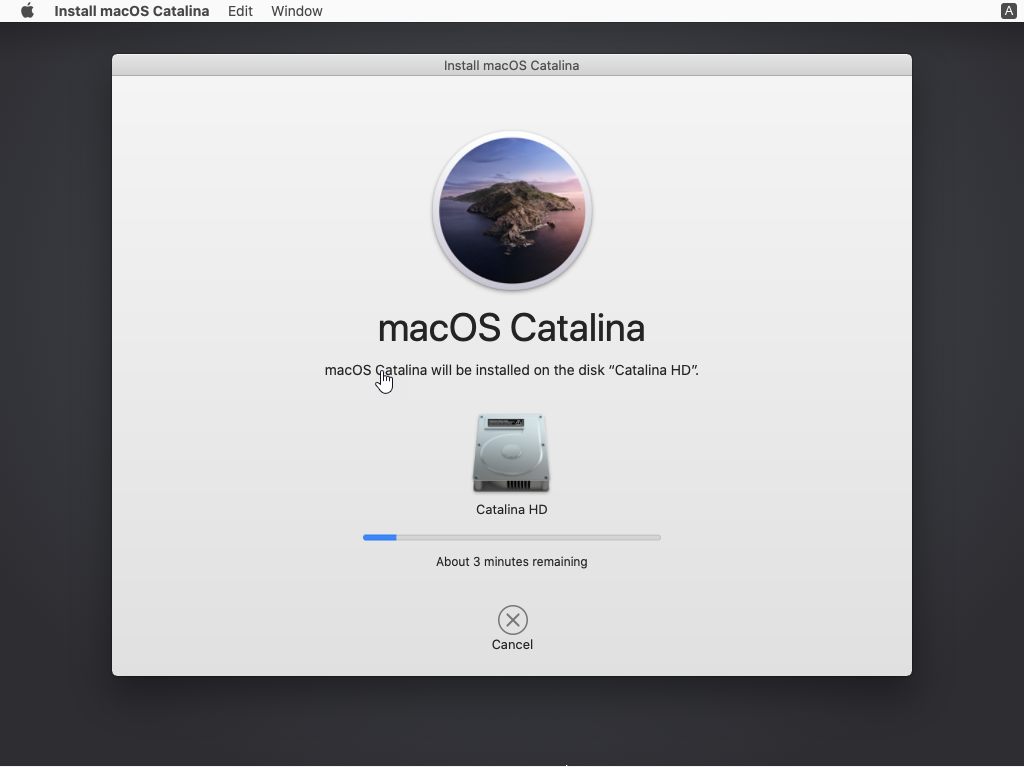
Select Catalina HD and click Install.
Wait for macOS Catalina will restart 2/3 times to complete the installation itself without you touching anything. It will take roughly 15-20 minutes depending on your system, be patient.
Complete Basic macOS Account Settings
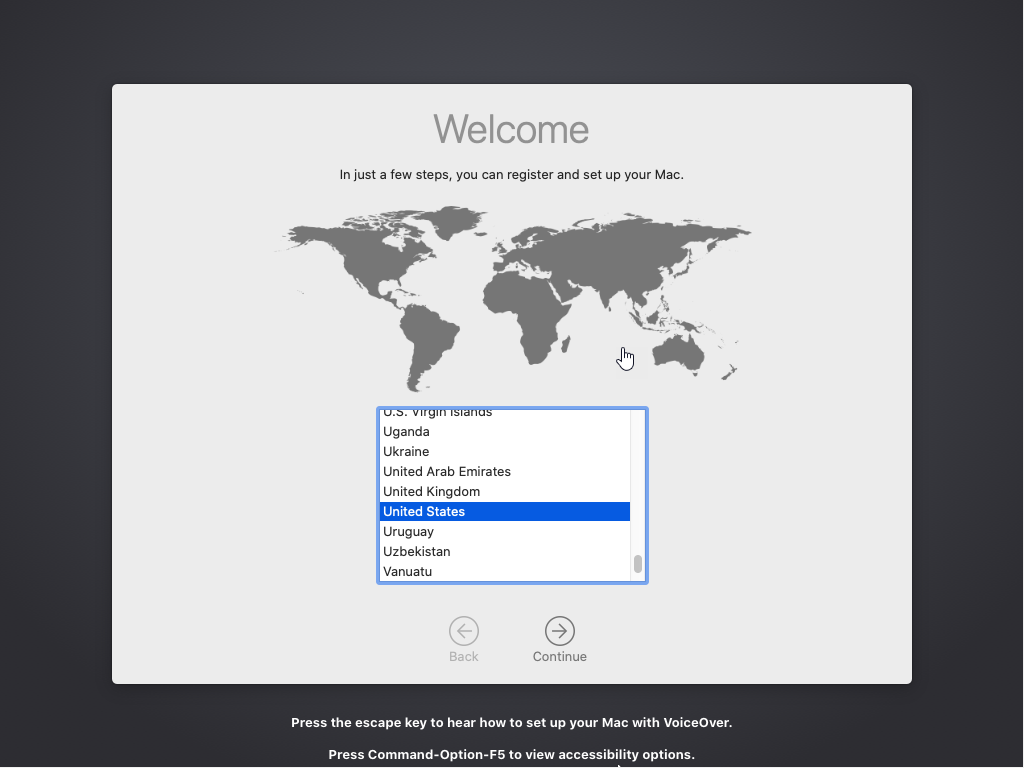
Once the installation part complete, the VM will reboot, and after the reboot, you should see macOS Catalina Welcome page. Complete the setup as needed.
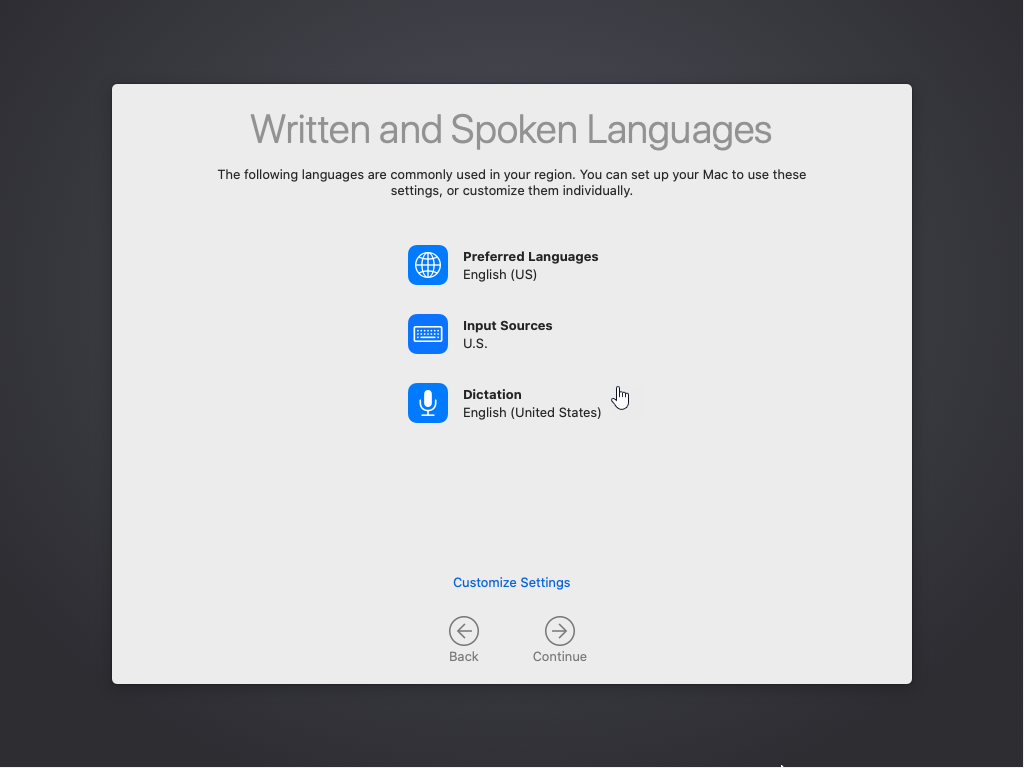
Continue the setup.

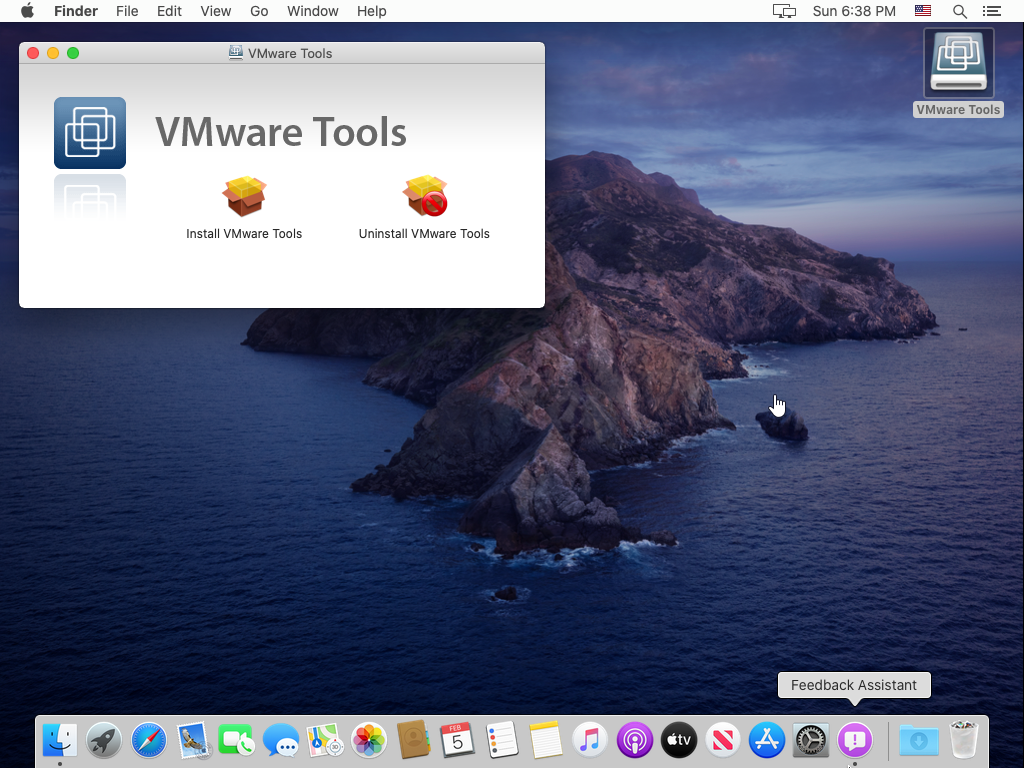
Install VMware Tools (Optional)
Download VMware Tools ISO
Click the link below to download the VMware tools for macOS Catalina.
Step #2. Attach the ISO to macOS Catalina
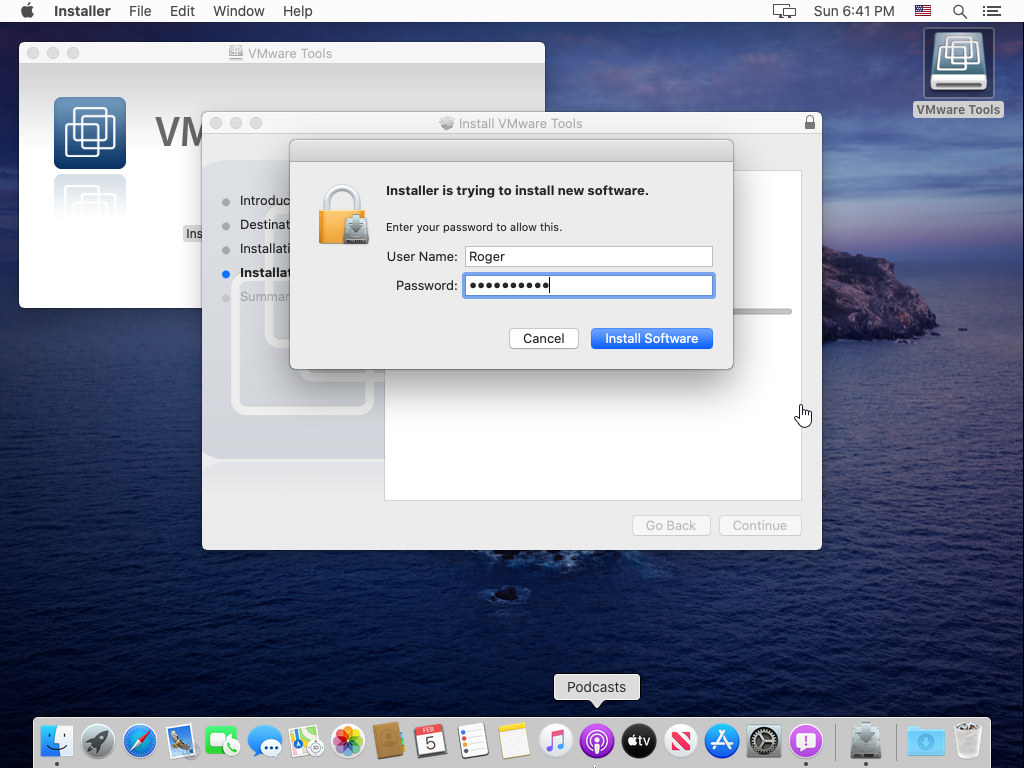
First, Start Vmware Player. Choose the MacOS VM. Click Settings. Change the CDROM to load the Vmware tools ISO. Click OK. Power on the macOS Catalina. Once logged in Open the Vmware Tool.
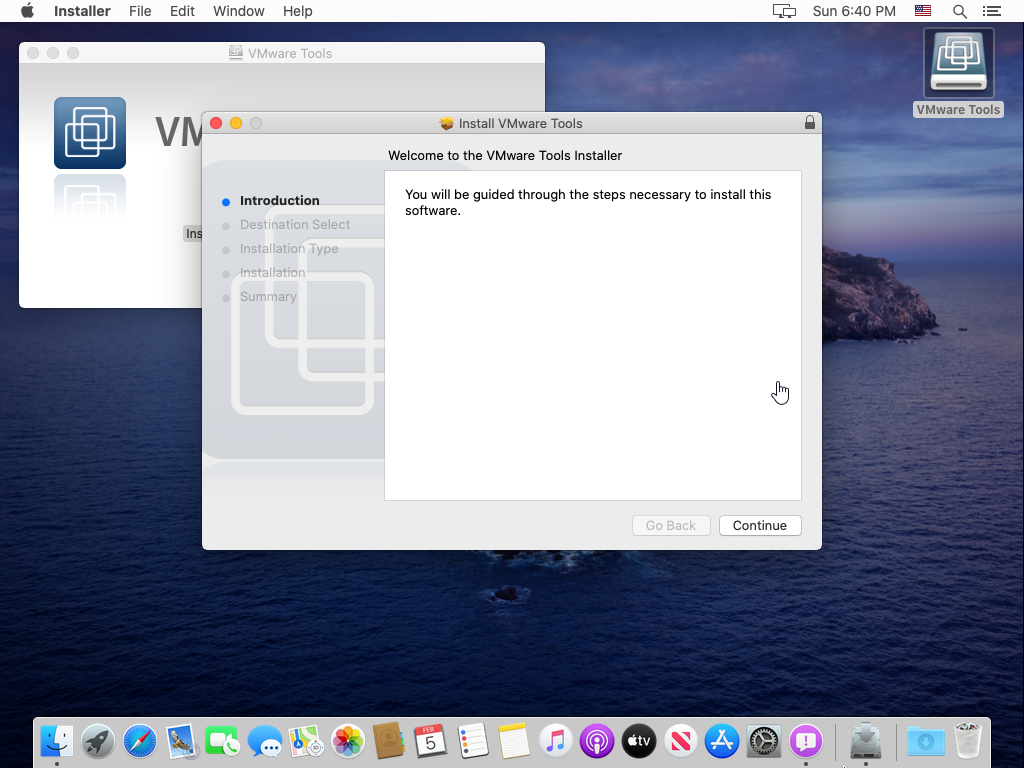
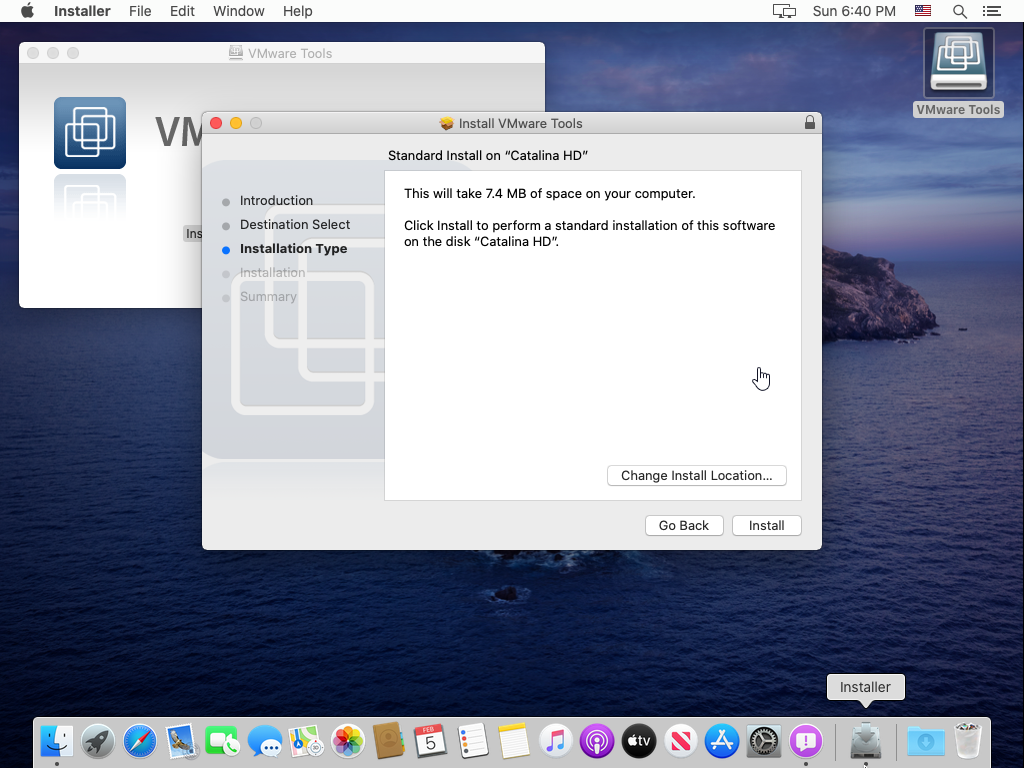
Choose Install
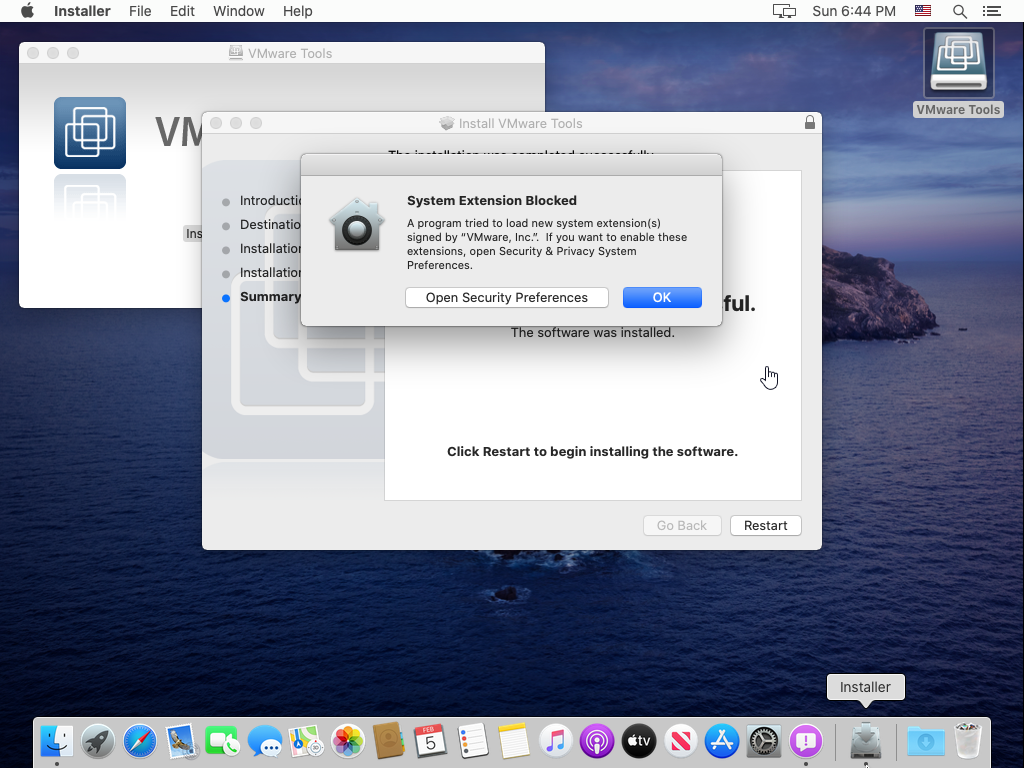
You will a pop-up System Extension Blocked. After the pop-up appears, click Open Security Preferences.
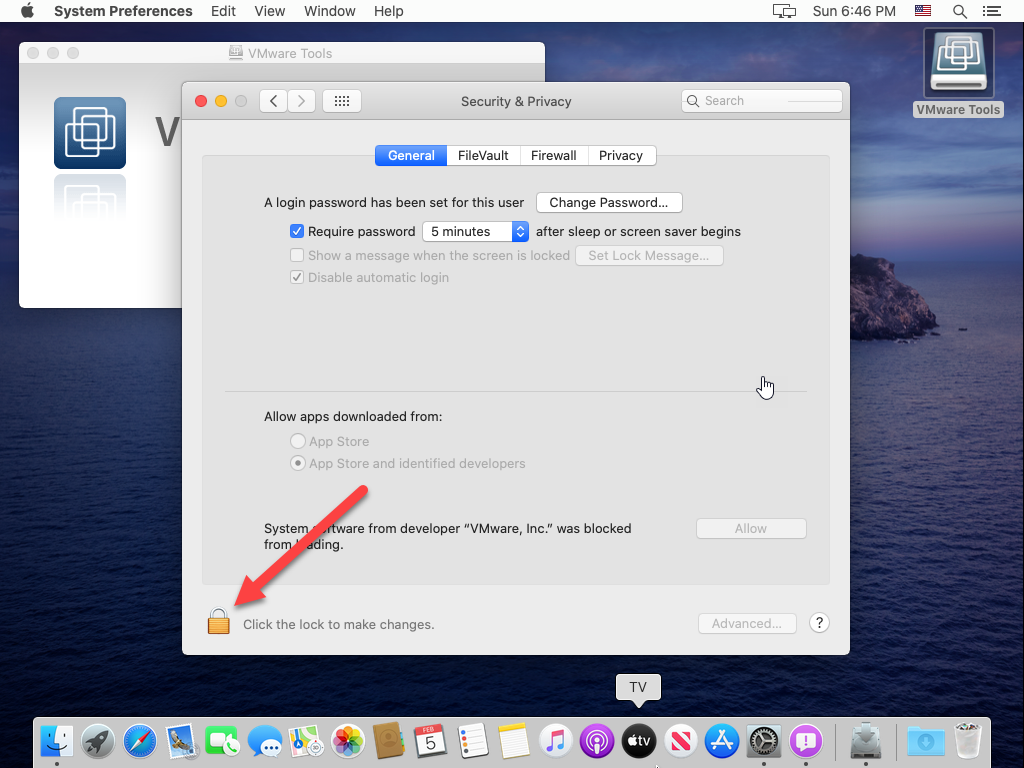
Click on the Padlock icon then type your password. It allows you to make changes.
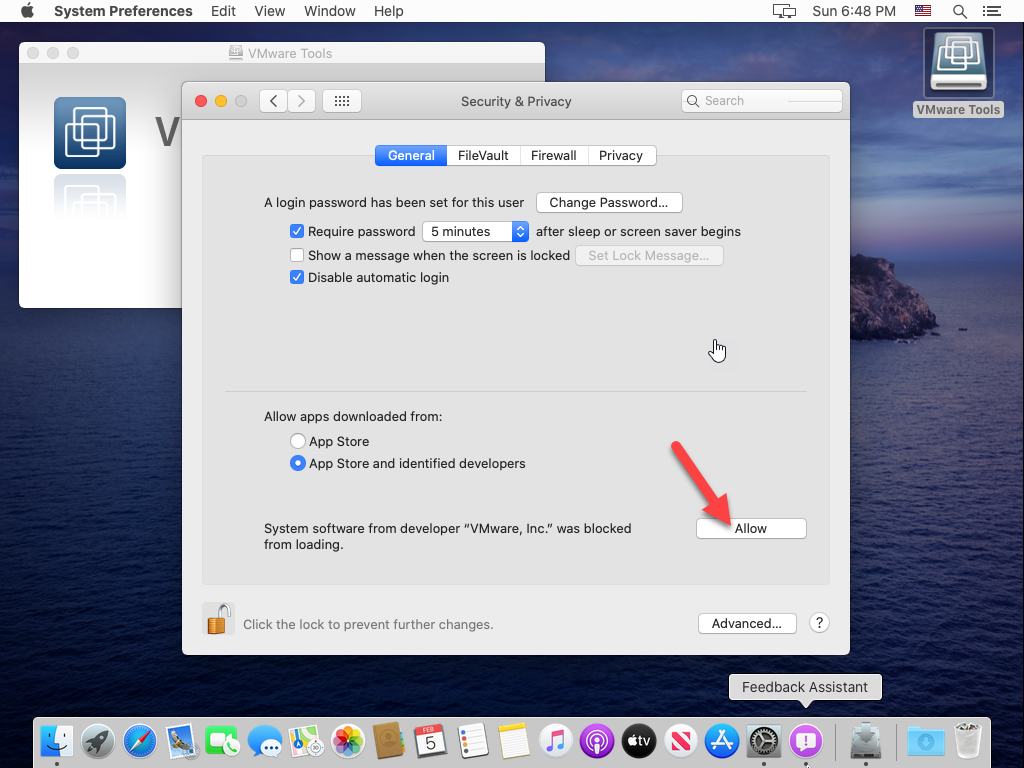
Click Allow to enable the VMware tools extension to be installed from the security & privacy window.
On the Legacy system Extension, click OK.
Click on OK again on the Security and Privacy windows.
Once the installation is successfully done, click the Restart button.
macOS Catalina VM will restart and after the restart login with your Username and Password.
You may see the same System Extension Blocked pop-up again. Click Open Security Preferences.
Click Allow again from the Security & Privacy window.
Restart your VM and test the enhanced features are working.
This article describes how to create a bash file to restart the apache server.
This article describes how to connect a PHP script to a MySQL database.
We often get asked this question a lot as in many cases. With the information in this article, we will outline how to map a domain name to the local hosts file, thus overriding temporarily the DNS record for a domain.
If you ever set up a new domain hosting or migrate a domain to a new server, you will want to check to make sure that the changes are good before changing the DNS to the new server.
If you ever set up a new domain hosting or migrate a domain to a new server, you will want to check to make sure that the changes are good before changing the DNS to the new server.
We often get asked this question a lot as in many cases, clients change the DNS before checking to see if there site actually works. This can lead to frustration, downtime and lost revenue and customers.
Excellent site for WooCommerce Modifications